Something cool is coming

Raw Material: 3/16" (.188") CR 1018 Steel 1 1/4" x 9" [Sep 1, 2022]
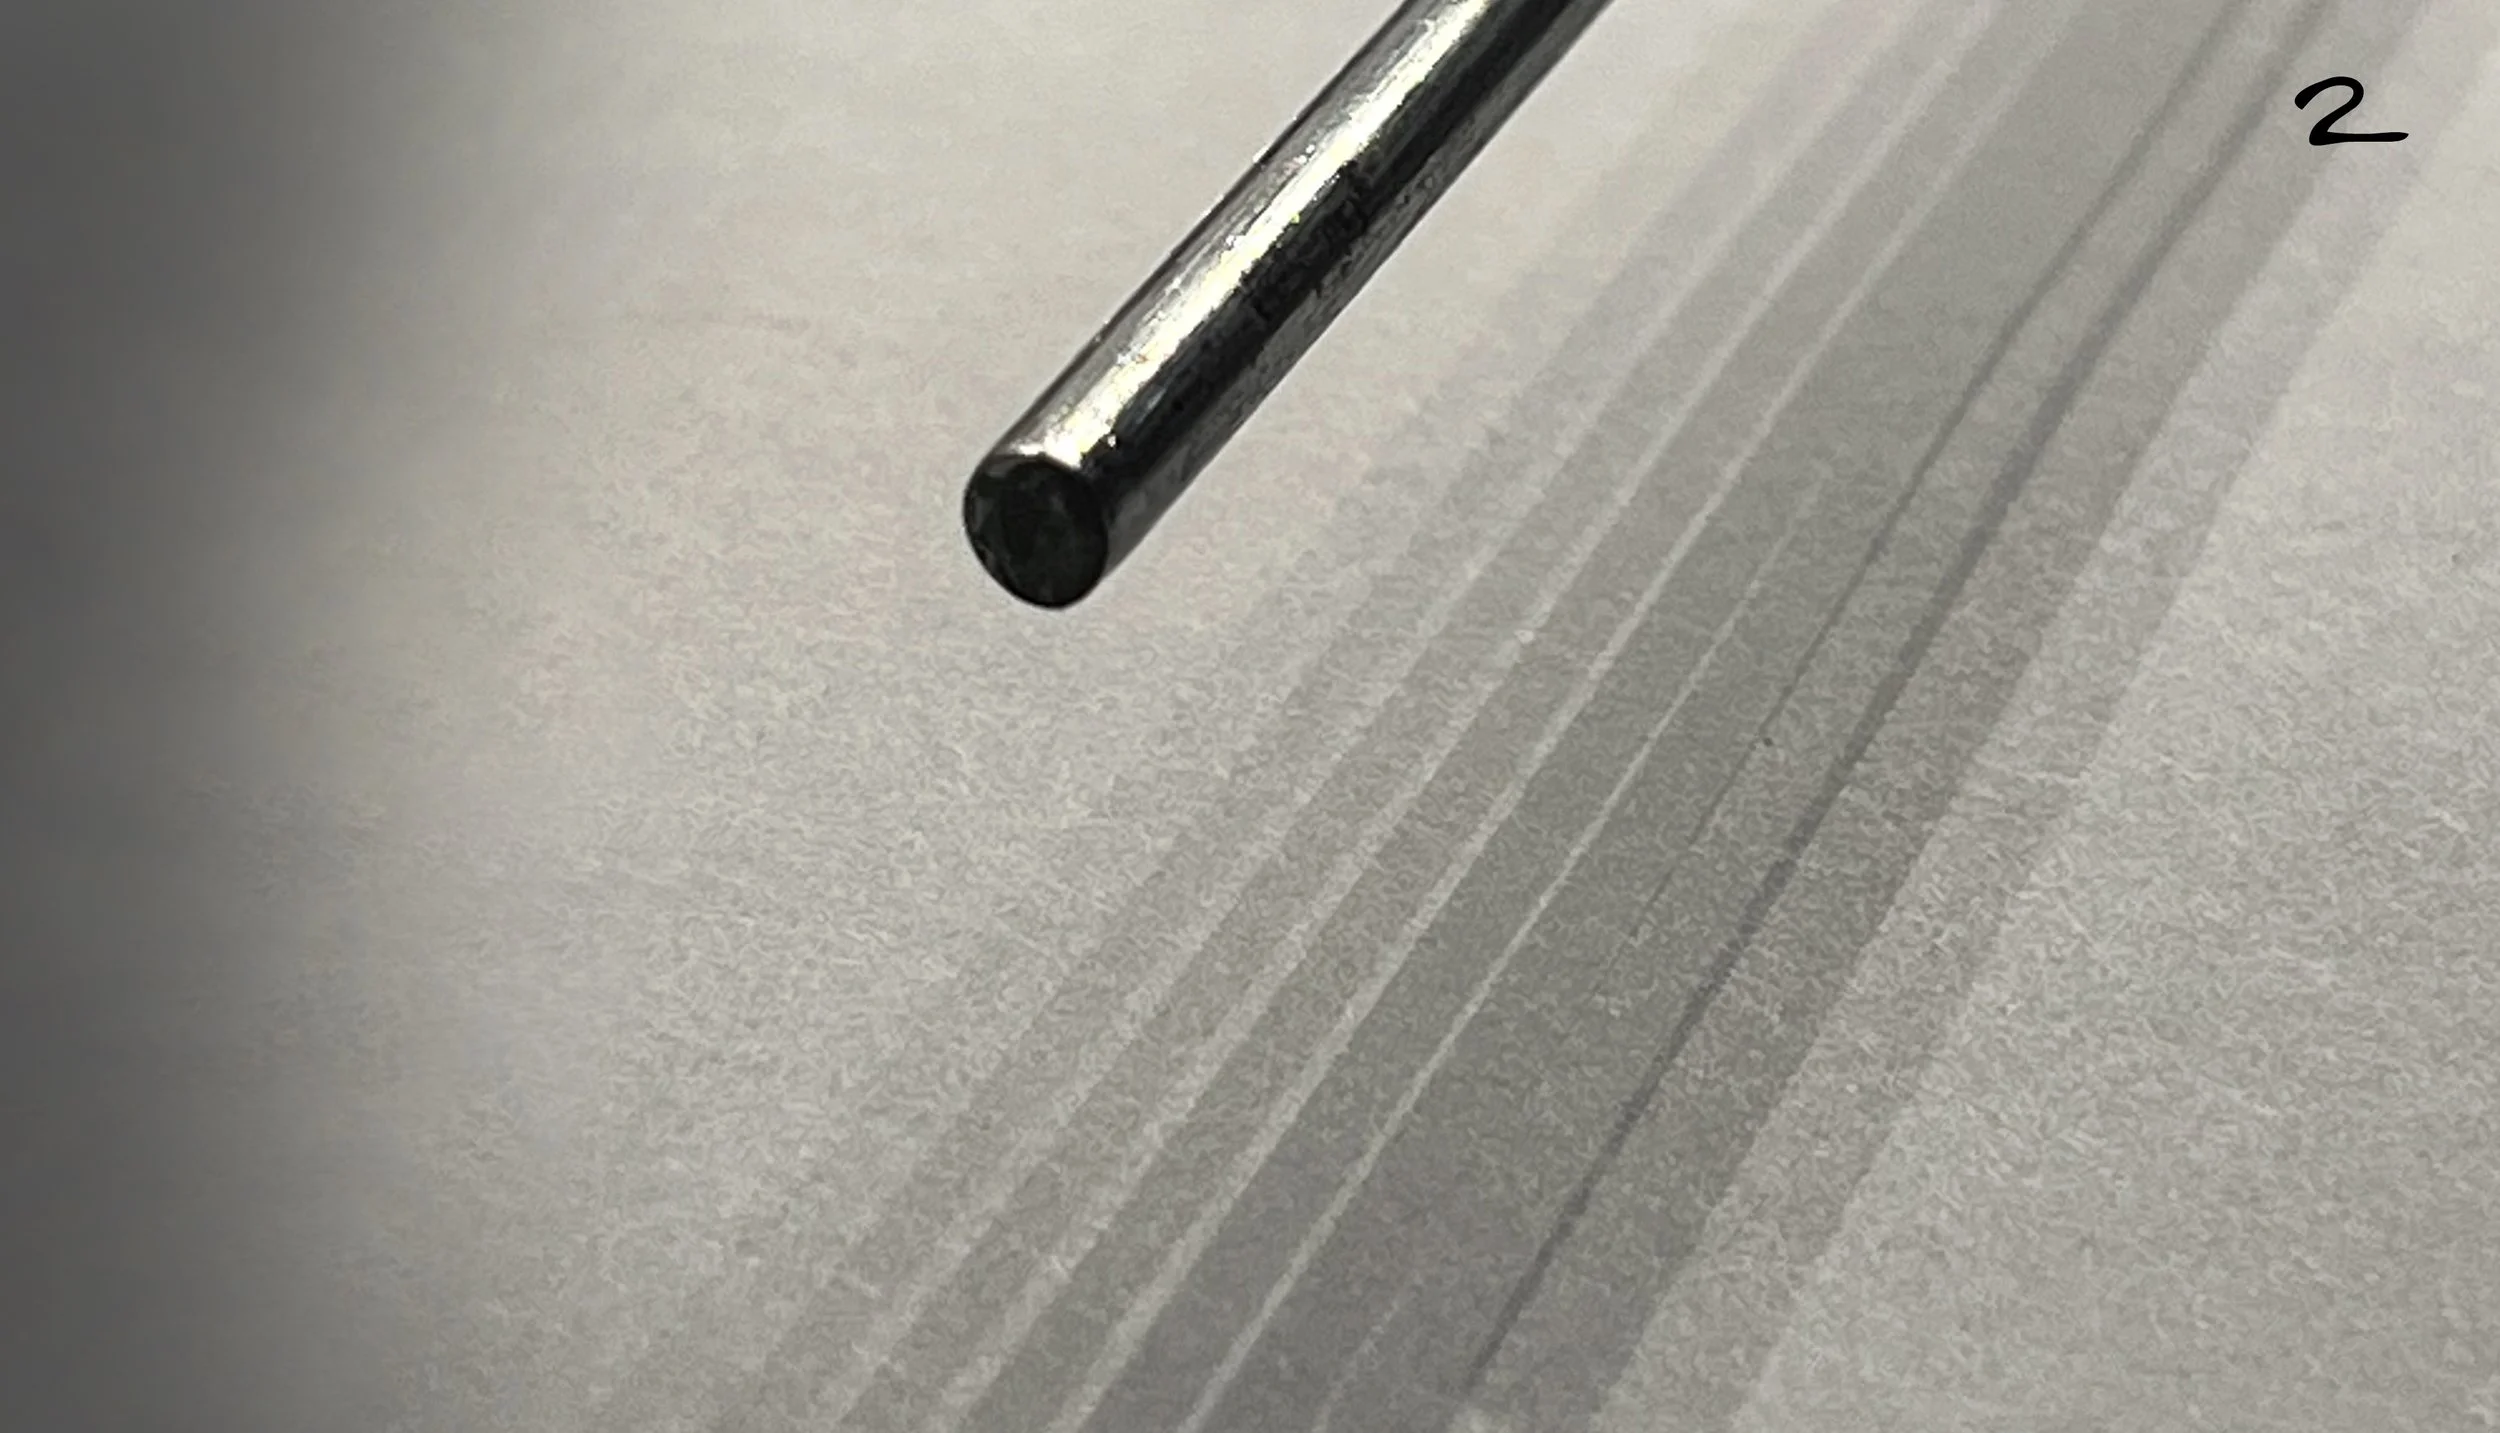
Another component: 3/16” Steel Rod [Sep 5, 2022]
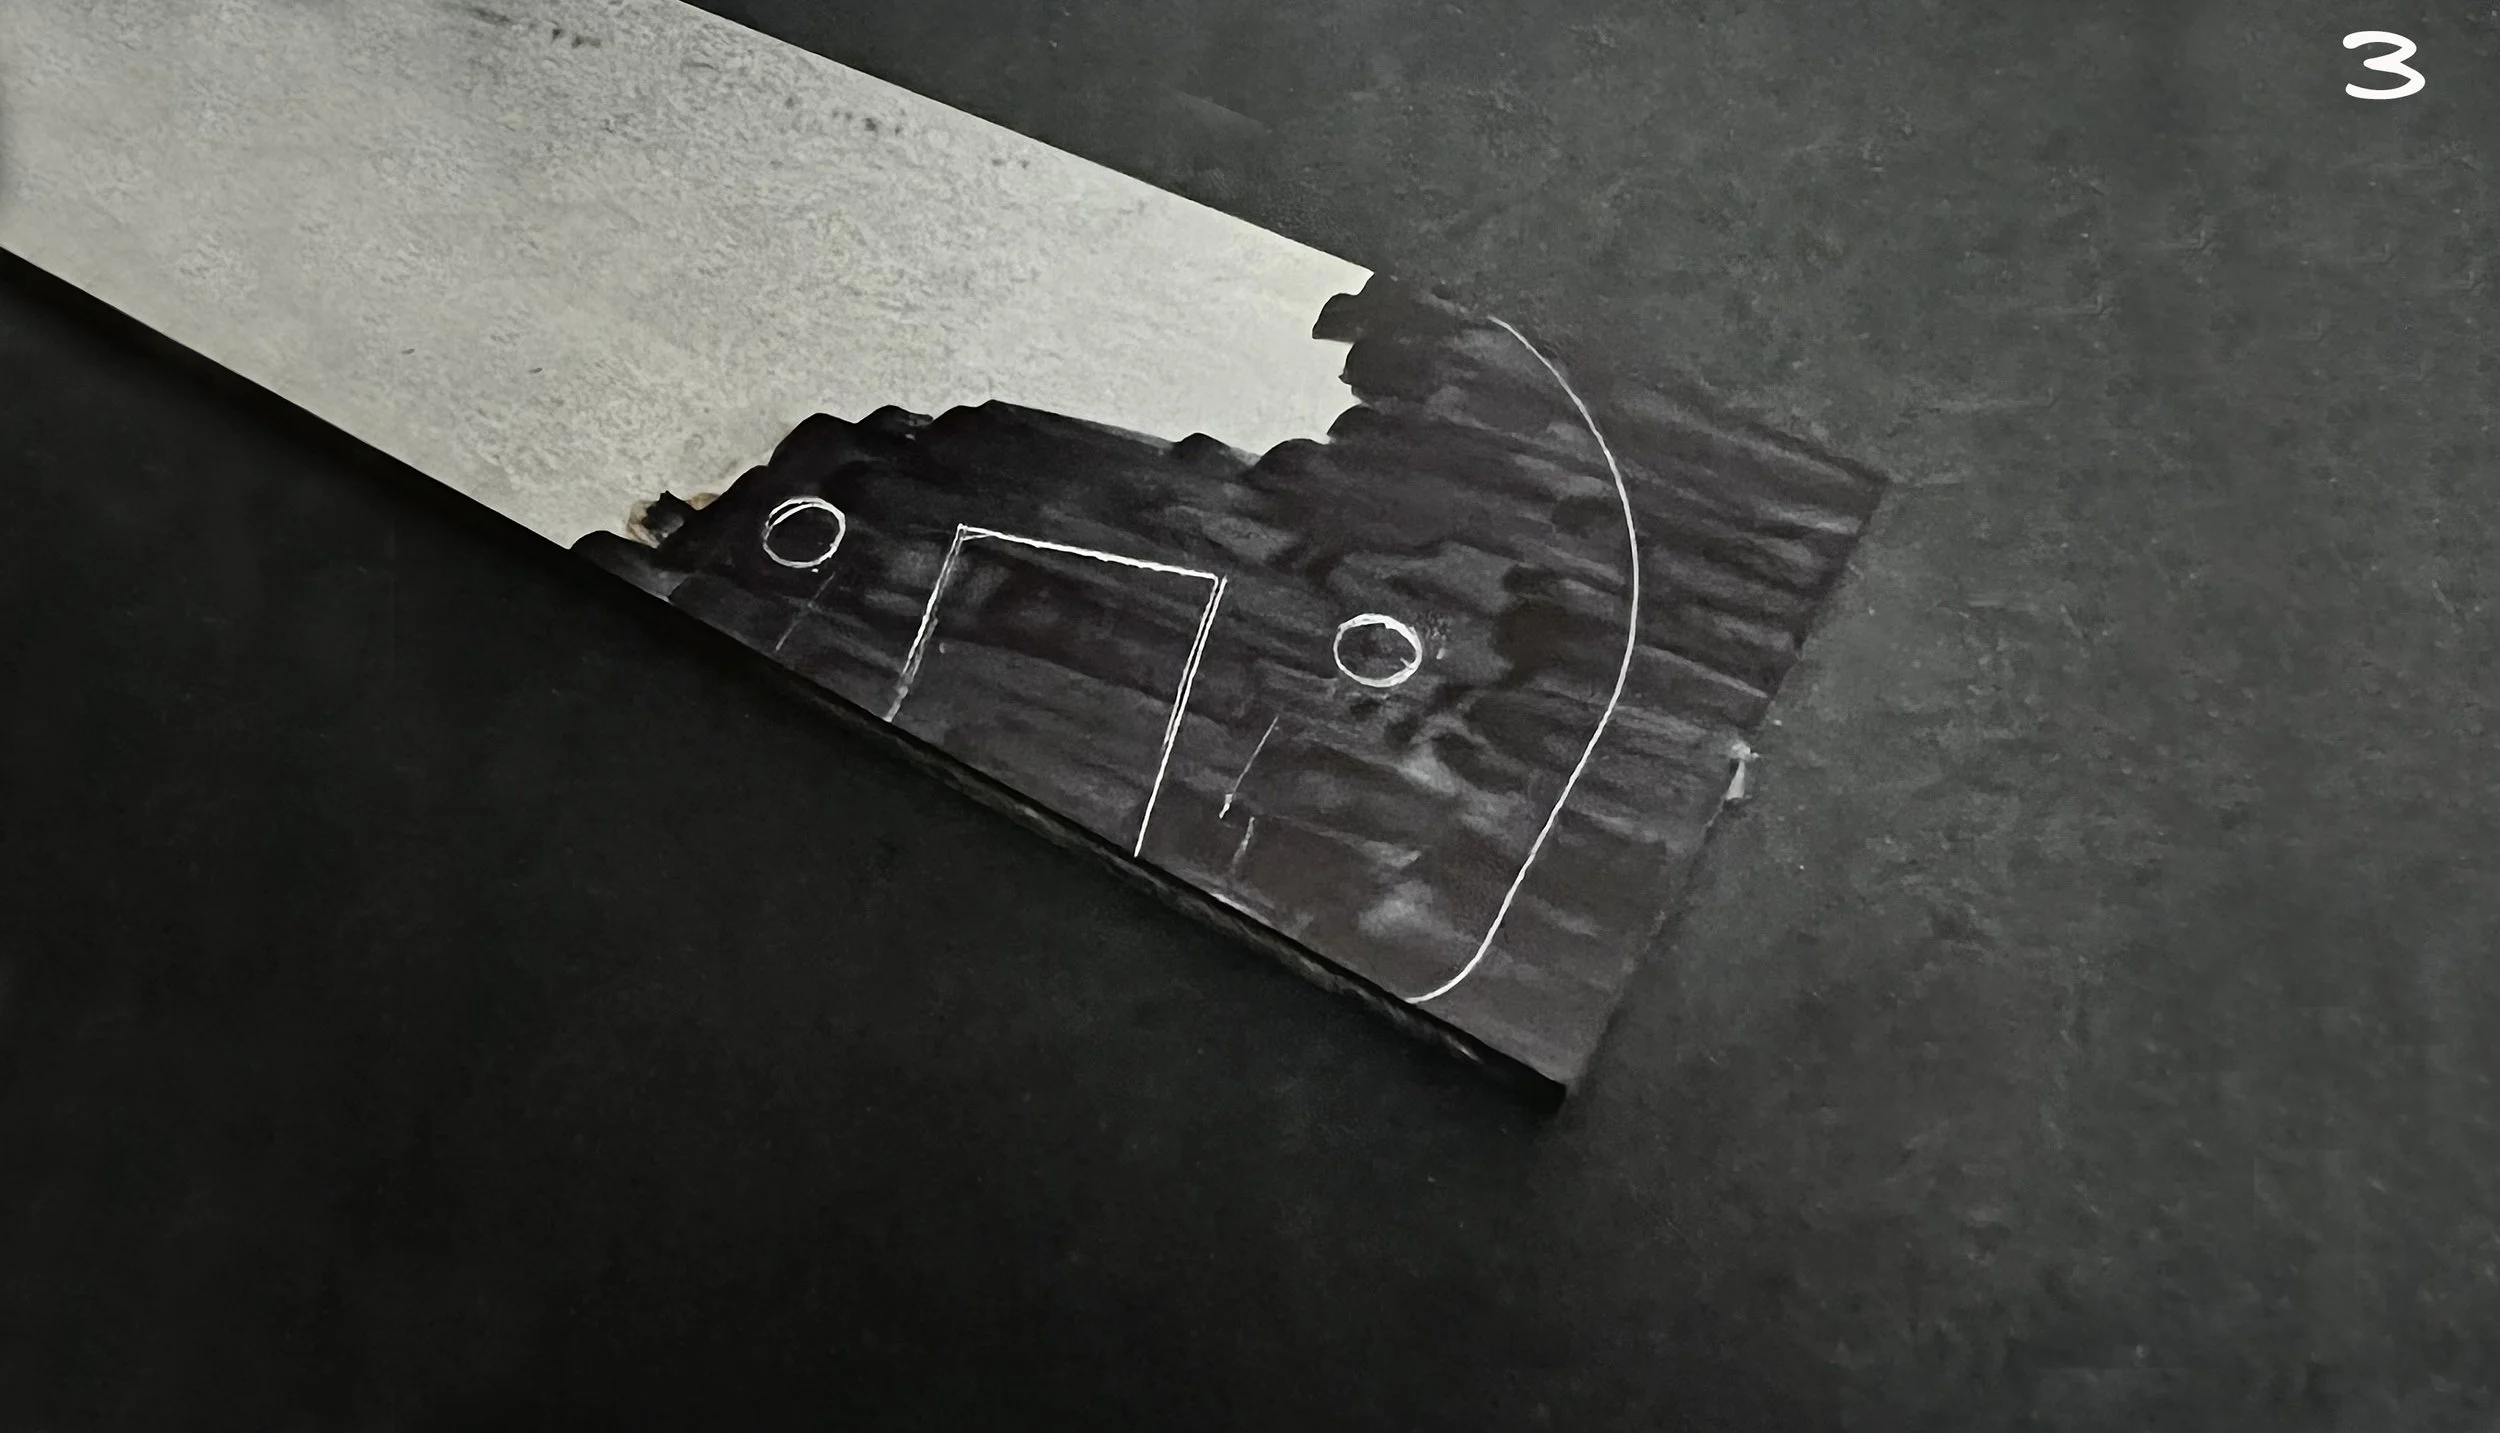
Steel scribed with pattern and ready for the band saw. [Sep 11, 2022]

A little time at the band saw. [Sep 13, 2022]

Some progress [Sep 14, 2022]

The file is your friend, the file is your friend, the file is . . . . [Sep 16, 2022]

The drill press is being “pressed” into service. [Sep 17, 2022]
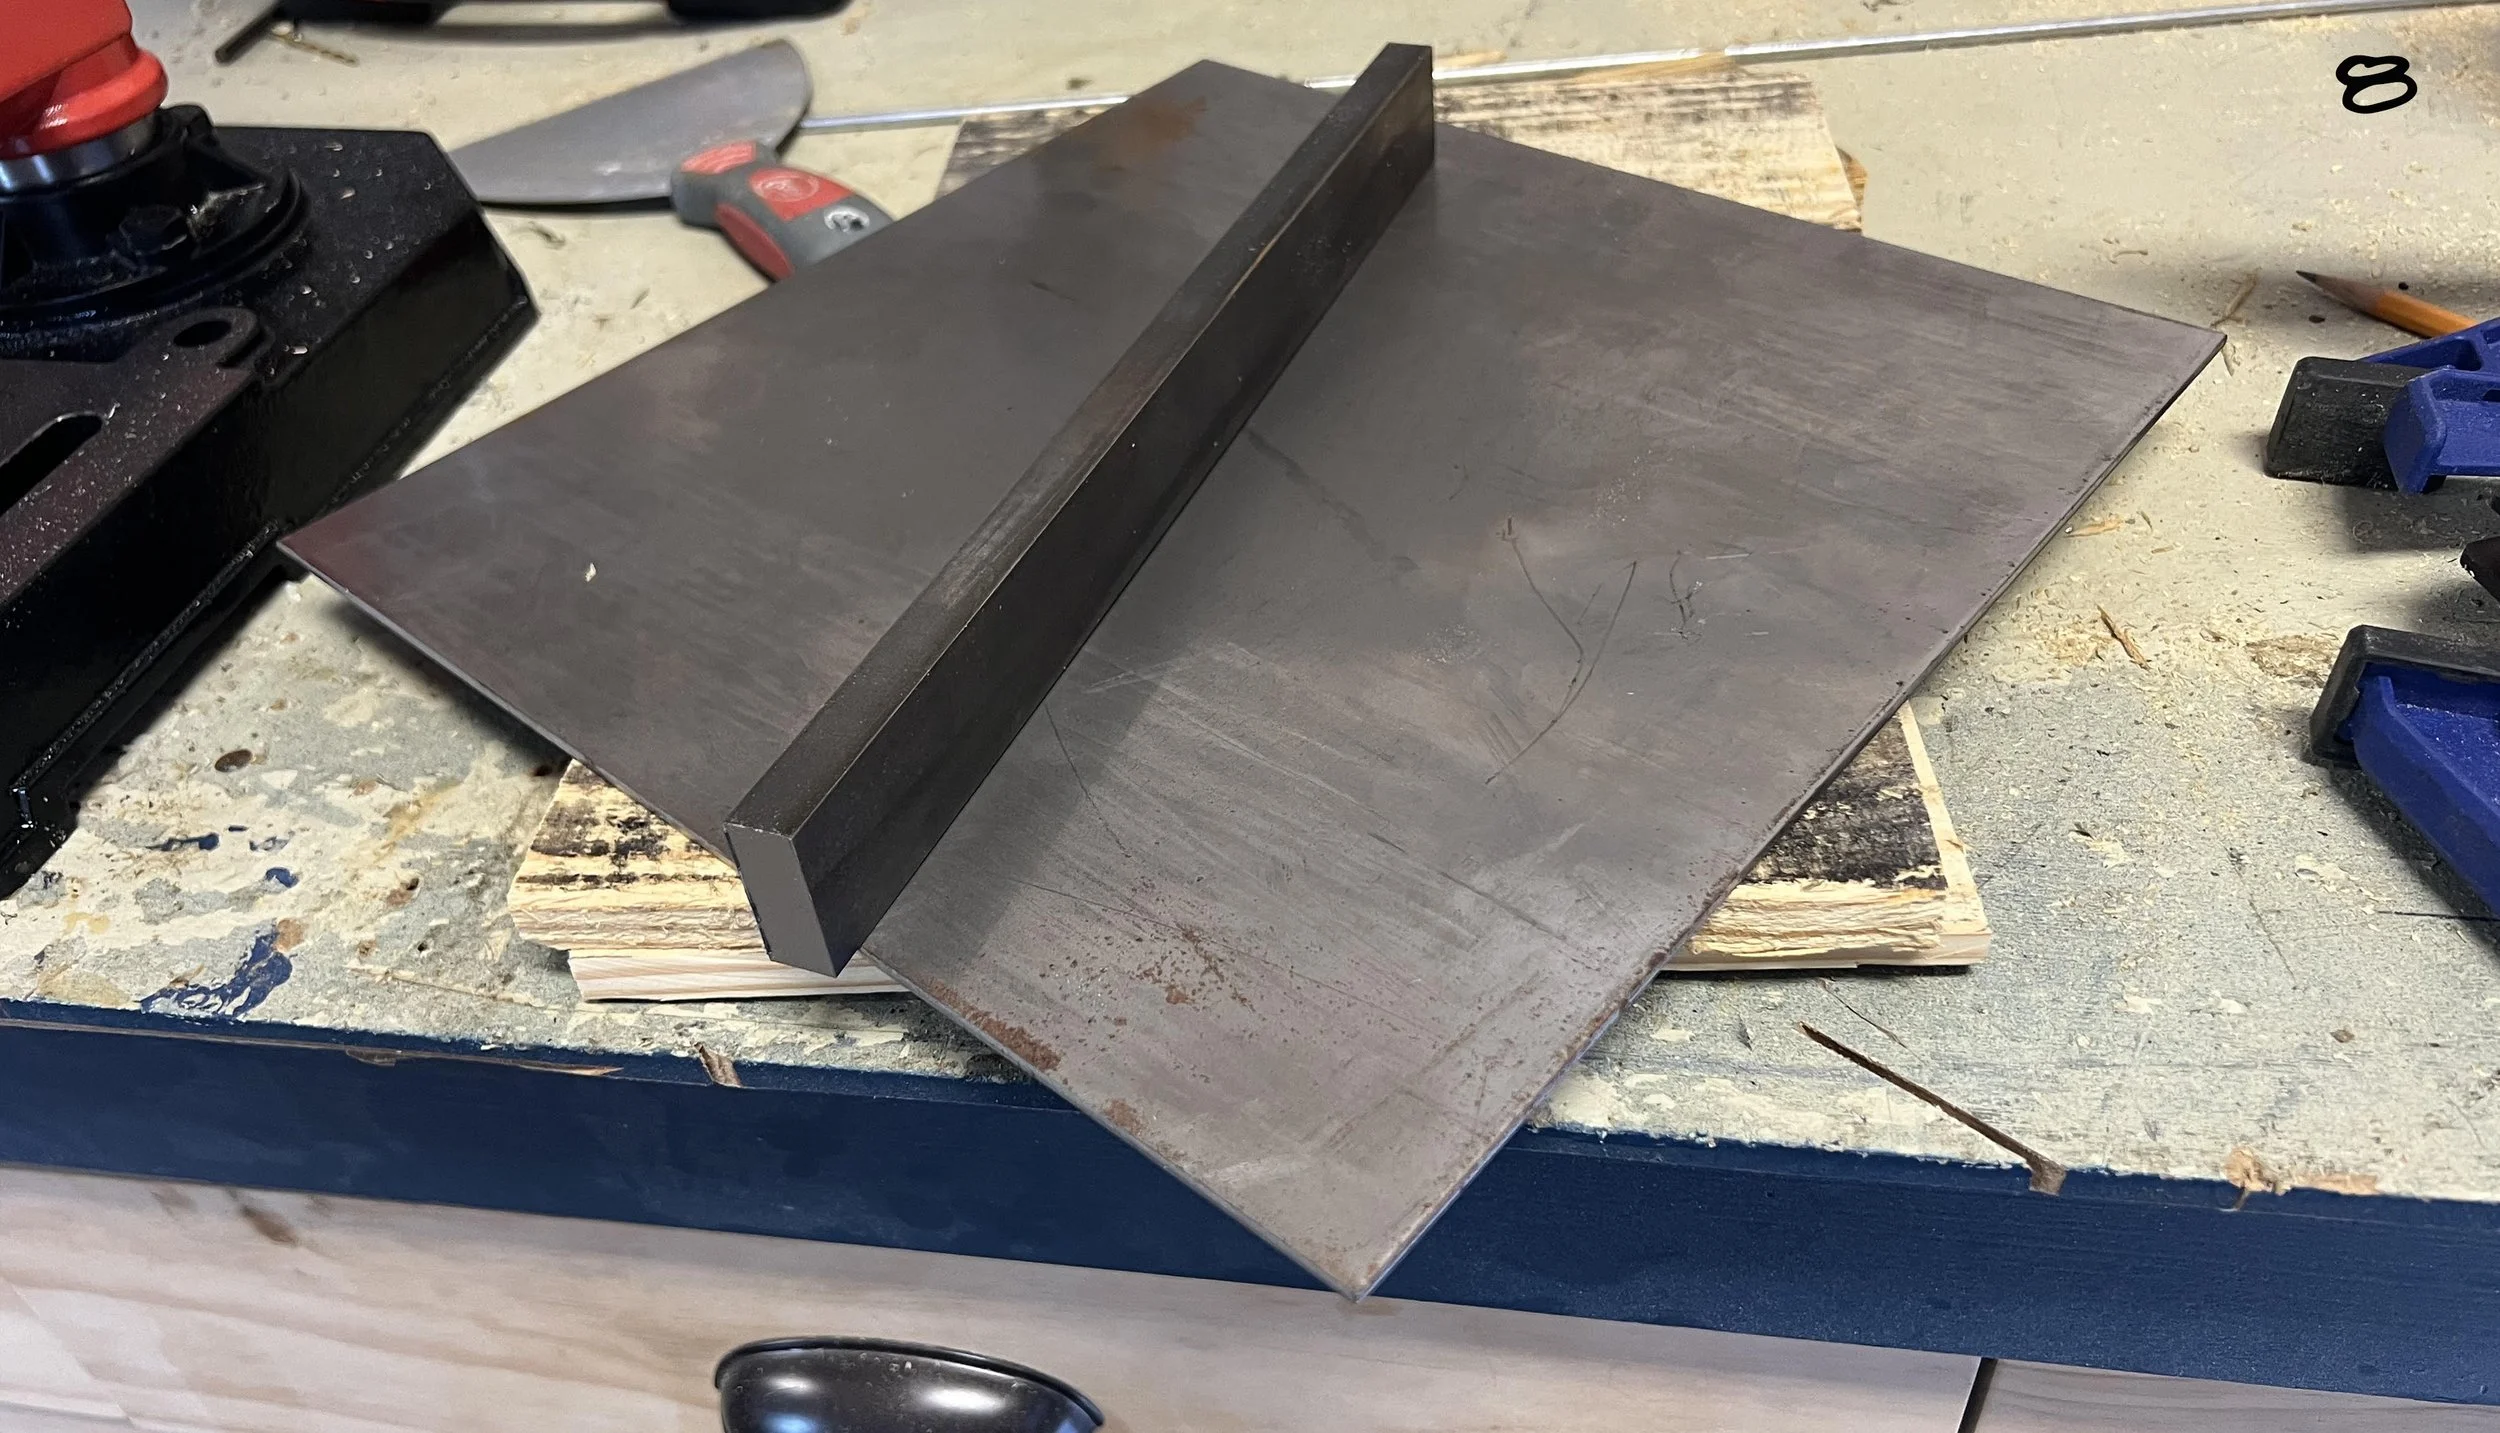
“Steel” more raw materials have arrived for making future components. [Sep 18, 2022]

Where it happens, aka the Sweat Shop. I refer to it as my “Shop Lite”, not really a well equipped shop but it is what I have to work with for now. There are some upgrades that will be required a little further along. [Sep 19, 2022]
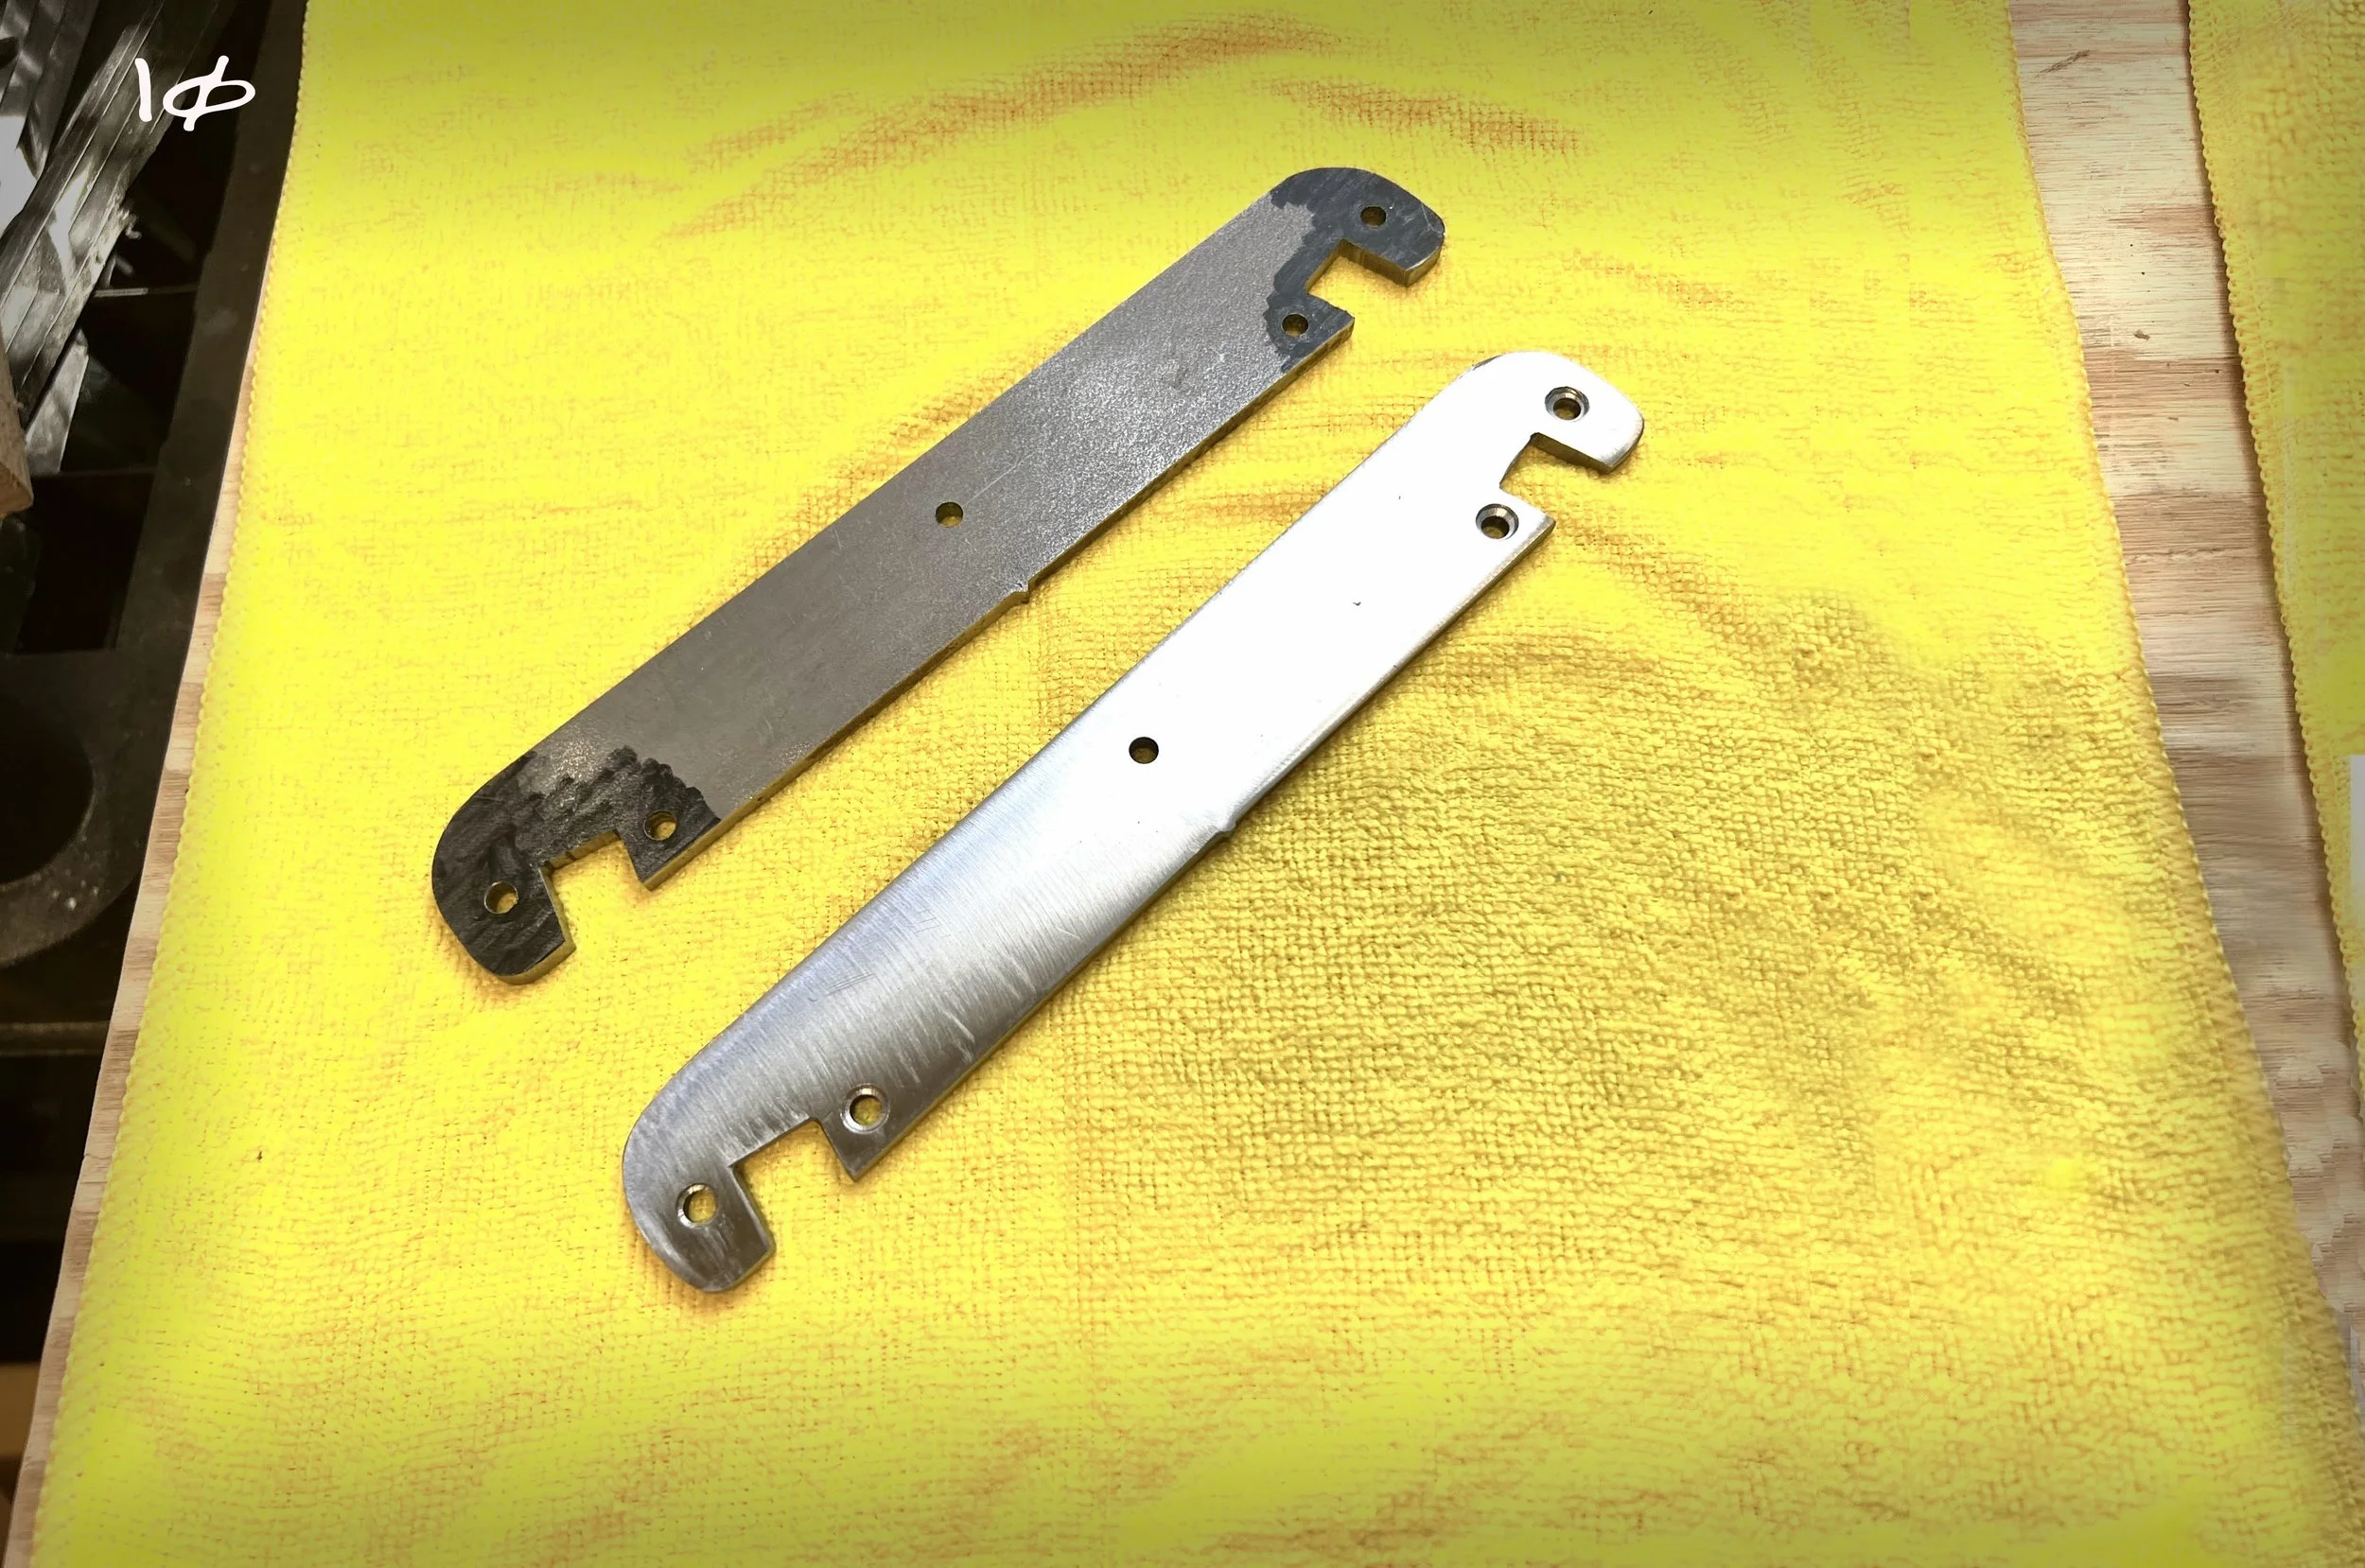
A little bit of cutting, a little bit of drilling, a little bit of grinding and now the two pieces depicted in photo one have been transformed into these (granted the top piece still needs the mill scale ground off). This is only a rough finish but they are now ready for the second phase. [Sep 20, 2022]

Rowel design on Adobe Illustrator. I initially went with the 12 point rowel but was not satisfied after the rough cut. I have much to learn and my first efforts were not good. So I decided to back down to a nine point rowel (top row) and had better results on the rough cut. It took me a short time to get comfortable with Adobe Illustrator because I have not used it much in the past. The process is to print the design out on label paper, peel the back off and stick your pattern directly to the steel. [Sep 21, 2022]
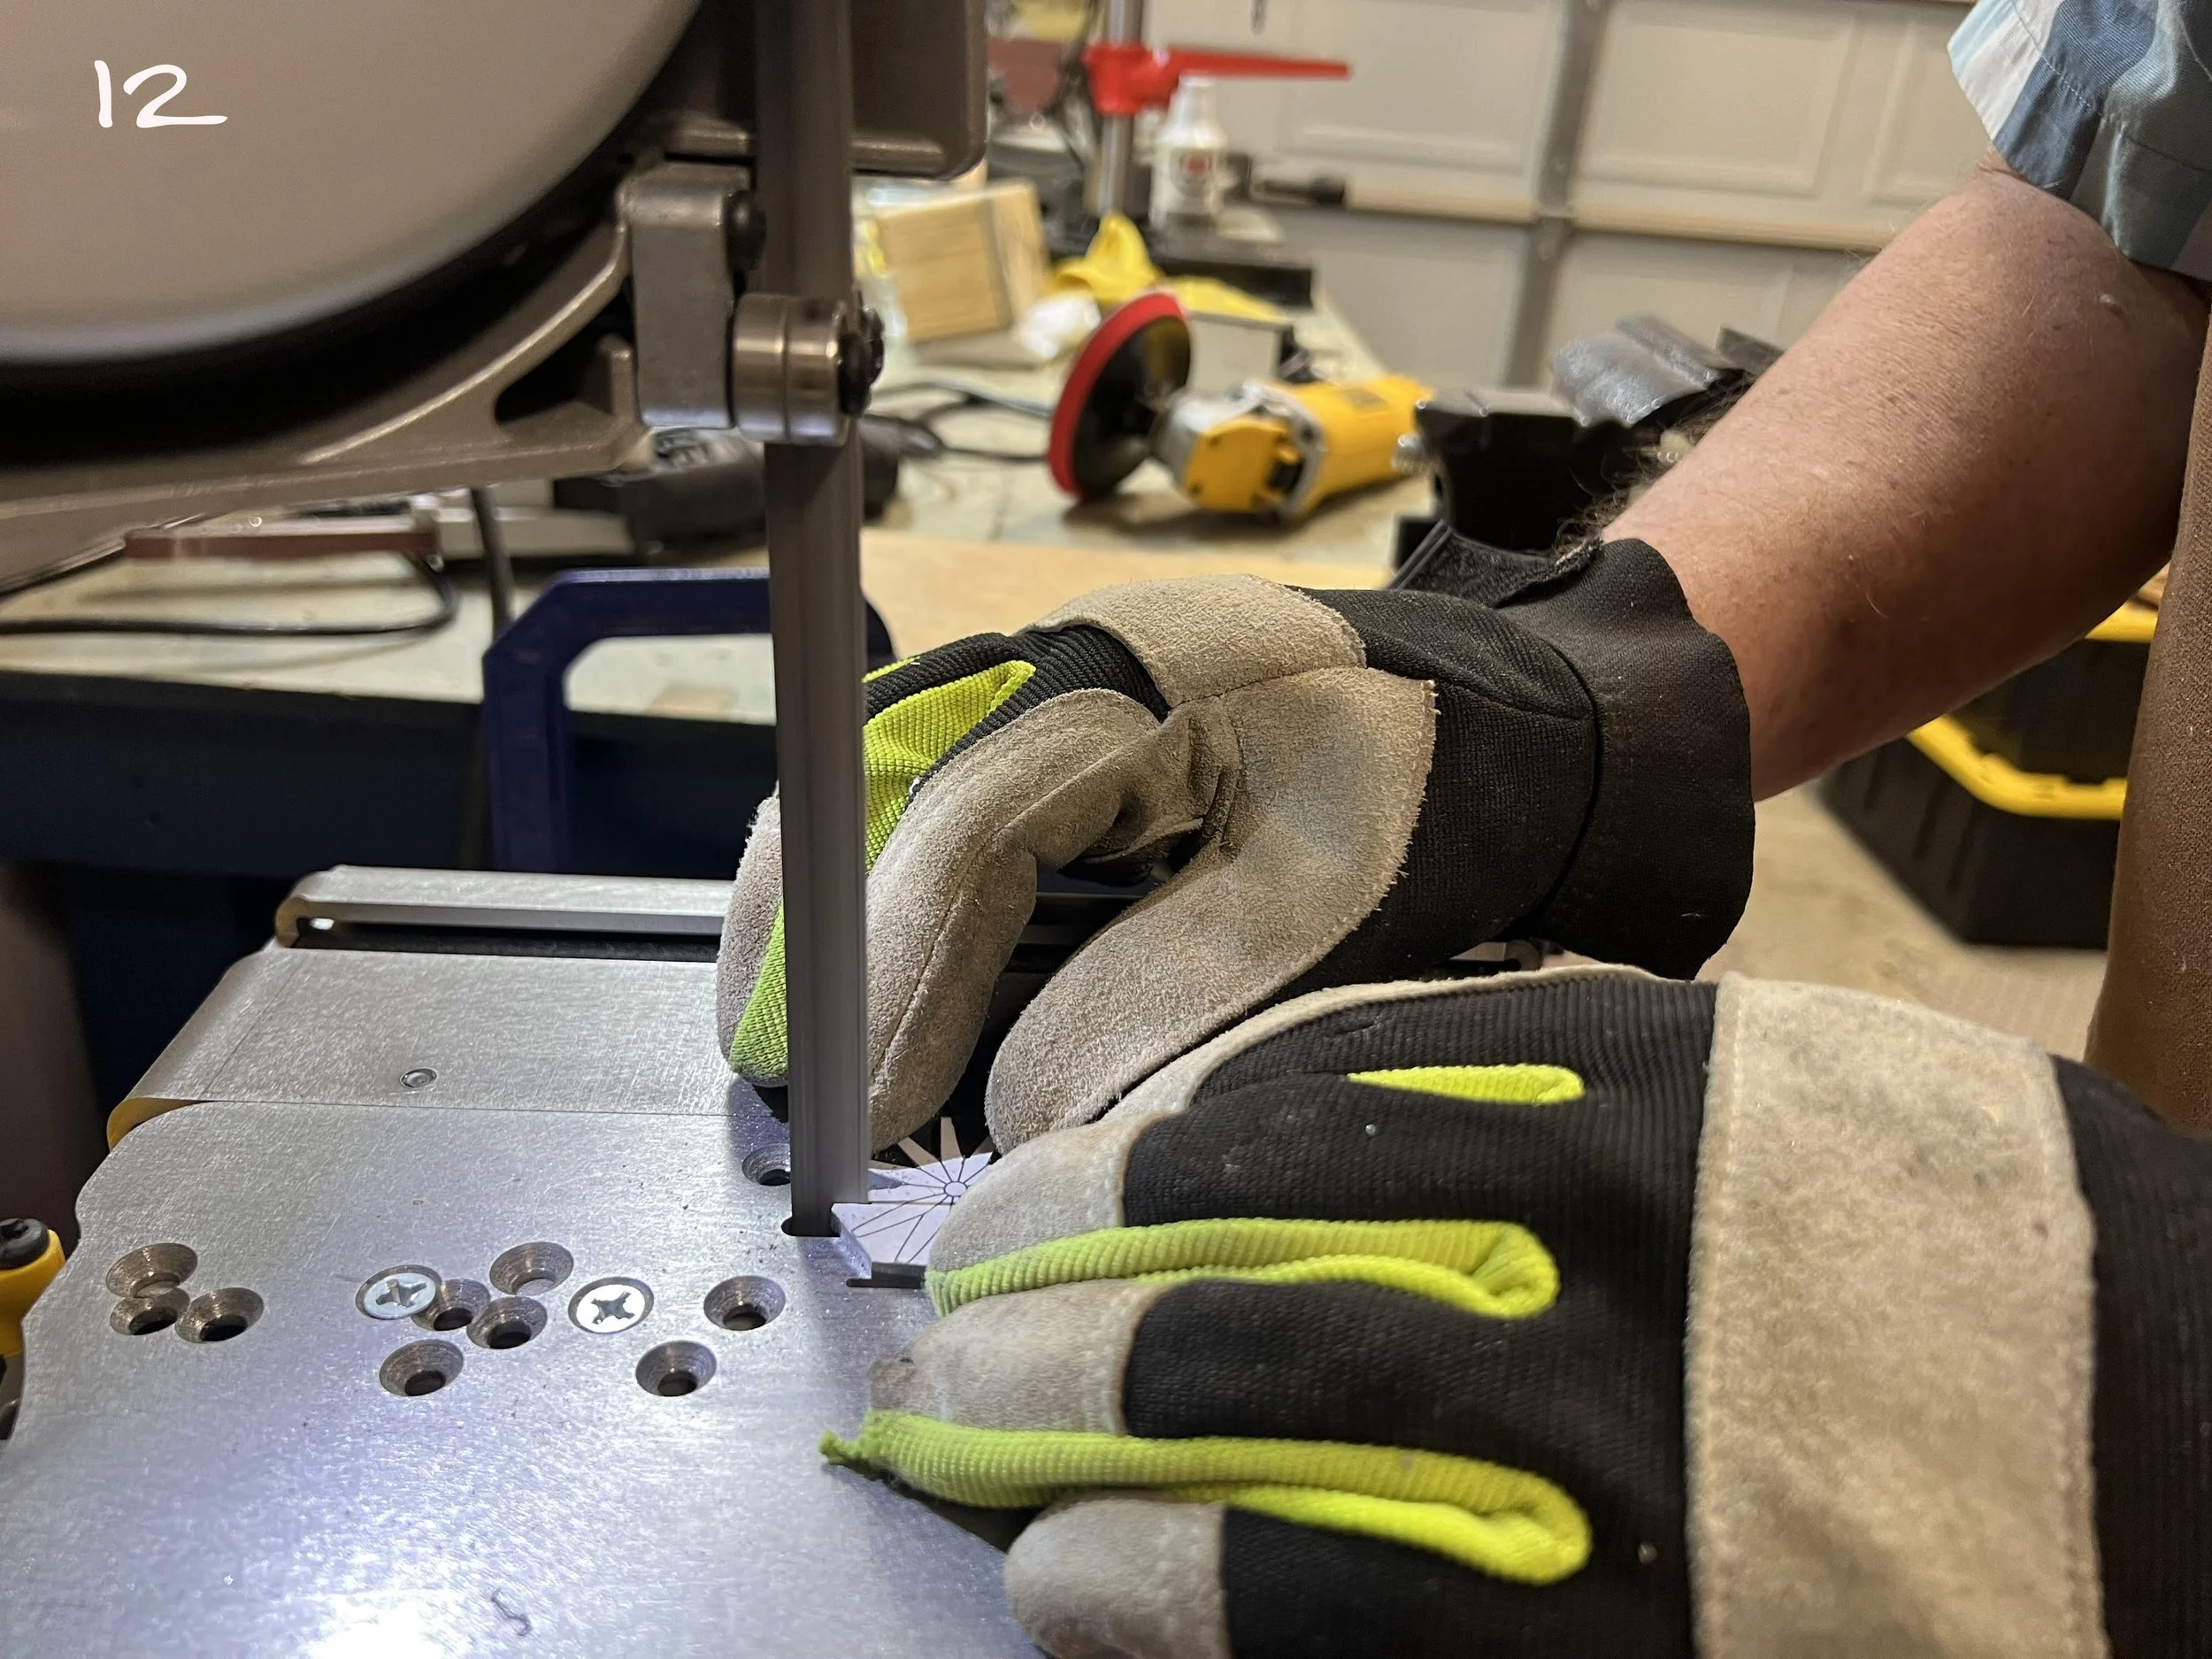
Cutting out a Rowel on the band saw. [Sep 26, 2022]
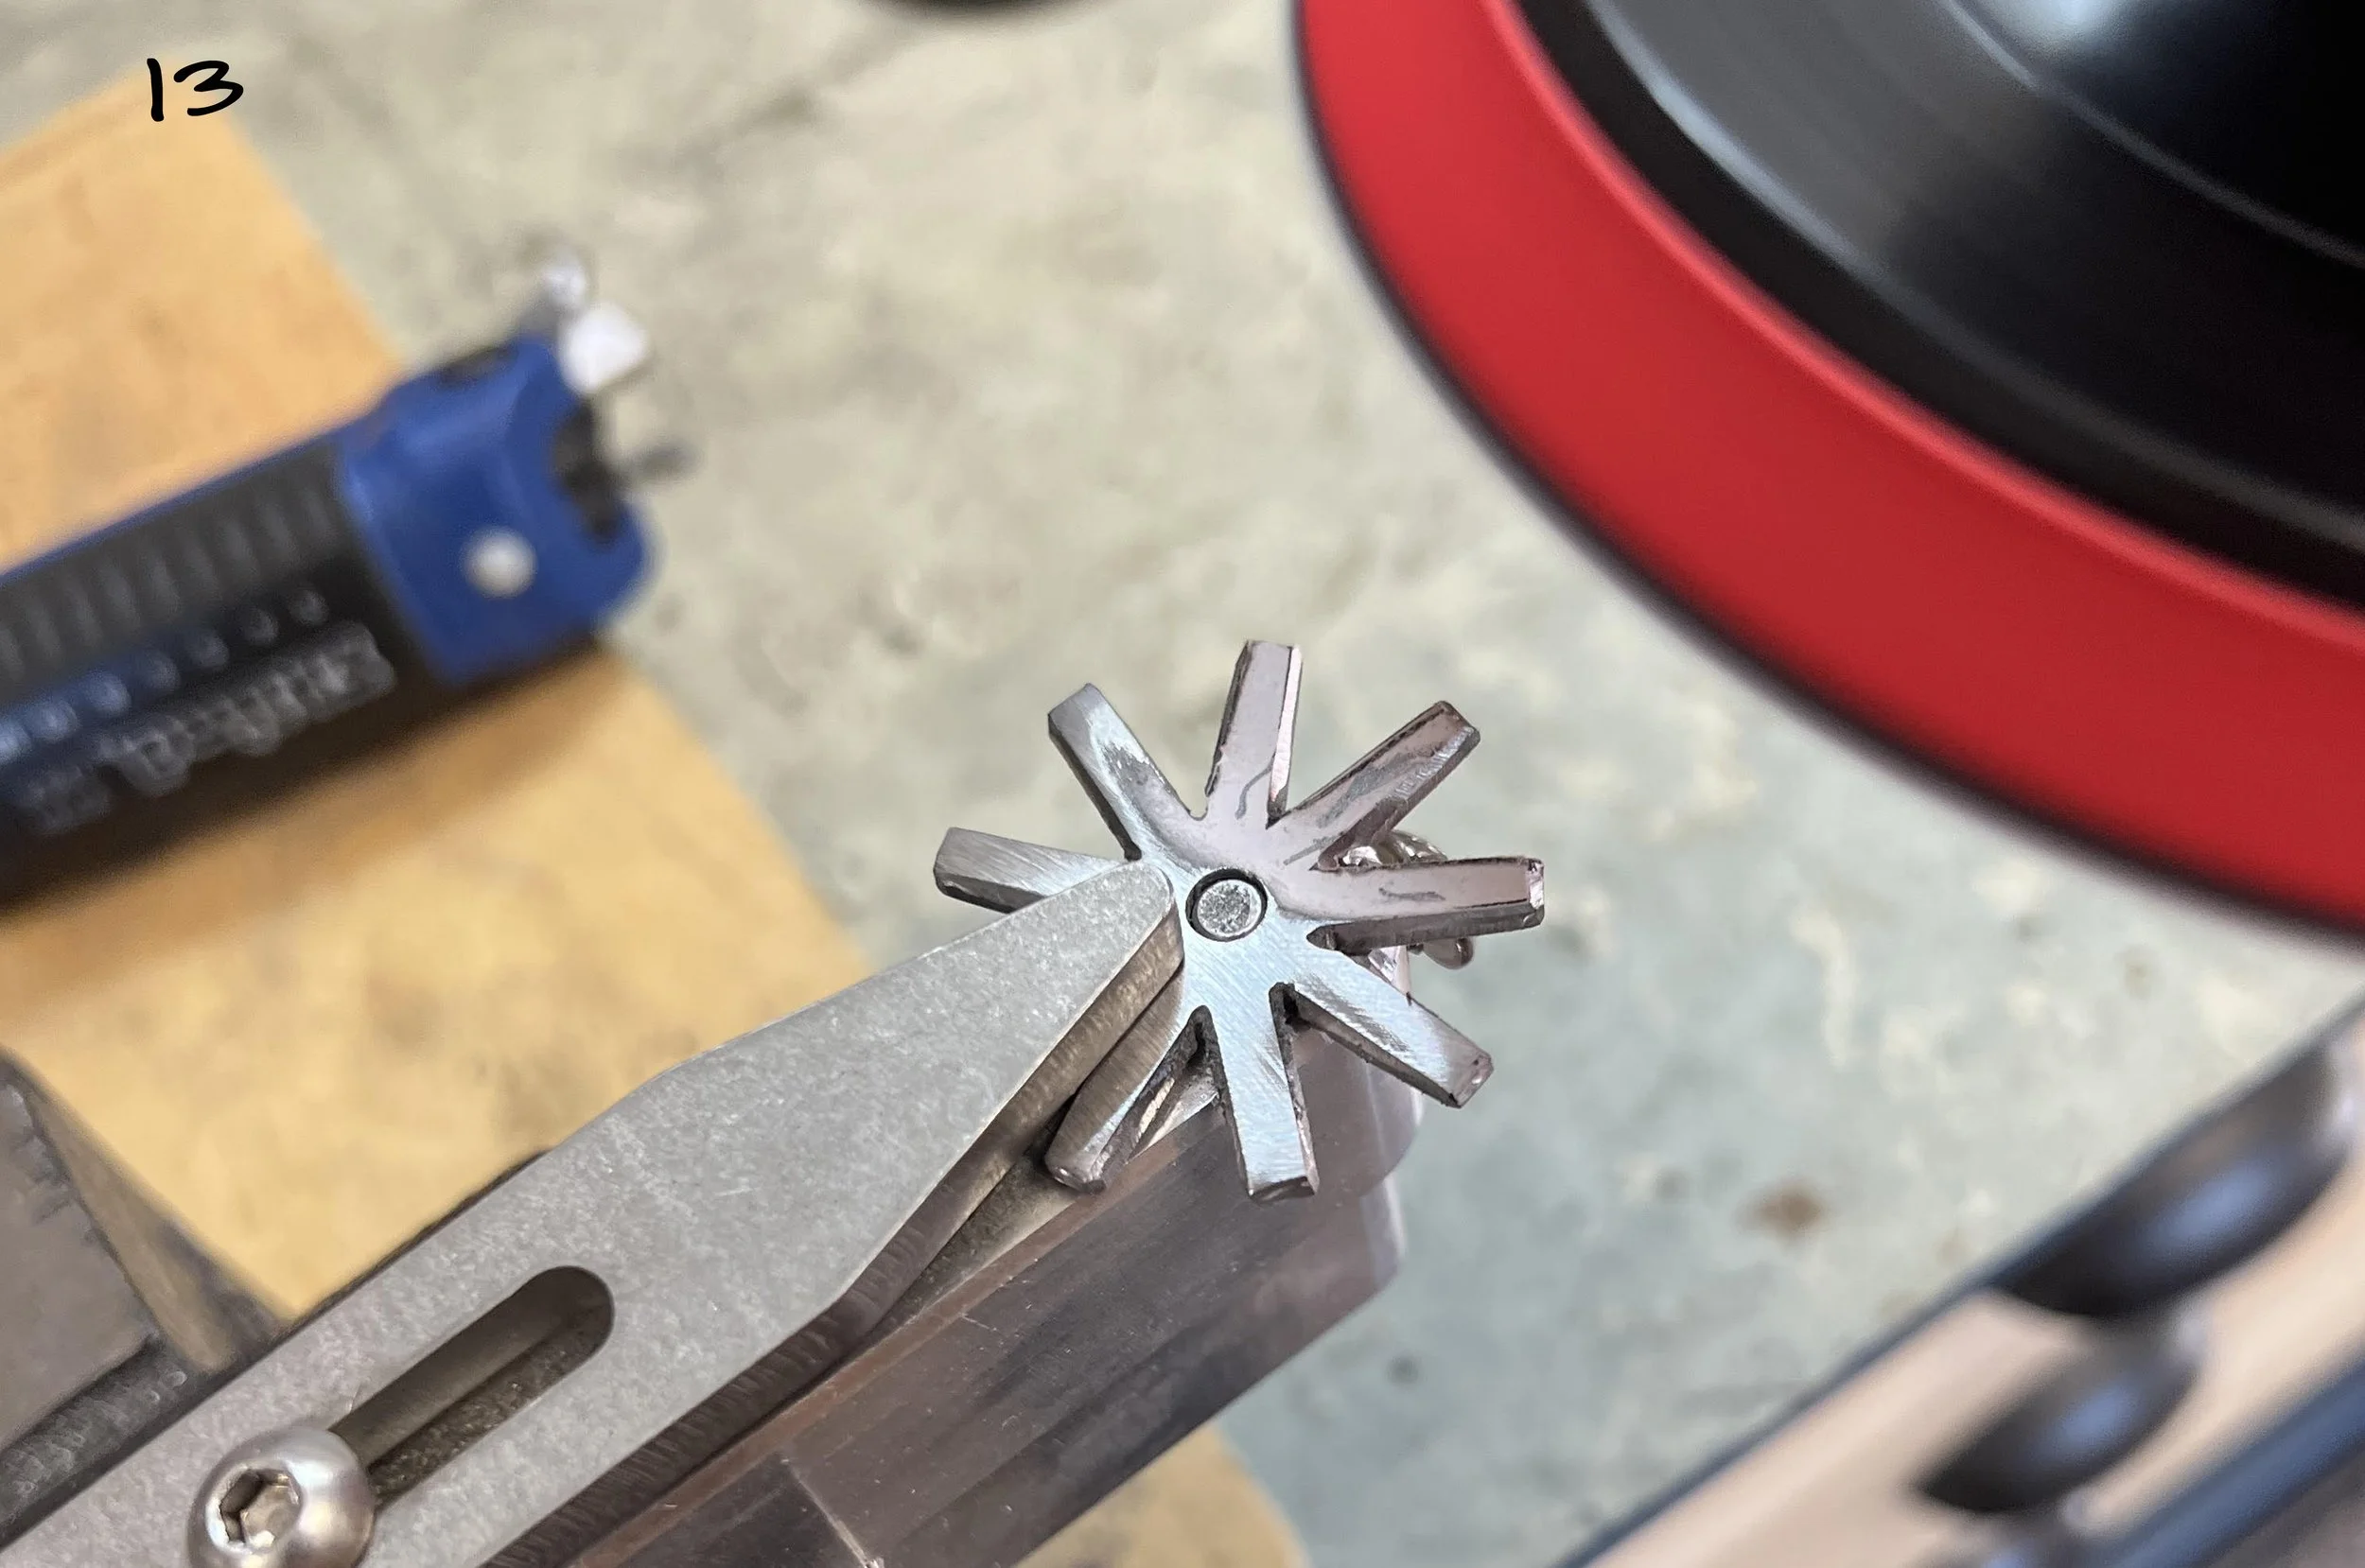
Cleaning up the rough-cut rowel on a rowel jig using a course grit sandpaper on an angle grinder. [Sep 29, 2022]
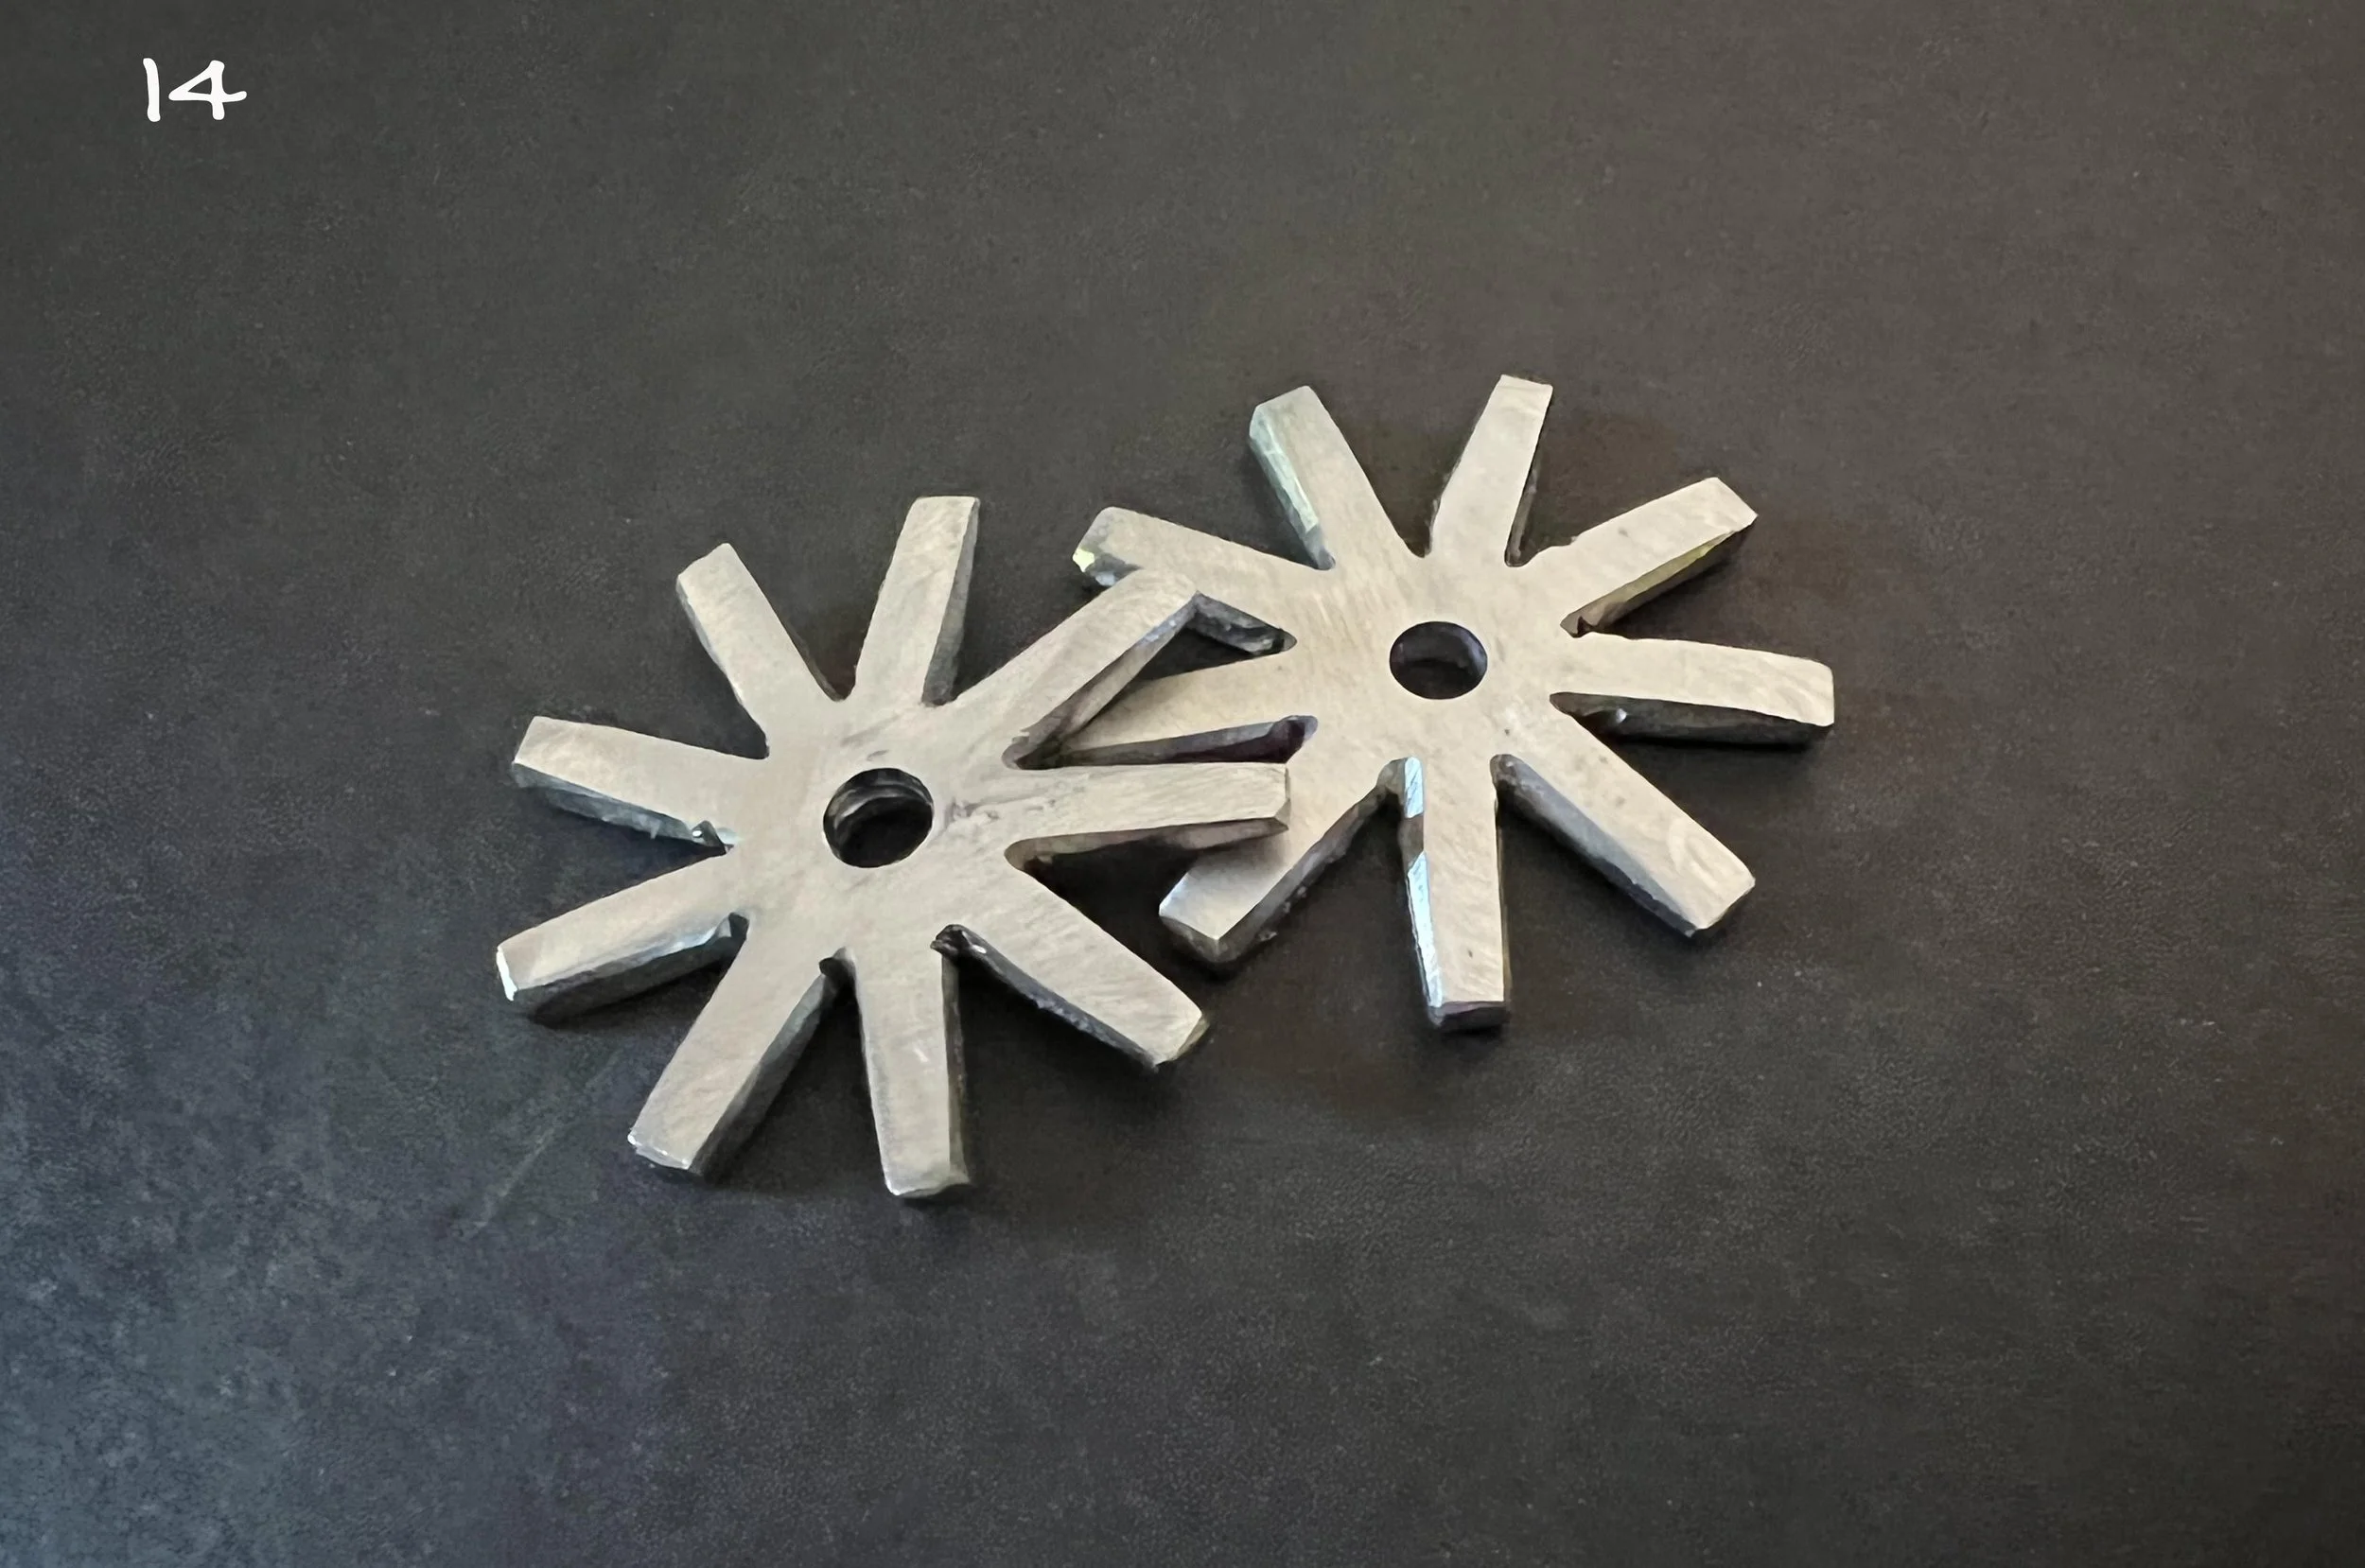
Rough cut Rowels before filing and finishing. [Oct 9, 2022]

Cutting out the Shanks on a band saw. [Oct 9, 2022]
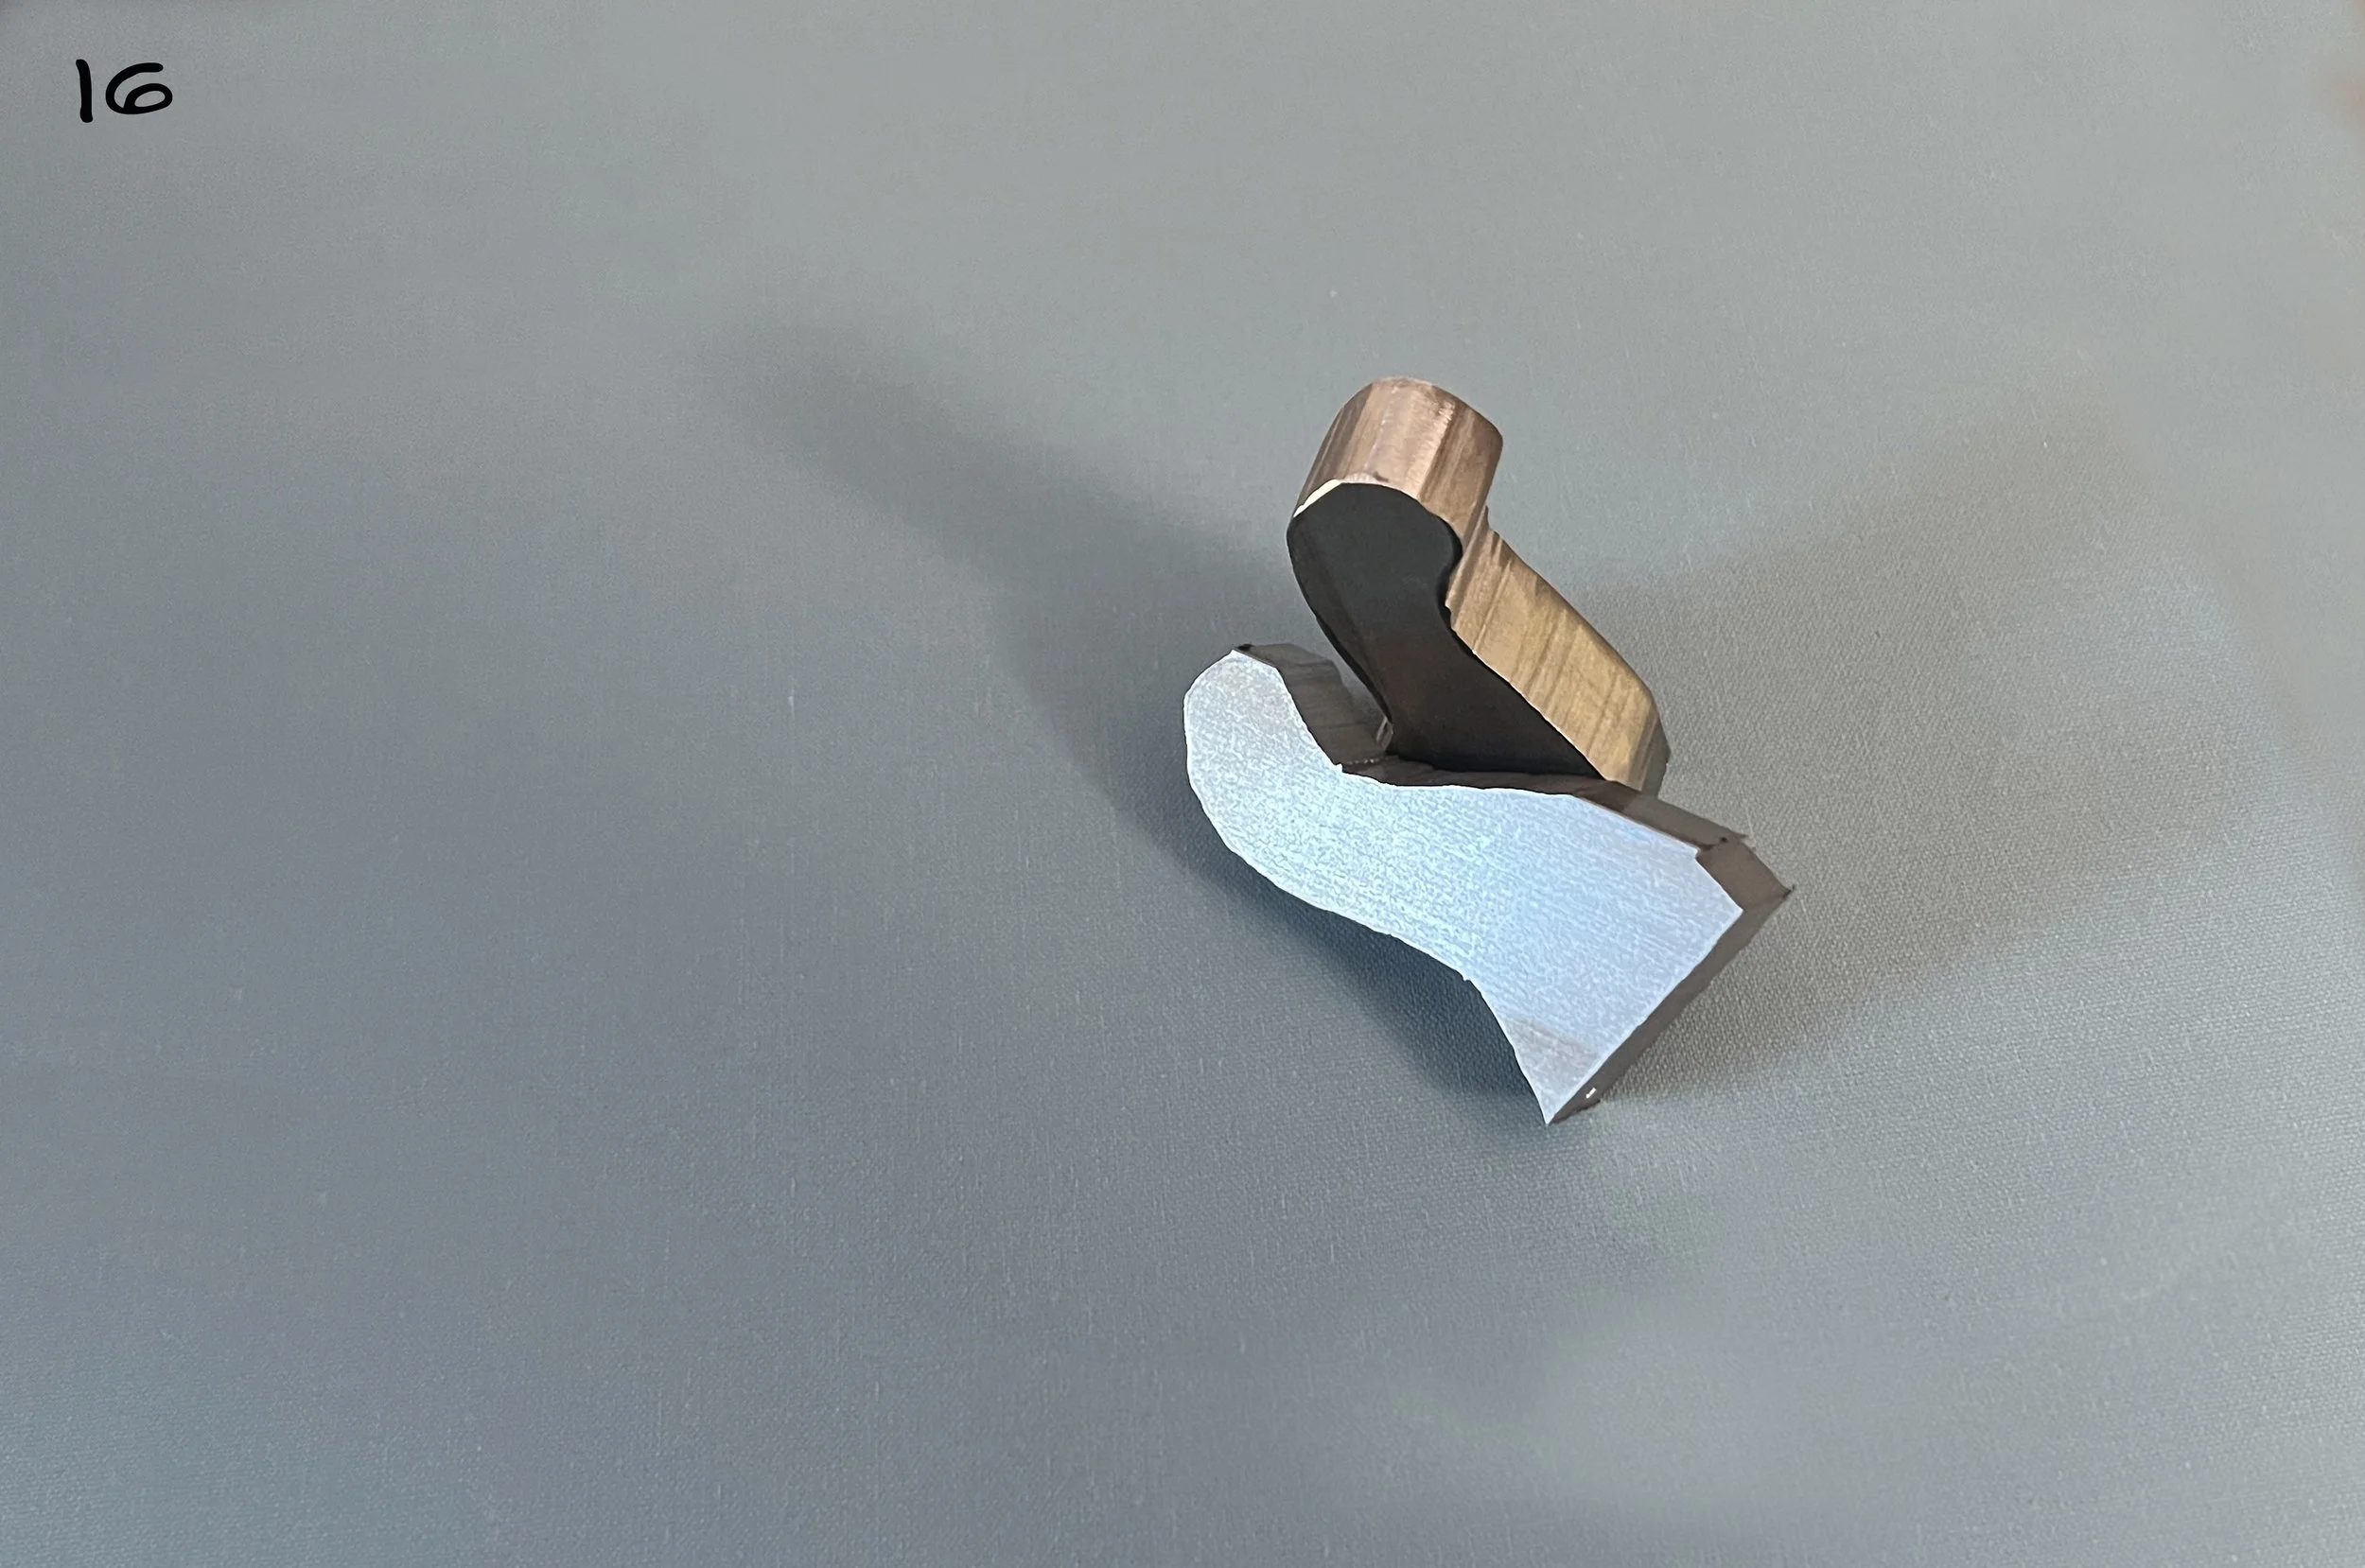
Rough-cut Shanks [Oct 9, 2022]

Added my Maker’s Mark to inside surface of Heel Band. [Nov 4, 2022]
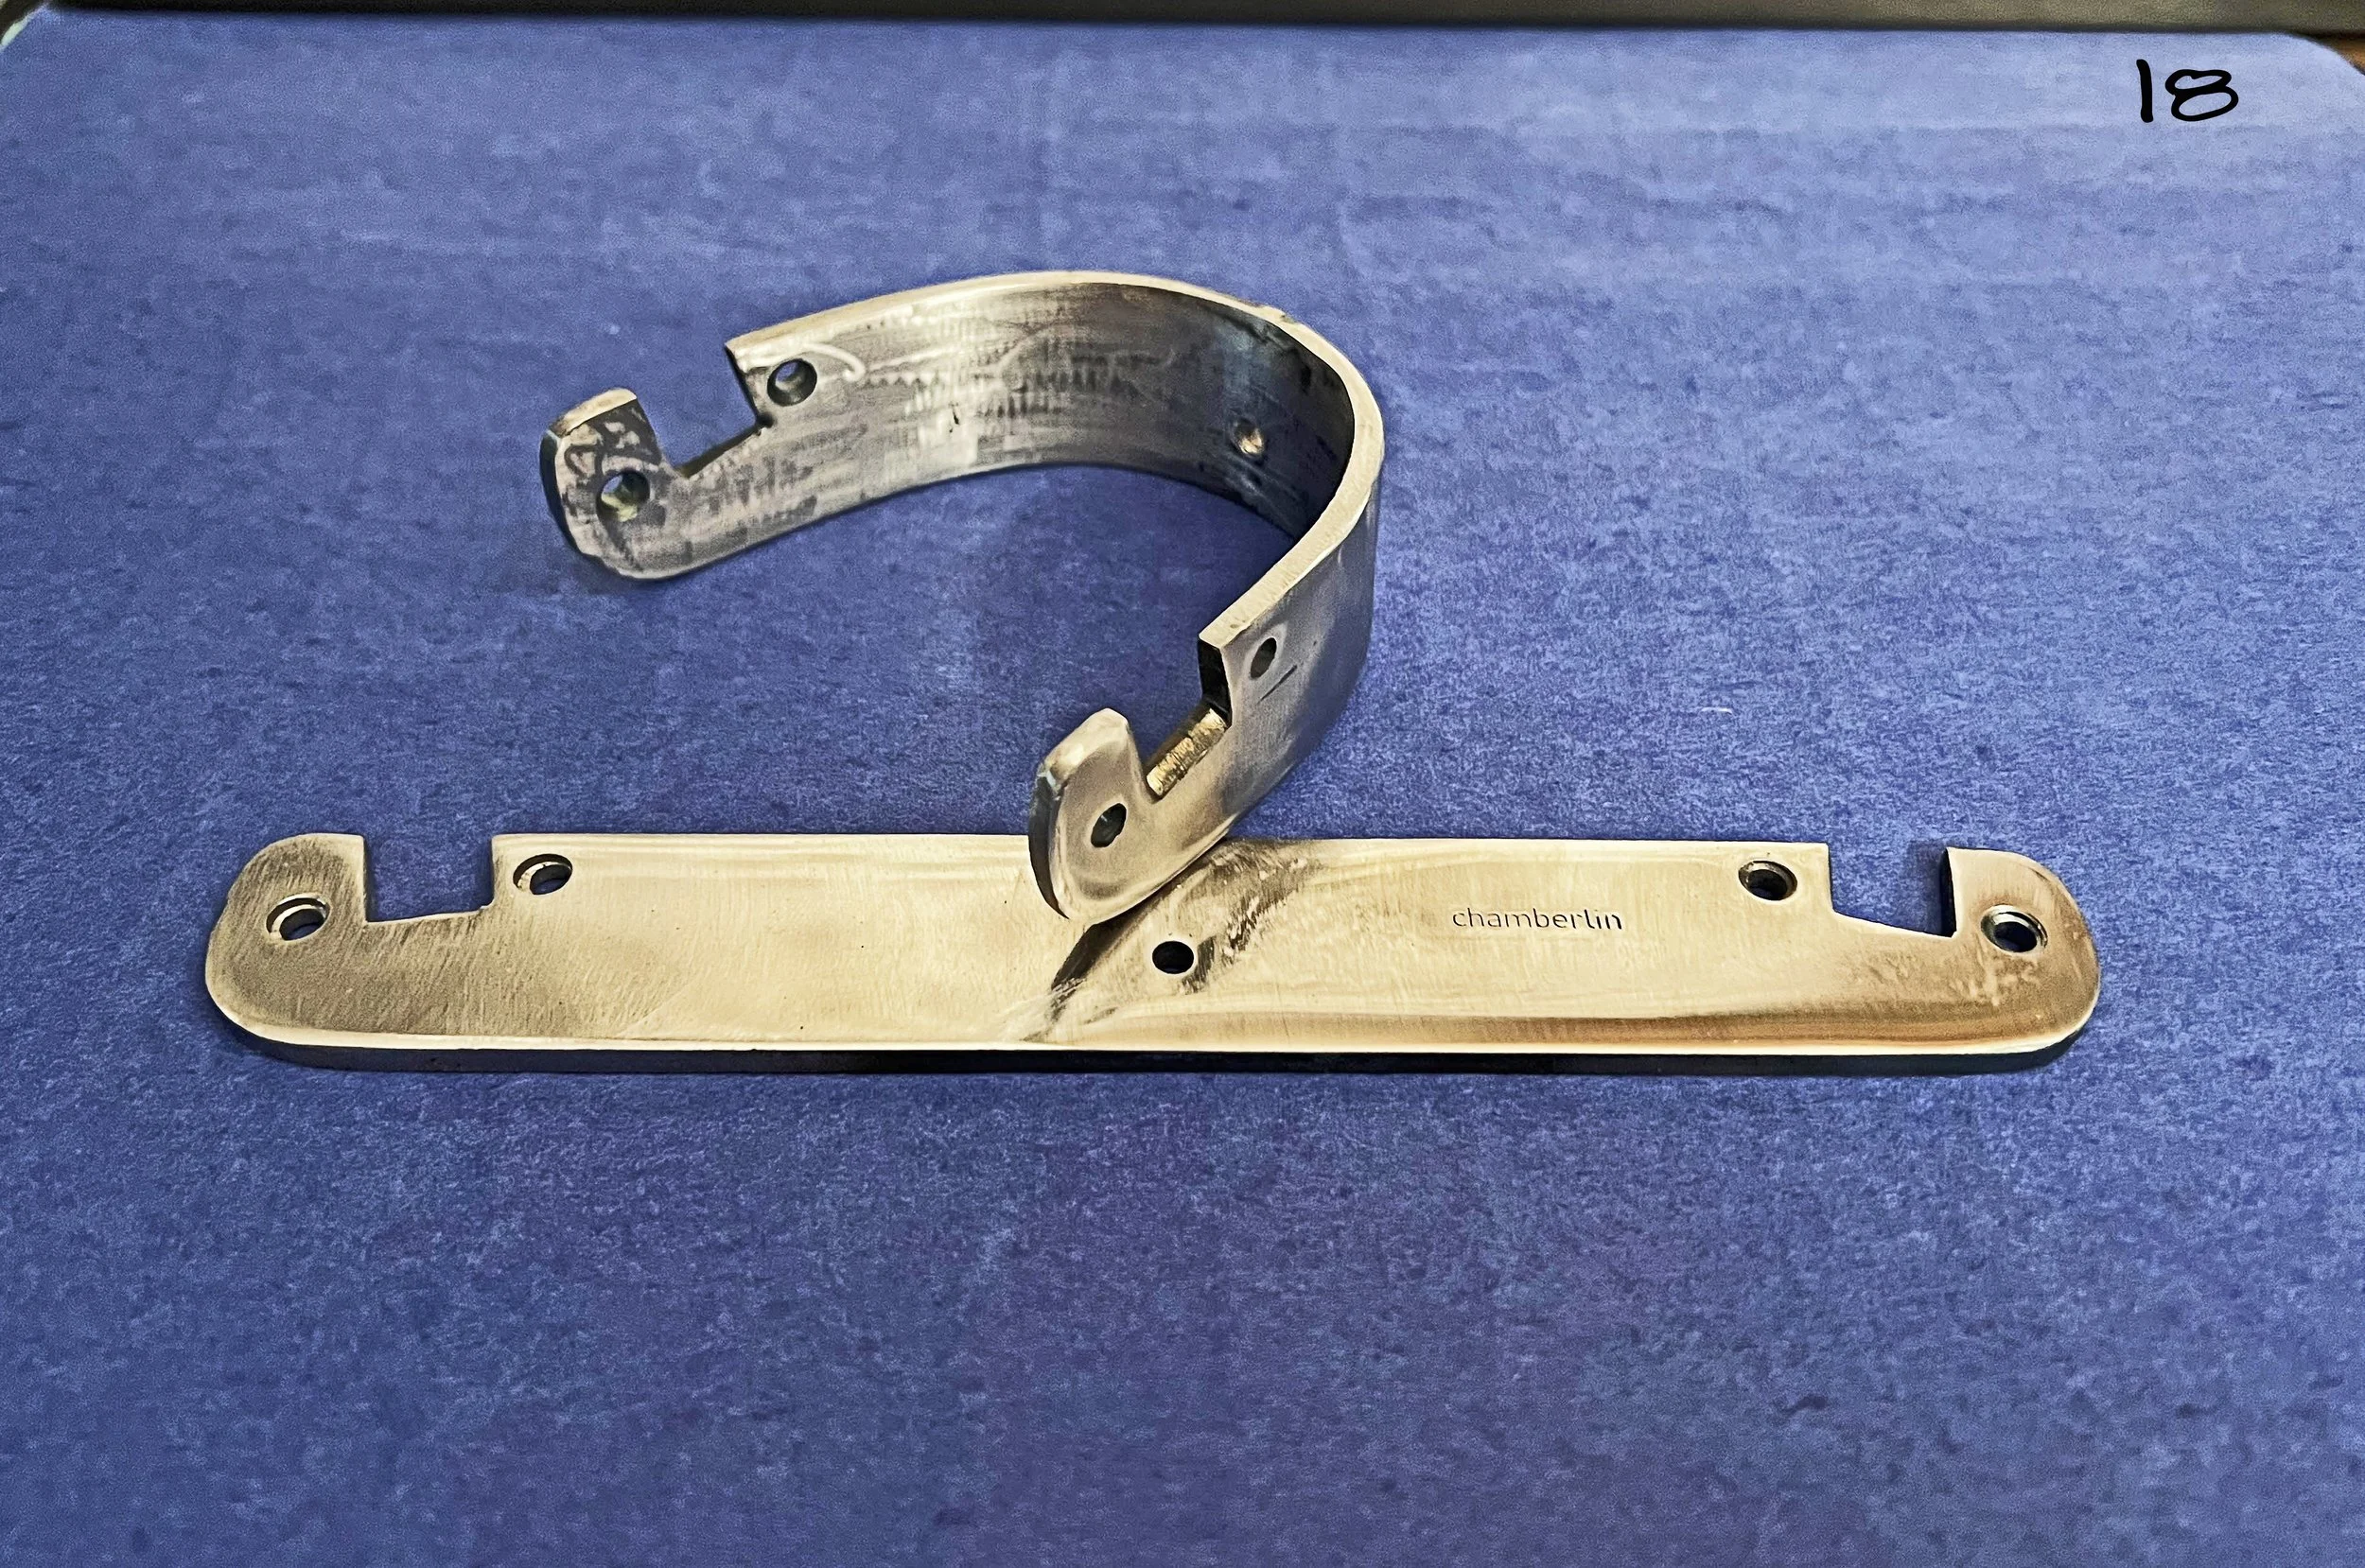
One Heel Band bent to shape, one more to go. [Nov 6, 2022]
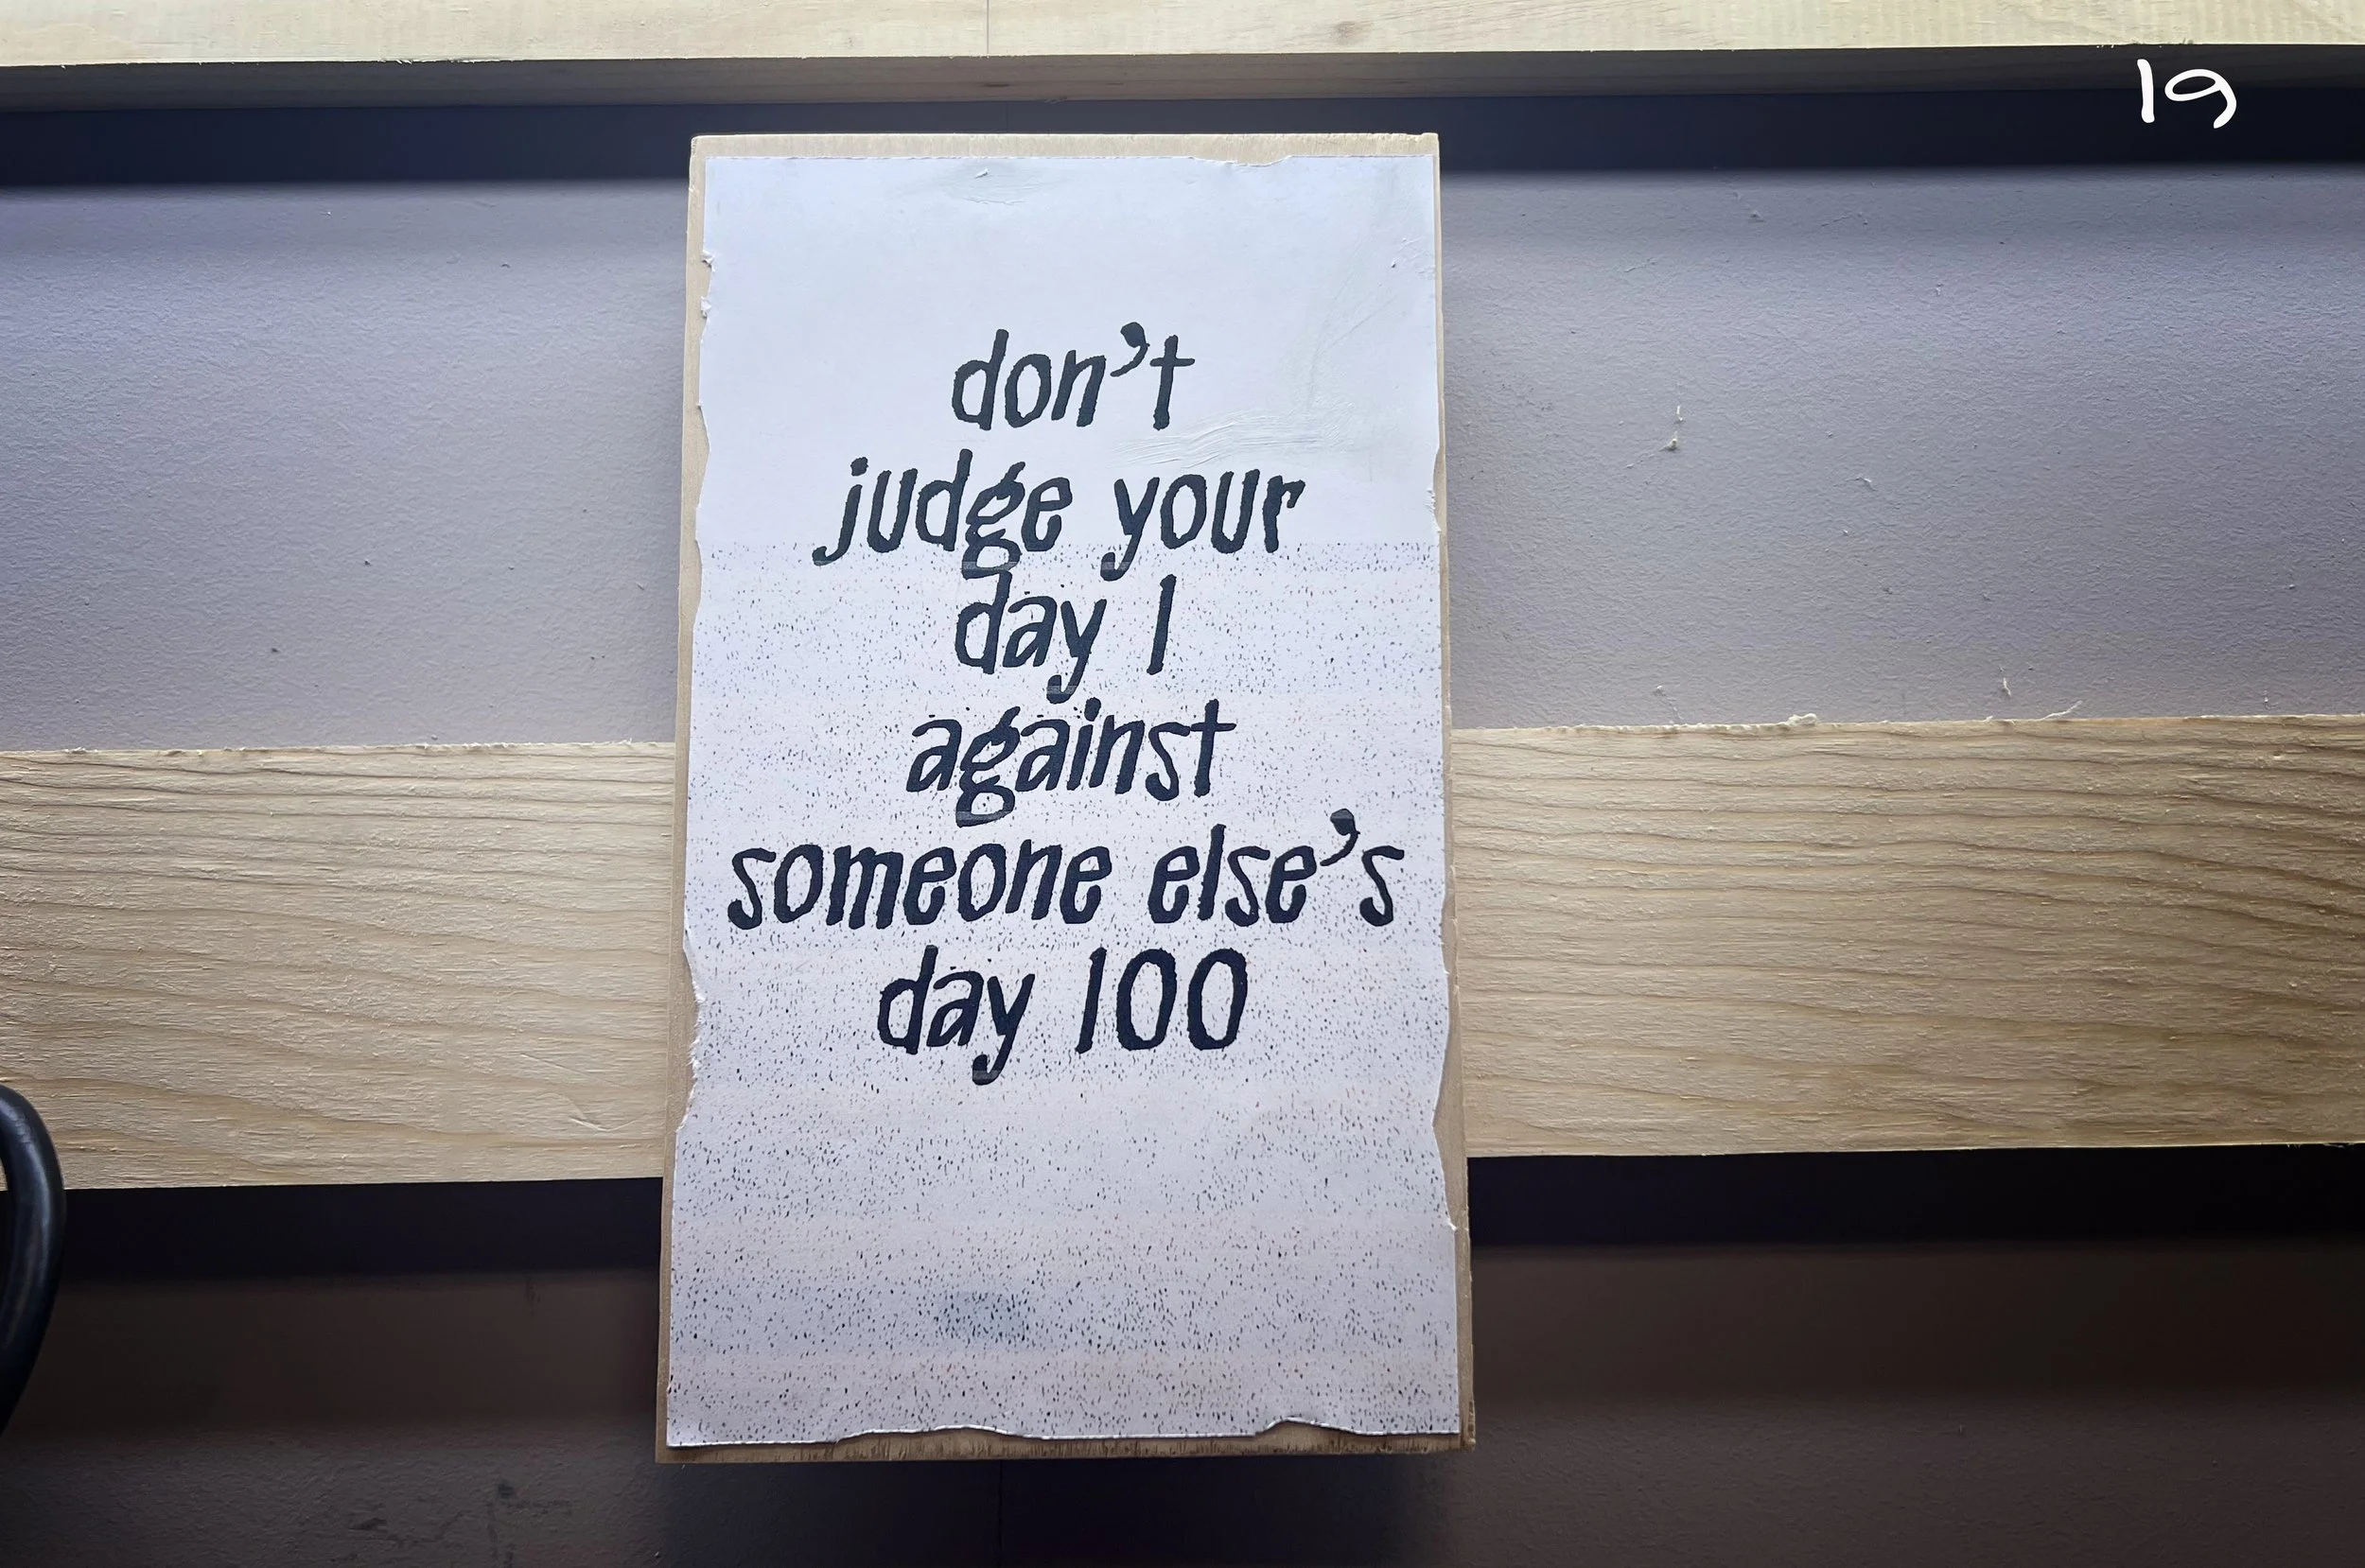
A quote that I came across one day while sifting through Youtube videos looking for “how to” tips for working with metal. Spoken by an artist named “Barbie the Welder” as she was helping someone who was attempting “art” welding for the first time. I try to live by this message each time a step or process that I perform on this project turns out to be less than I desired. [Nov 6. 2022]

Heel Band Bending Jig used to bend Heel Band pictured in Photo 18. This process involved a hammer and arm muscles for a basic cold bend, then heat was applied to band to get the final shape refined. For the second Heel Band I have decided to use a Metal Bender for the first step, the cold bend, then use this jig and heat to refine to final shape. That will save wear and tear on my arm and shoulder muscles. My motto has always been “Work smarter, not harder.” [Nov 26, 2022]

After working on my first Heel Band I decided that the jig needed some modifications to make it easier to anchor the band while heating and setting the final shape with a hammer and block of wood. I put the heel band back on to test these modifications. I think this will be easier and work better. [Nov 27, 2022]
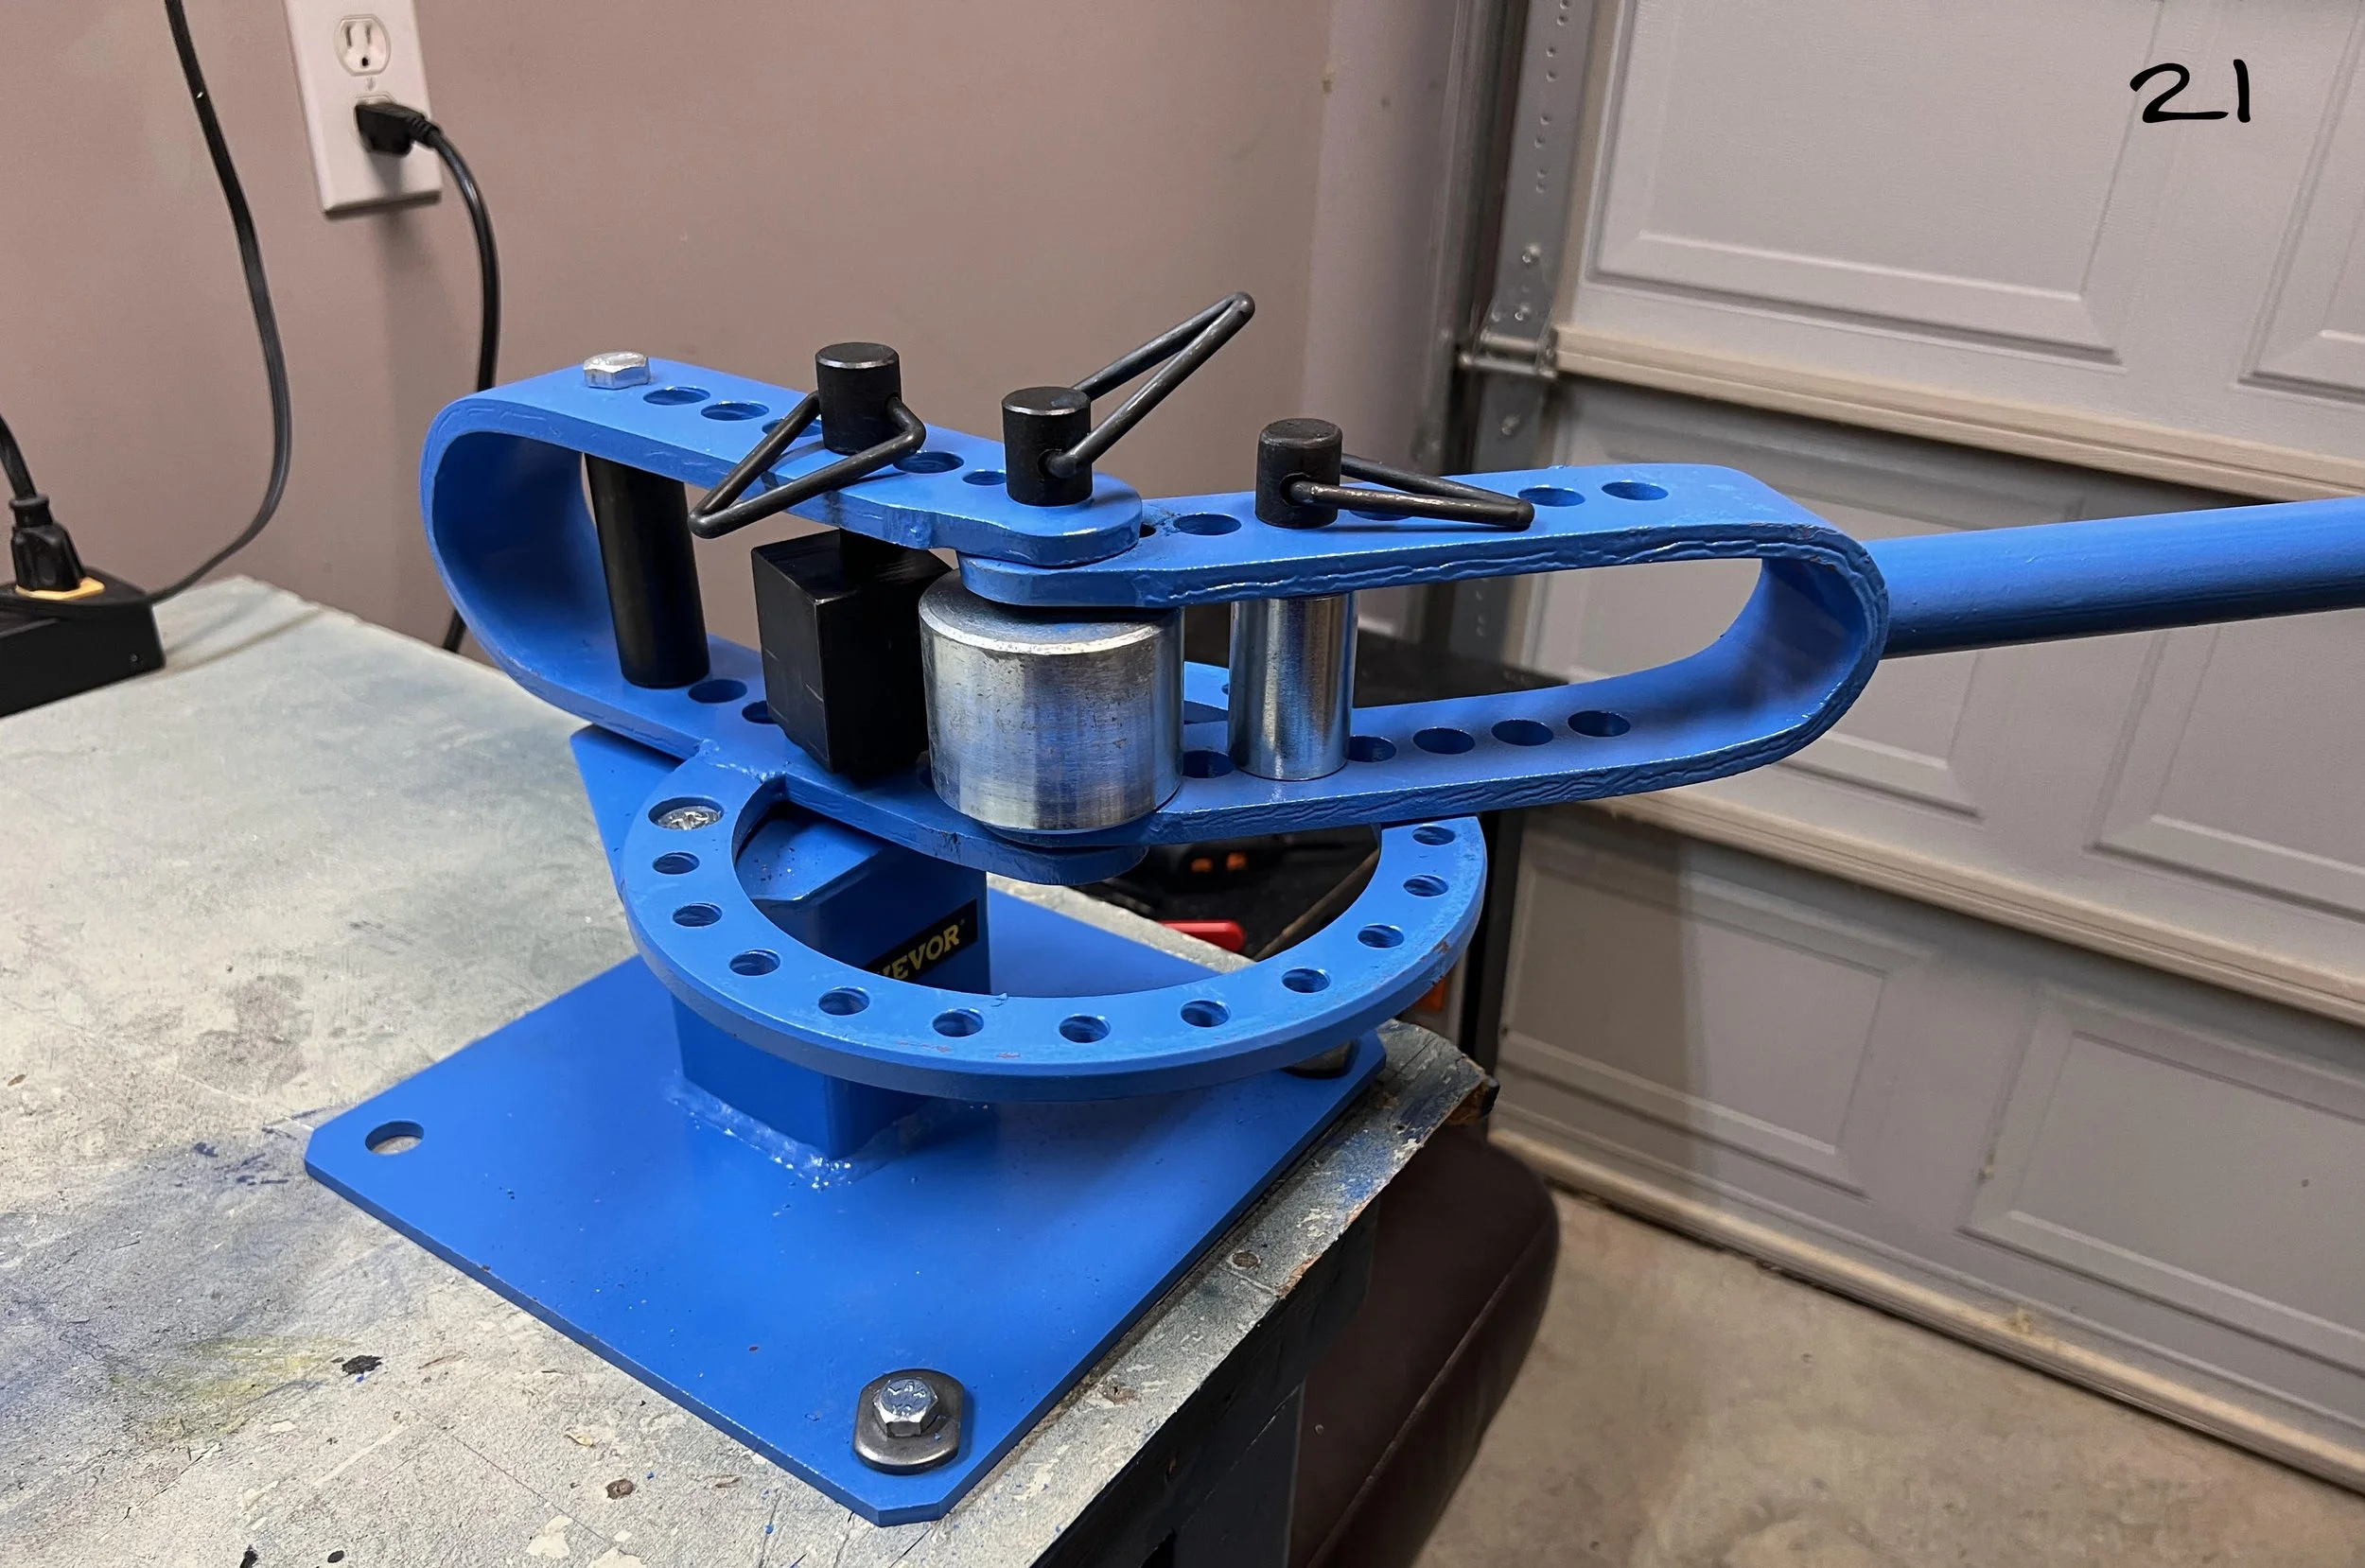
I searched Youtube for a better way to bend the Heel Bands than the old hammer and brute force method. I came across one video where a metal bender was used and it looked a lot easier. I decided to get one to make my life better, a very versatile apparatus that can be used in a lot of different ways during metal fabrication work. [Nov 28, 2022]

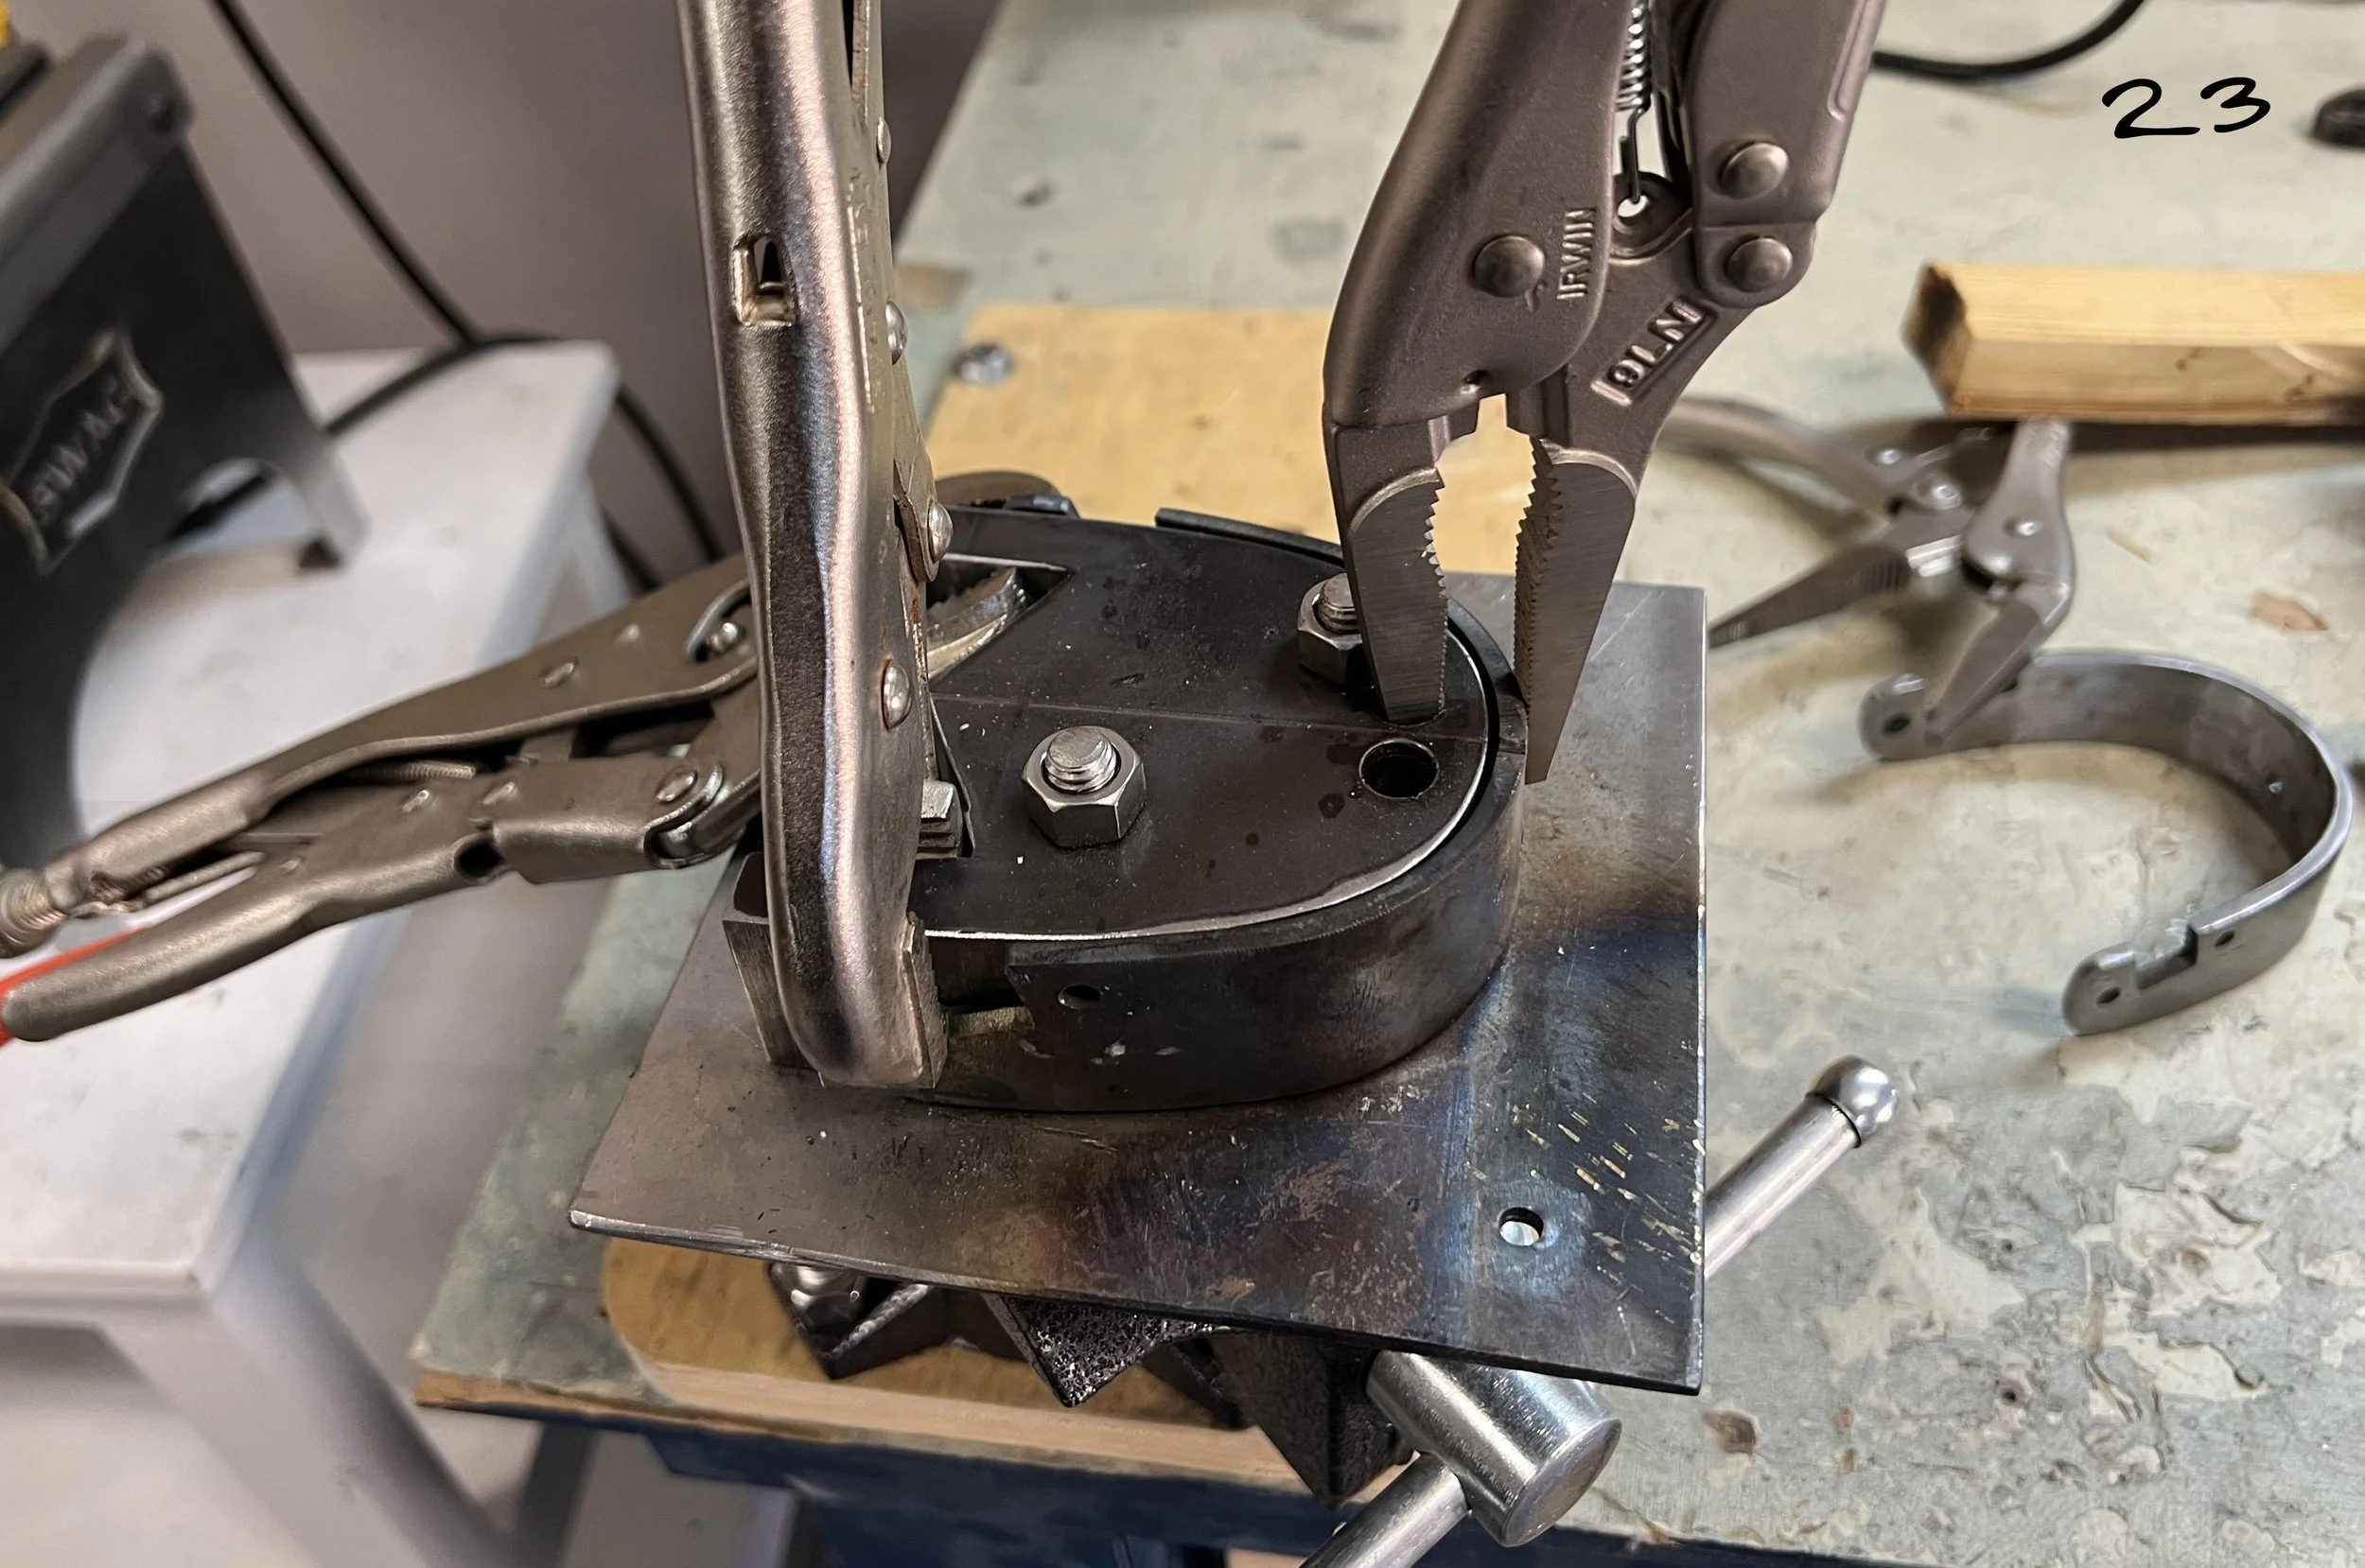
Close-up view of Heel Band number two in the metal bender. SWEET! [Nov 28 2022]
After the initial bend using the bending machine, I still have to do some final tweaking to get the shape right. That involves this jig, some vise grips, a heavy hammer and wooden block, and a number of sharp blows using said hammer and wooden block on the Heel Band that has been heated to a cherry red with a torch. [Nov 28, 2022]

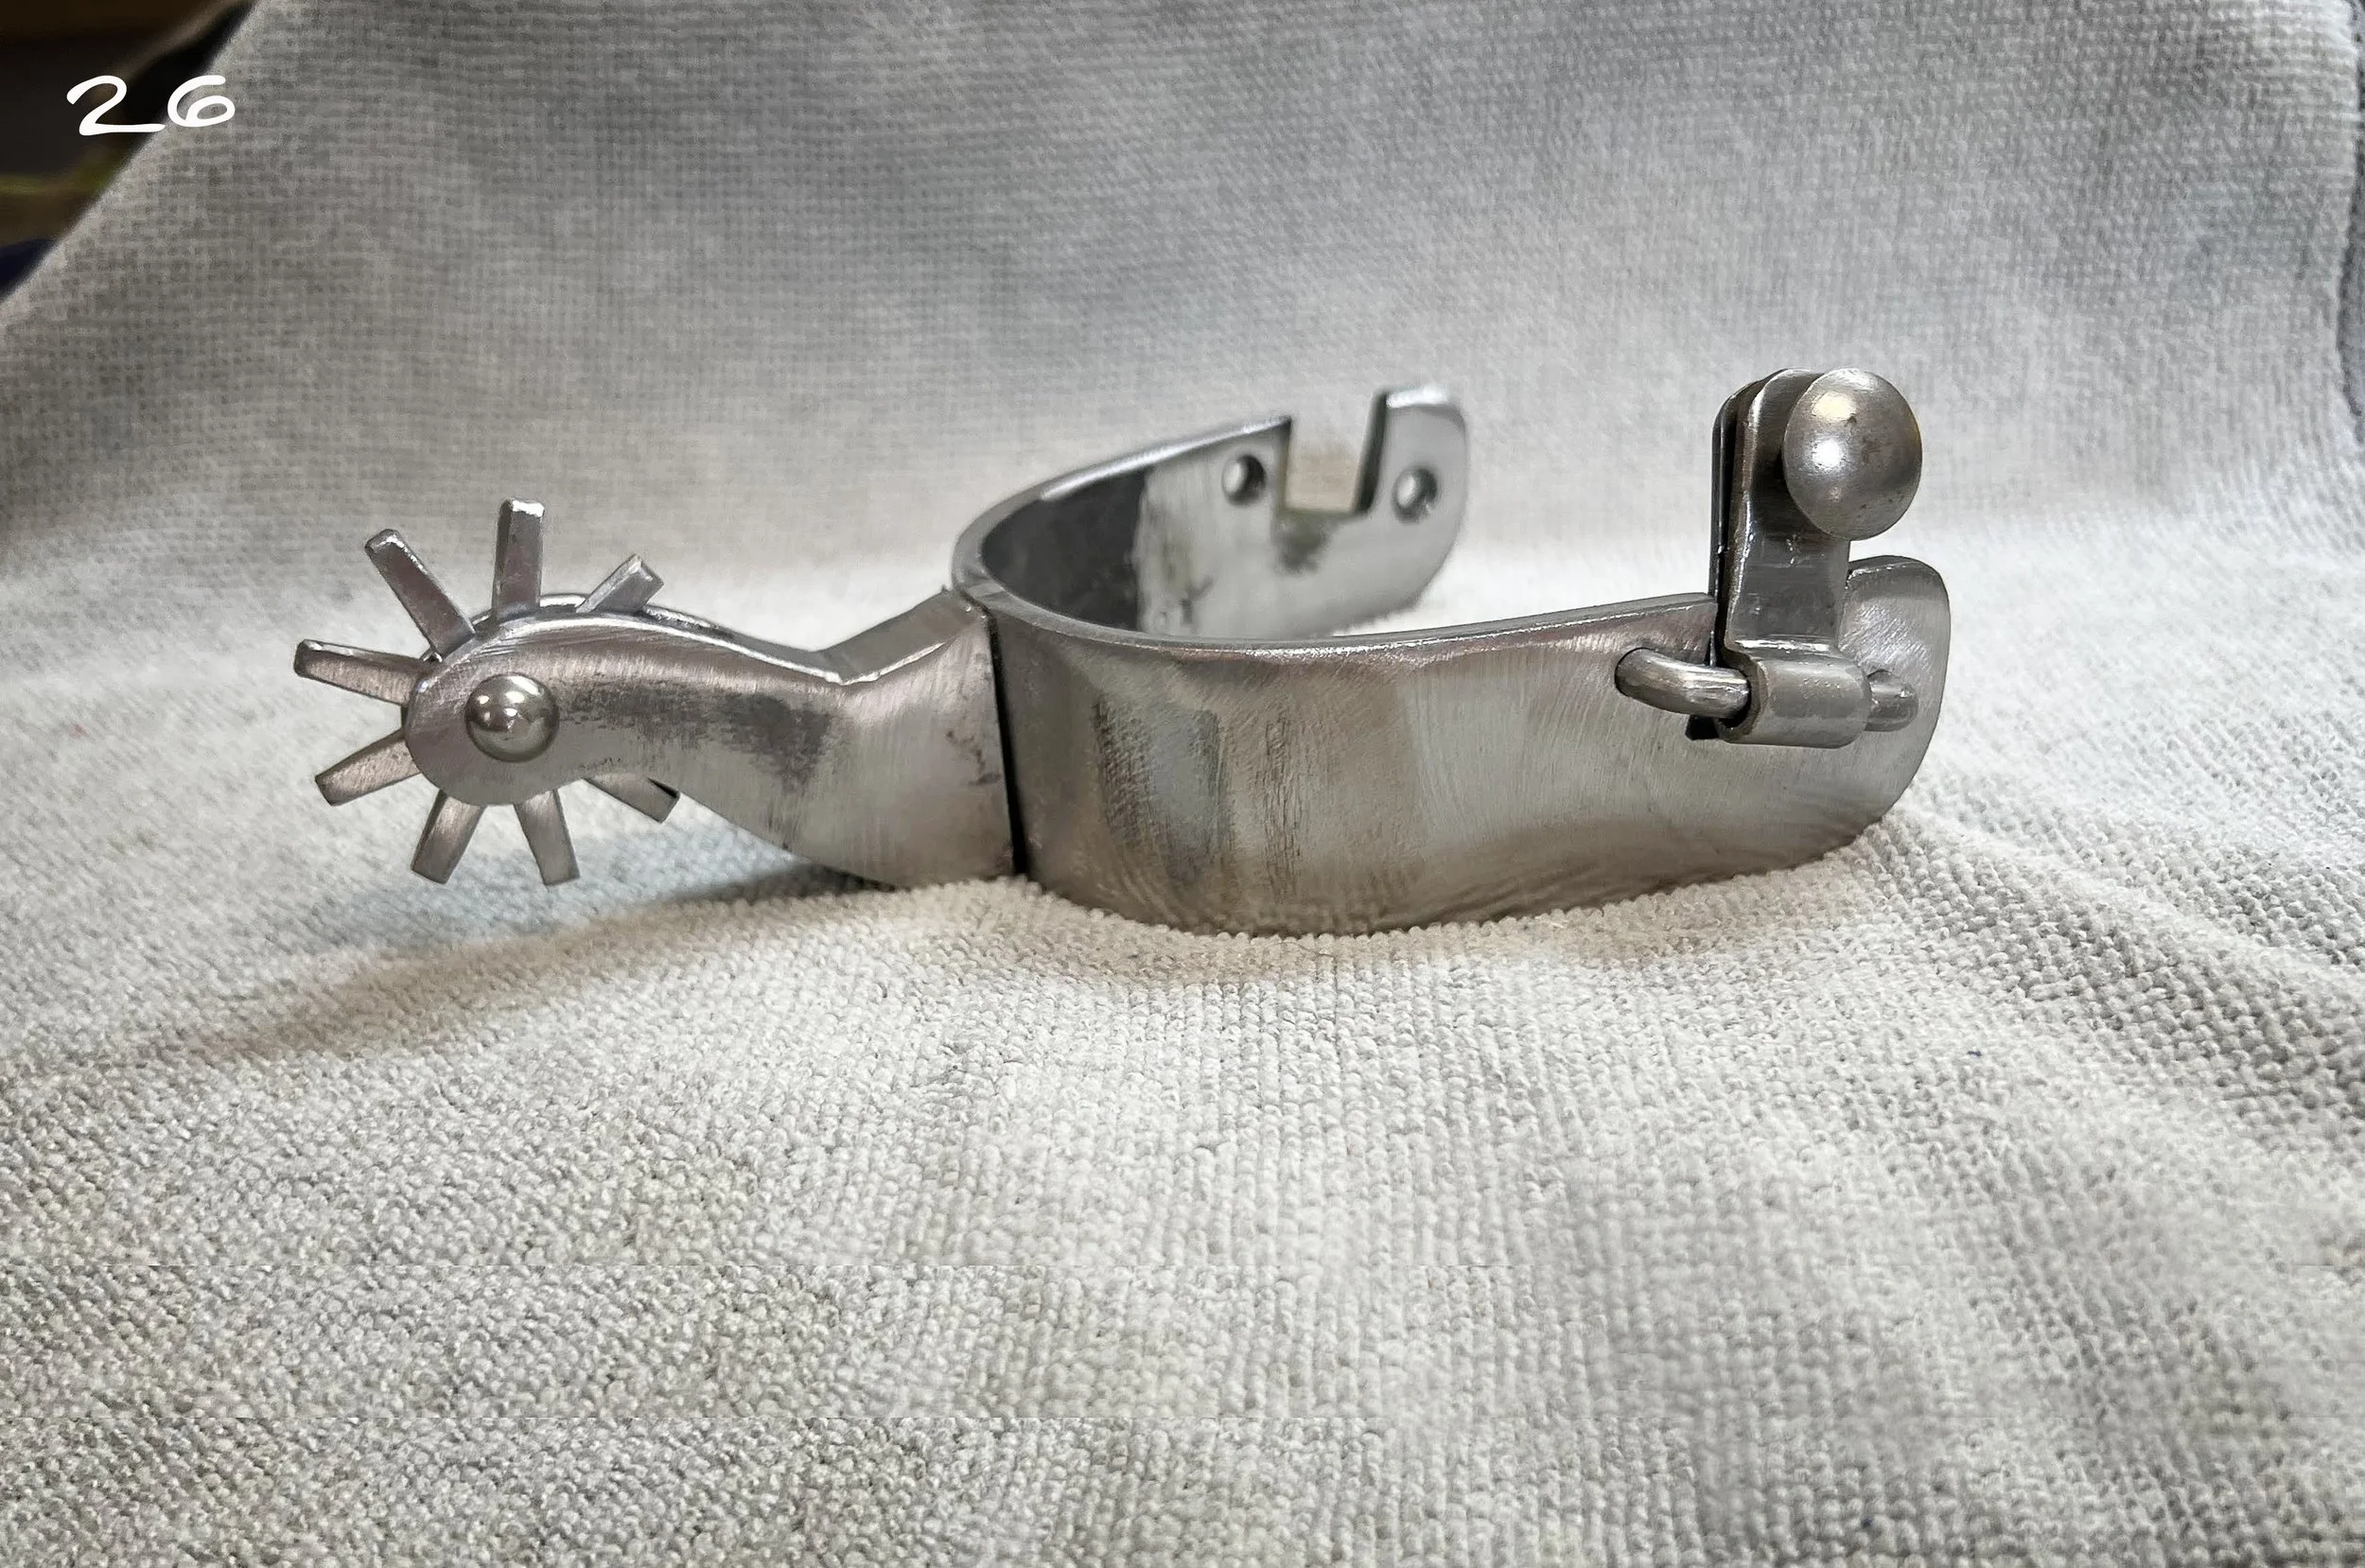
Second Heel Band done to match the first. [Nov 28, 2022]
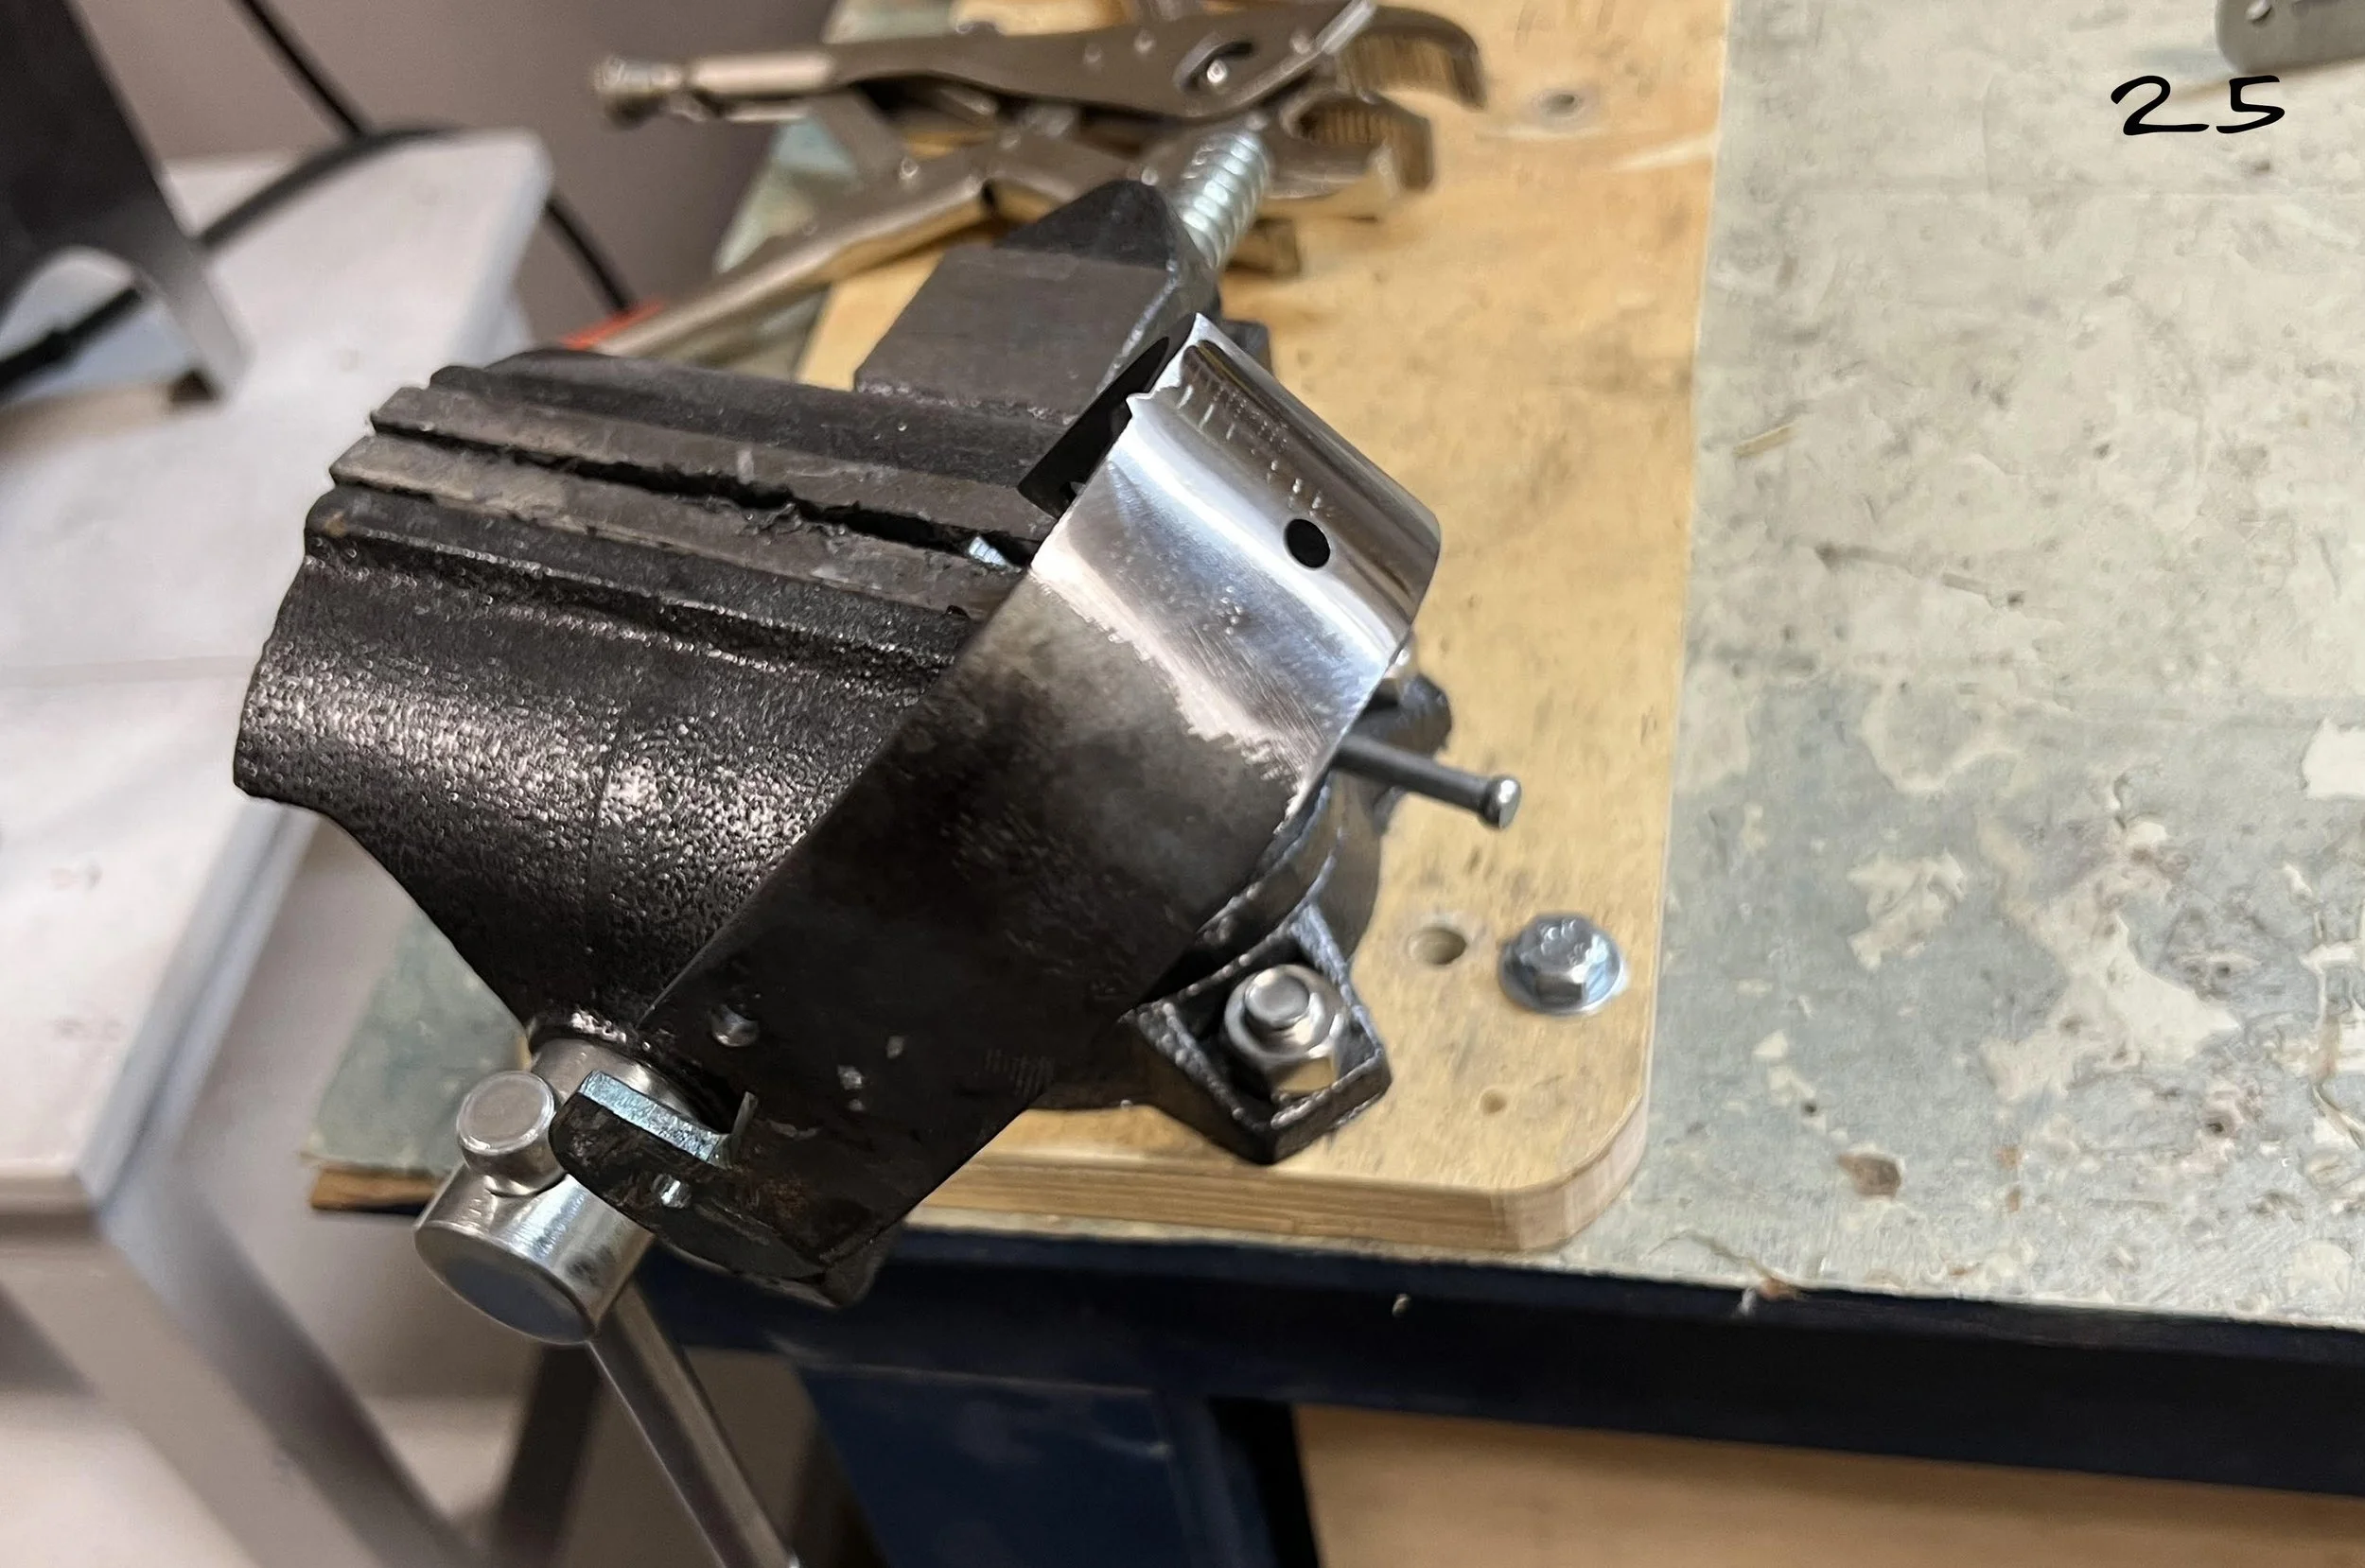
Heel Band in the vise during initial “clean-up” work. I need to get a basic smooth and shiny finish before proceeding to the next phase. [No 28, 2022]
Don’t get too excited, these parts are not assembled. I just took this opportunity to lay them up together to check on my overall design. I went with a shorter Shank and bigger Rowel than you see in the “inspiration” photo and I’m wondering about overall scale and balance. I guess it’s okay. I’ve come this far so I suppose I’ll continue on. This is a sneak preview of what “chamberlin 01” will look like when finished. [Nov 30, 2022]
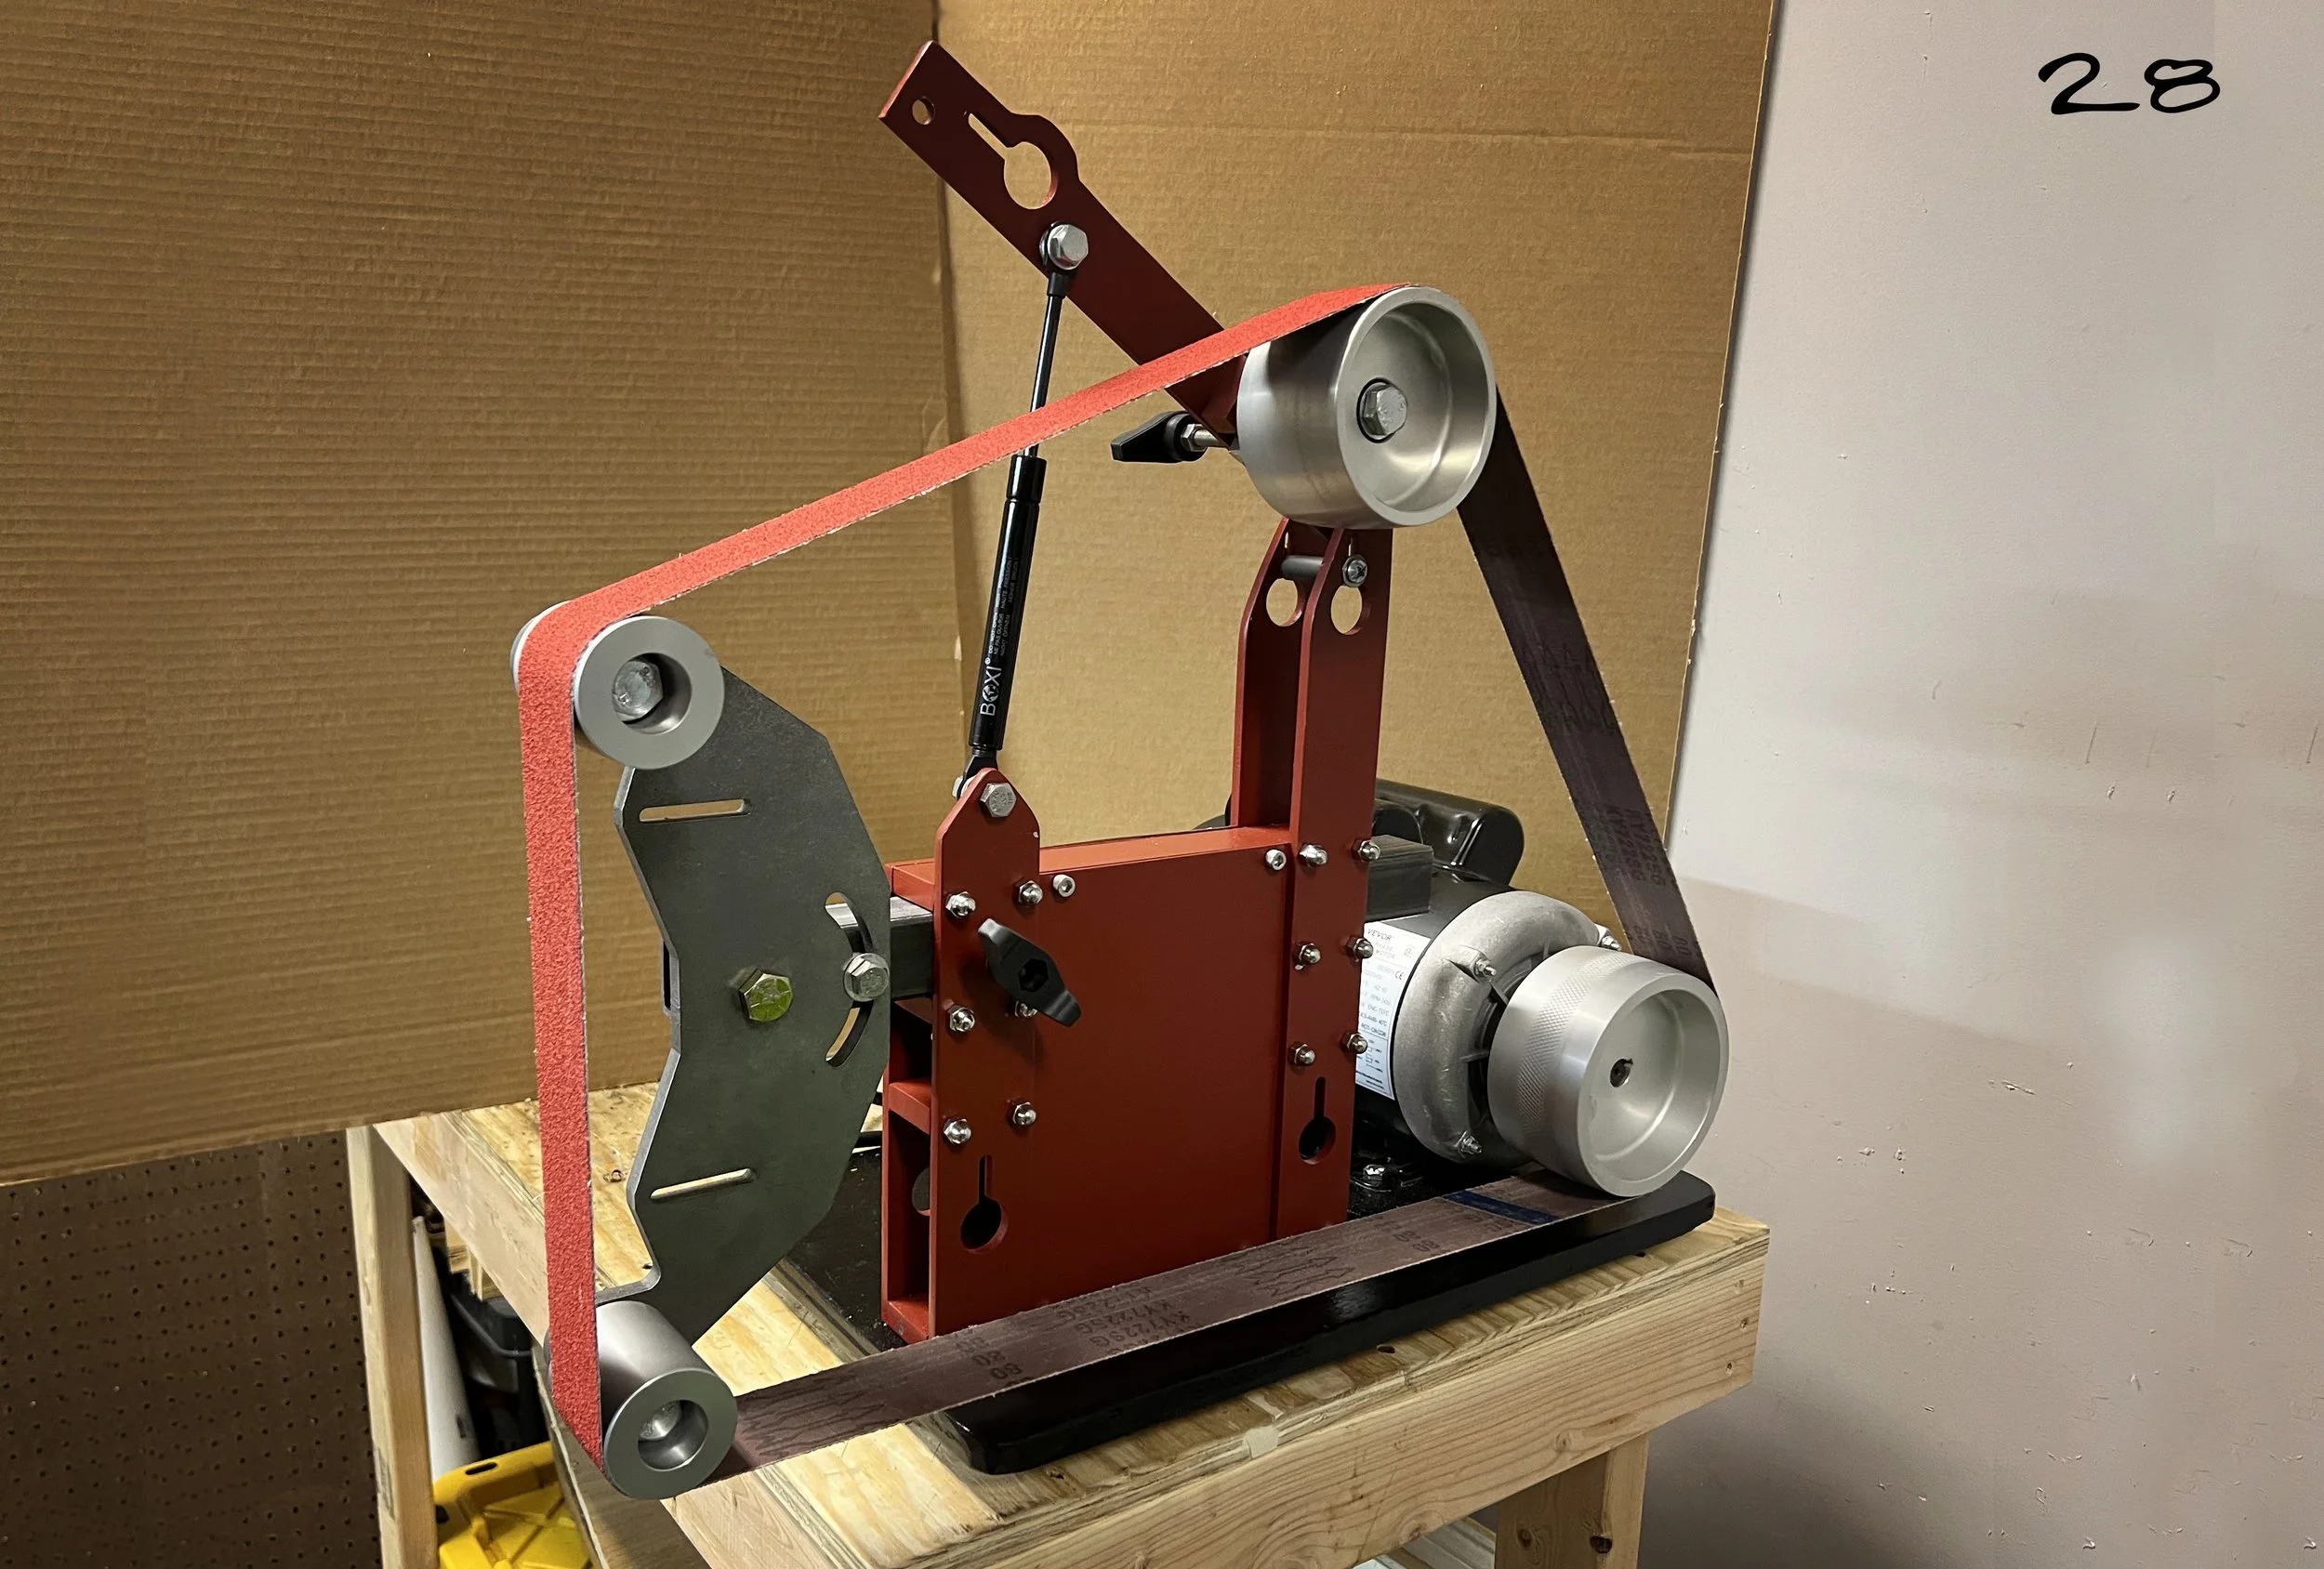
Finally finished my 2x72 Belt Sander build. It seems to be running and tracking at the present, however, I am already planning an improvement. My home-made tracking device seems to be a little wonky and I don’t think it will be reliable in the long run so changes will be made. In the meantime I will start testing it out. I still need a platen (hard steel surface just behind the vertical part of the belt). [Dec 22, 2022]

Back in the shop after taking a break for Christmas. I am tapering the Heel Bands using my newly built 2x72 Belt Sander. The bands are heavy and clunky-looking until you taper the ends, then that transforms them into a more pleasing look. The taper starts a little past the mid-point and gets thinner towards the ends. The back center of the band, where the shank will be attached, is left full thickness because that is where the strength of the spur band is concentrated. [Dec 27, 2022]

Tapered vs un-tapered: On the left is a tapered band and illustrates the look most spur makers prefer. It appears more refined and pleasing to the eye. On the right is a band that has no tapering, It appears heavy and blunt and clunky. The band on the left also has some rounding from top edge to bottom edge that does not show up very well in this photo. The right band is one I use for a pattern to get the hanger slots and swinger holes correct, plus the overall length and shape of the ends. I also used it to test my cold-bending process. It possibly could be finished out someday to become part of another pair of spurs. [Dec 27, 2022]
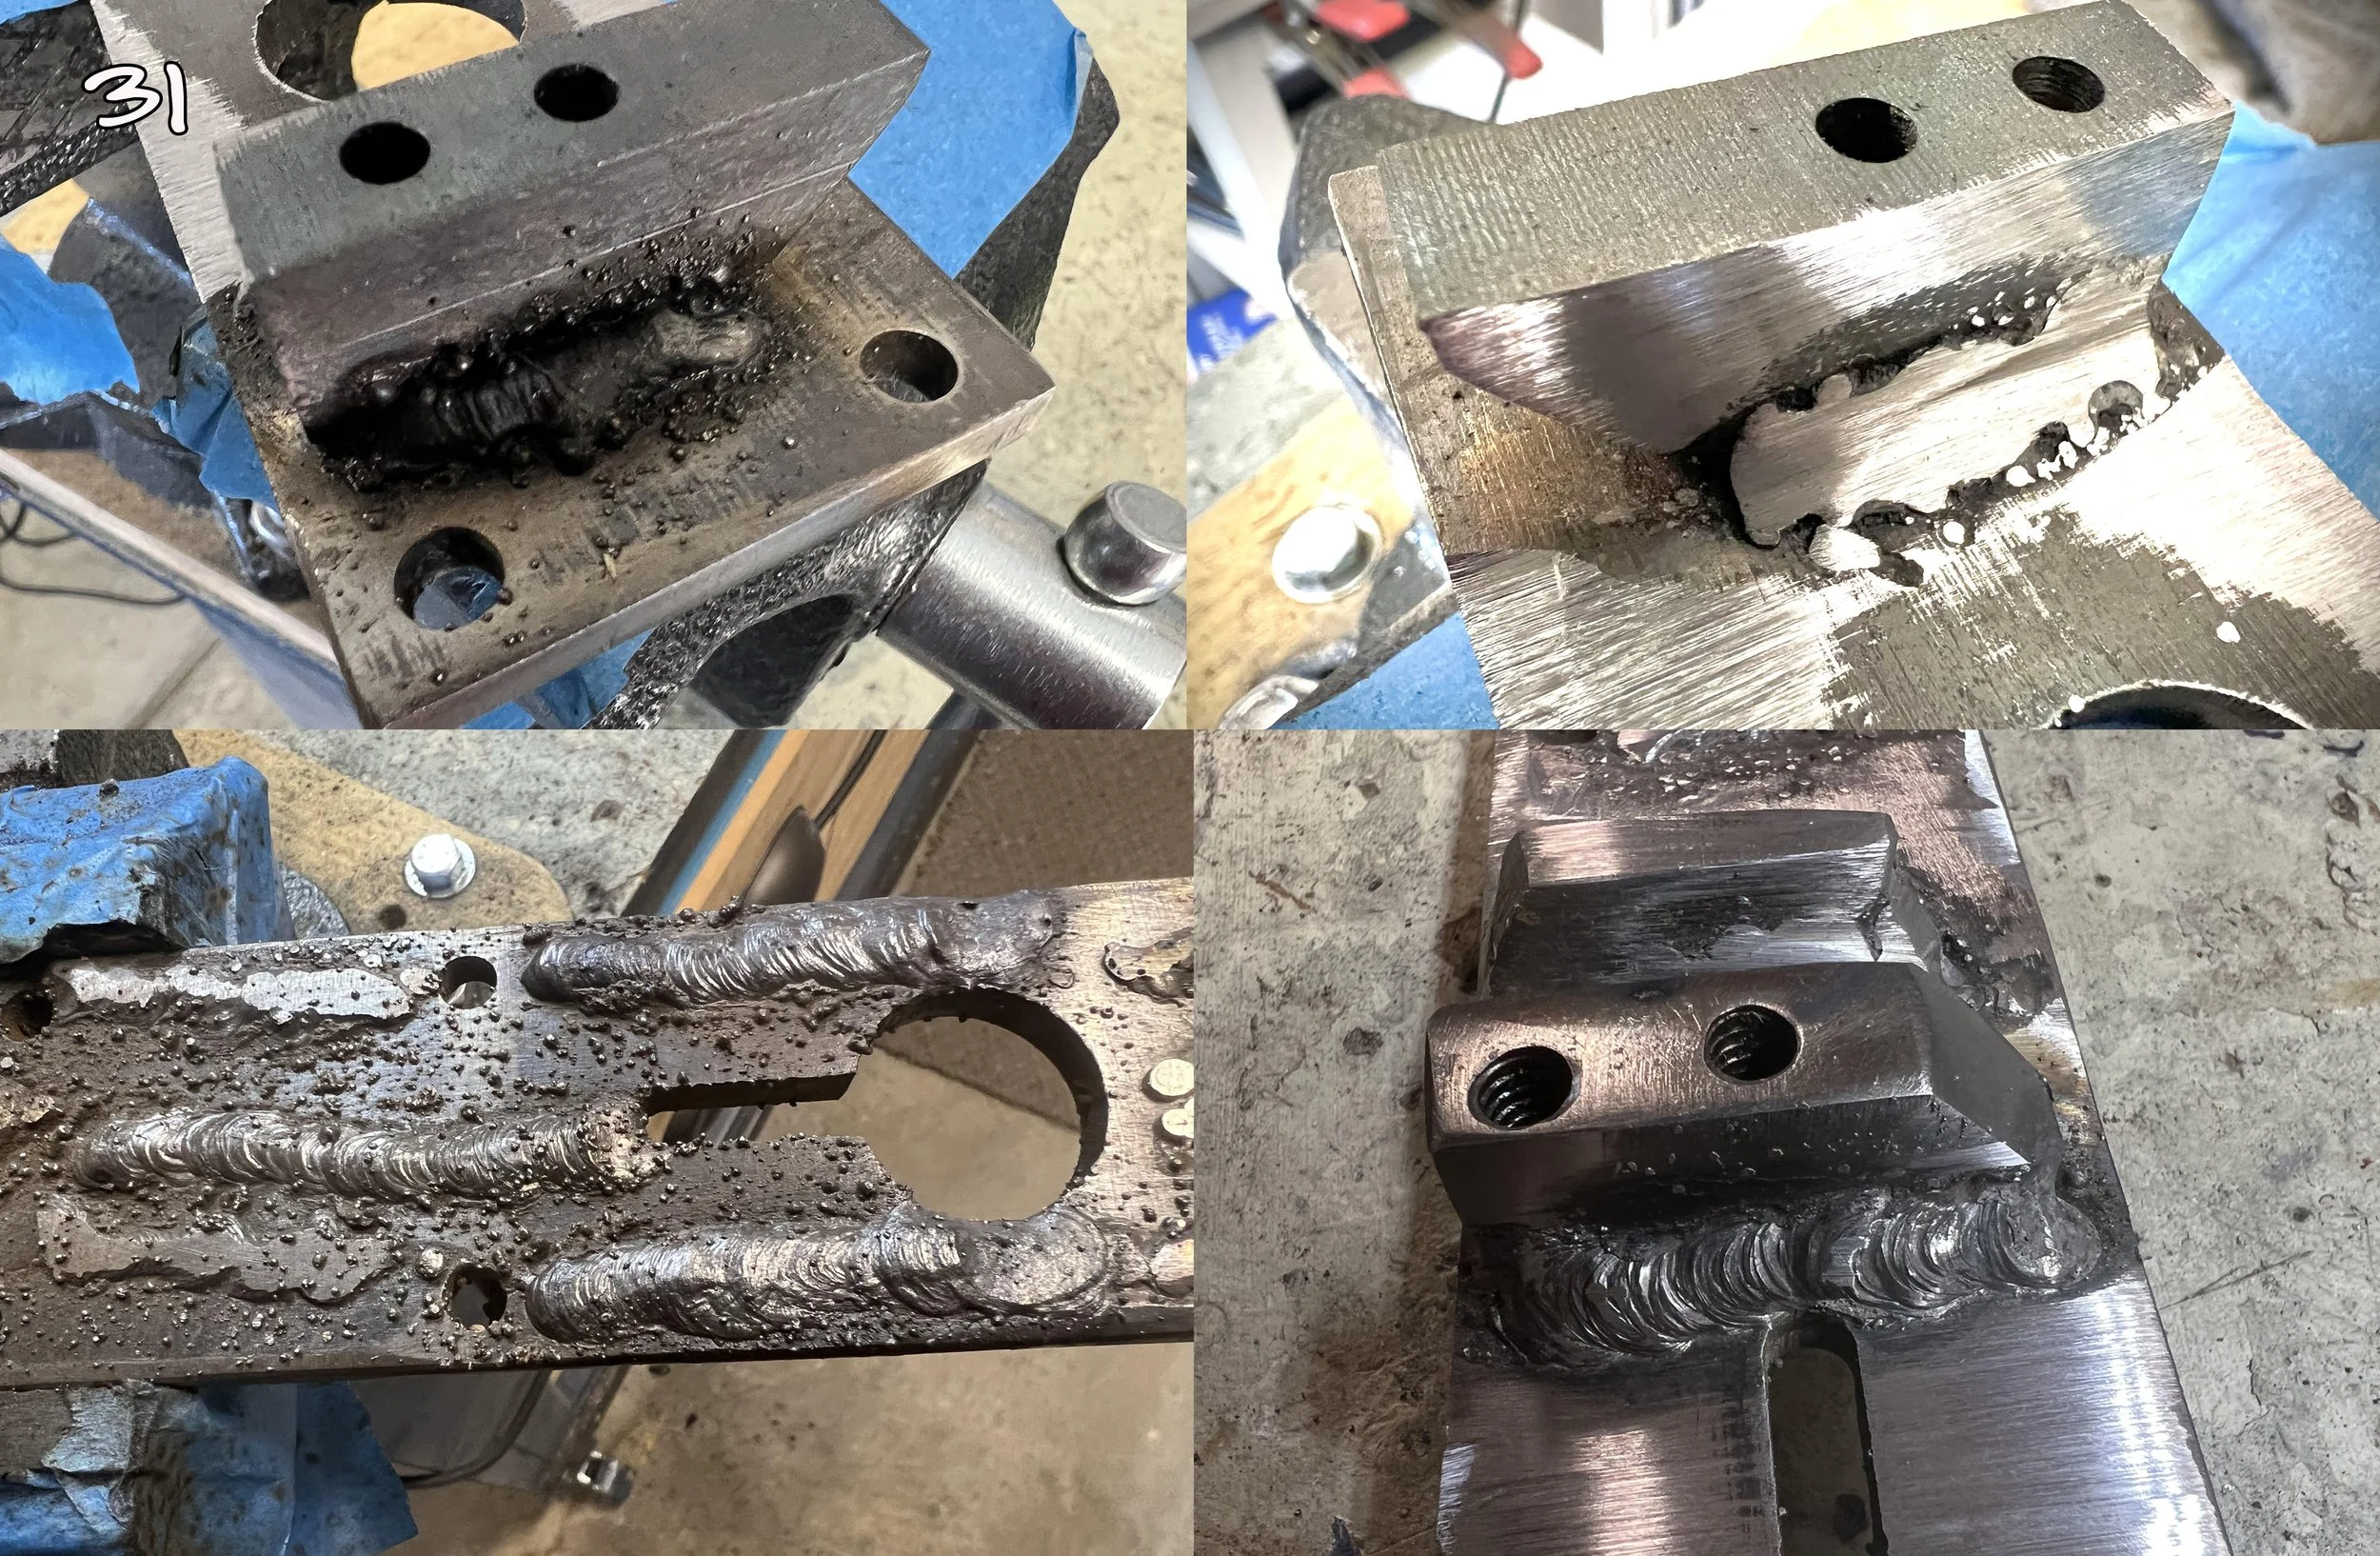
I have come to a critical part of this spur build, the part where I must weld the Shanks to the Heel Band. The last time I welded anything was the mid-1970s. I have decided it would be best to practice a bit before diving into the deep end. The UPPER LEFT was my first weld in 45 years or so. Yikes!. UPPER RIGHT was my second weld that I then ground down to see it’s internal state. LOWER LEFT is a group of beads that I ran during my third or fourth practice session. Compared to my first effort of just running a straight bead I am getting better. LOWER RIGHT is my latest effort. I feel like I have shown improvement. Soon I will try my newly acquired skill on the real item. Here’s hoping I don’t screw things up. [Jan 9, 2023]

Shanks have been welded onto the Heel Bands. Not the greatest job but it gives me hope since I know I have room to improve. [Jan 11, 2023]
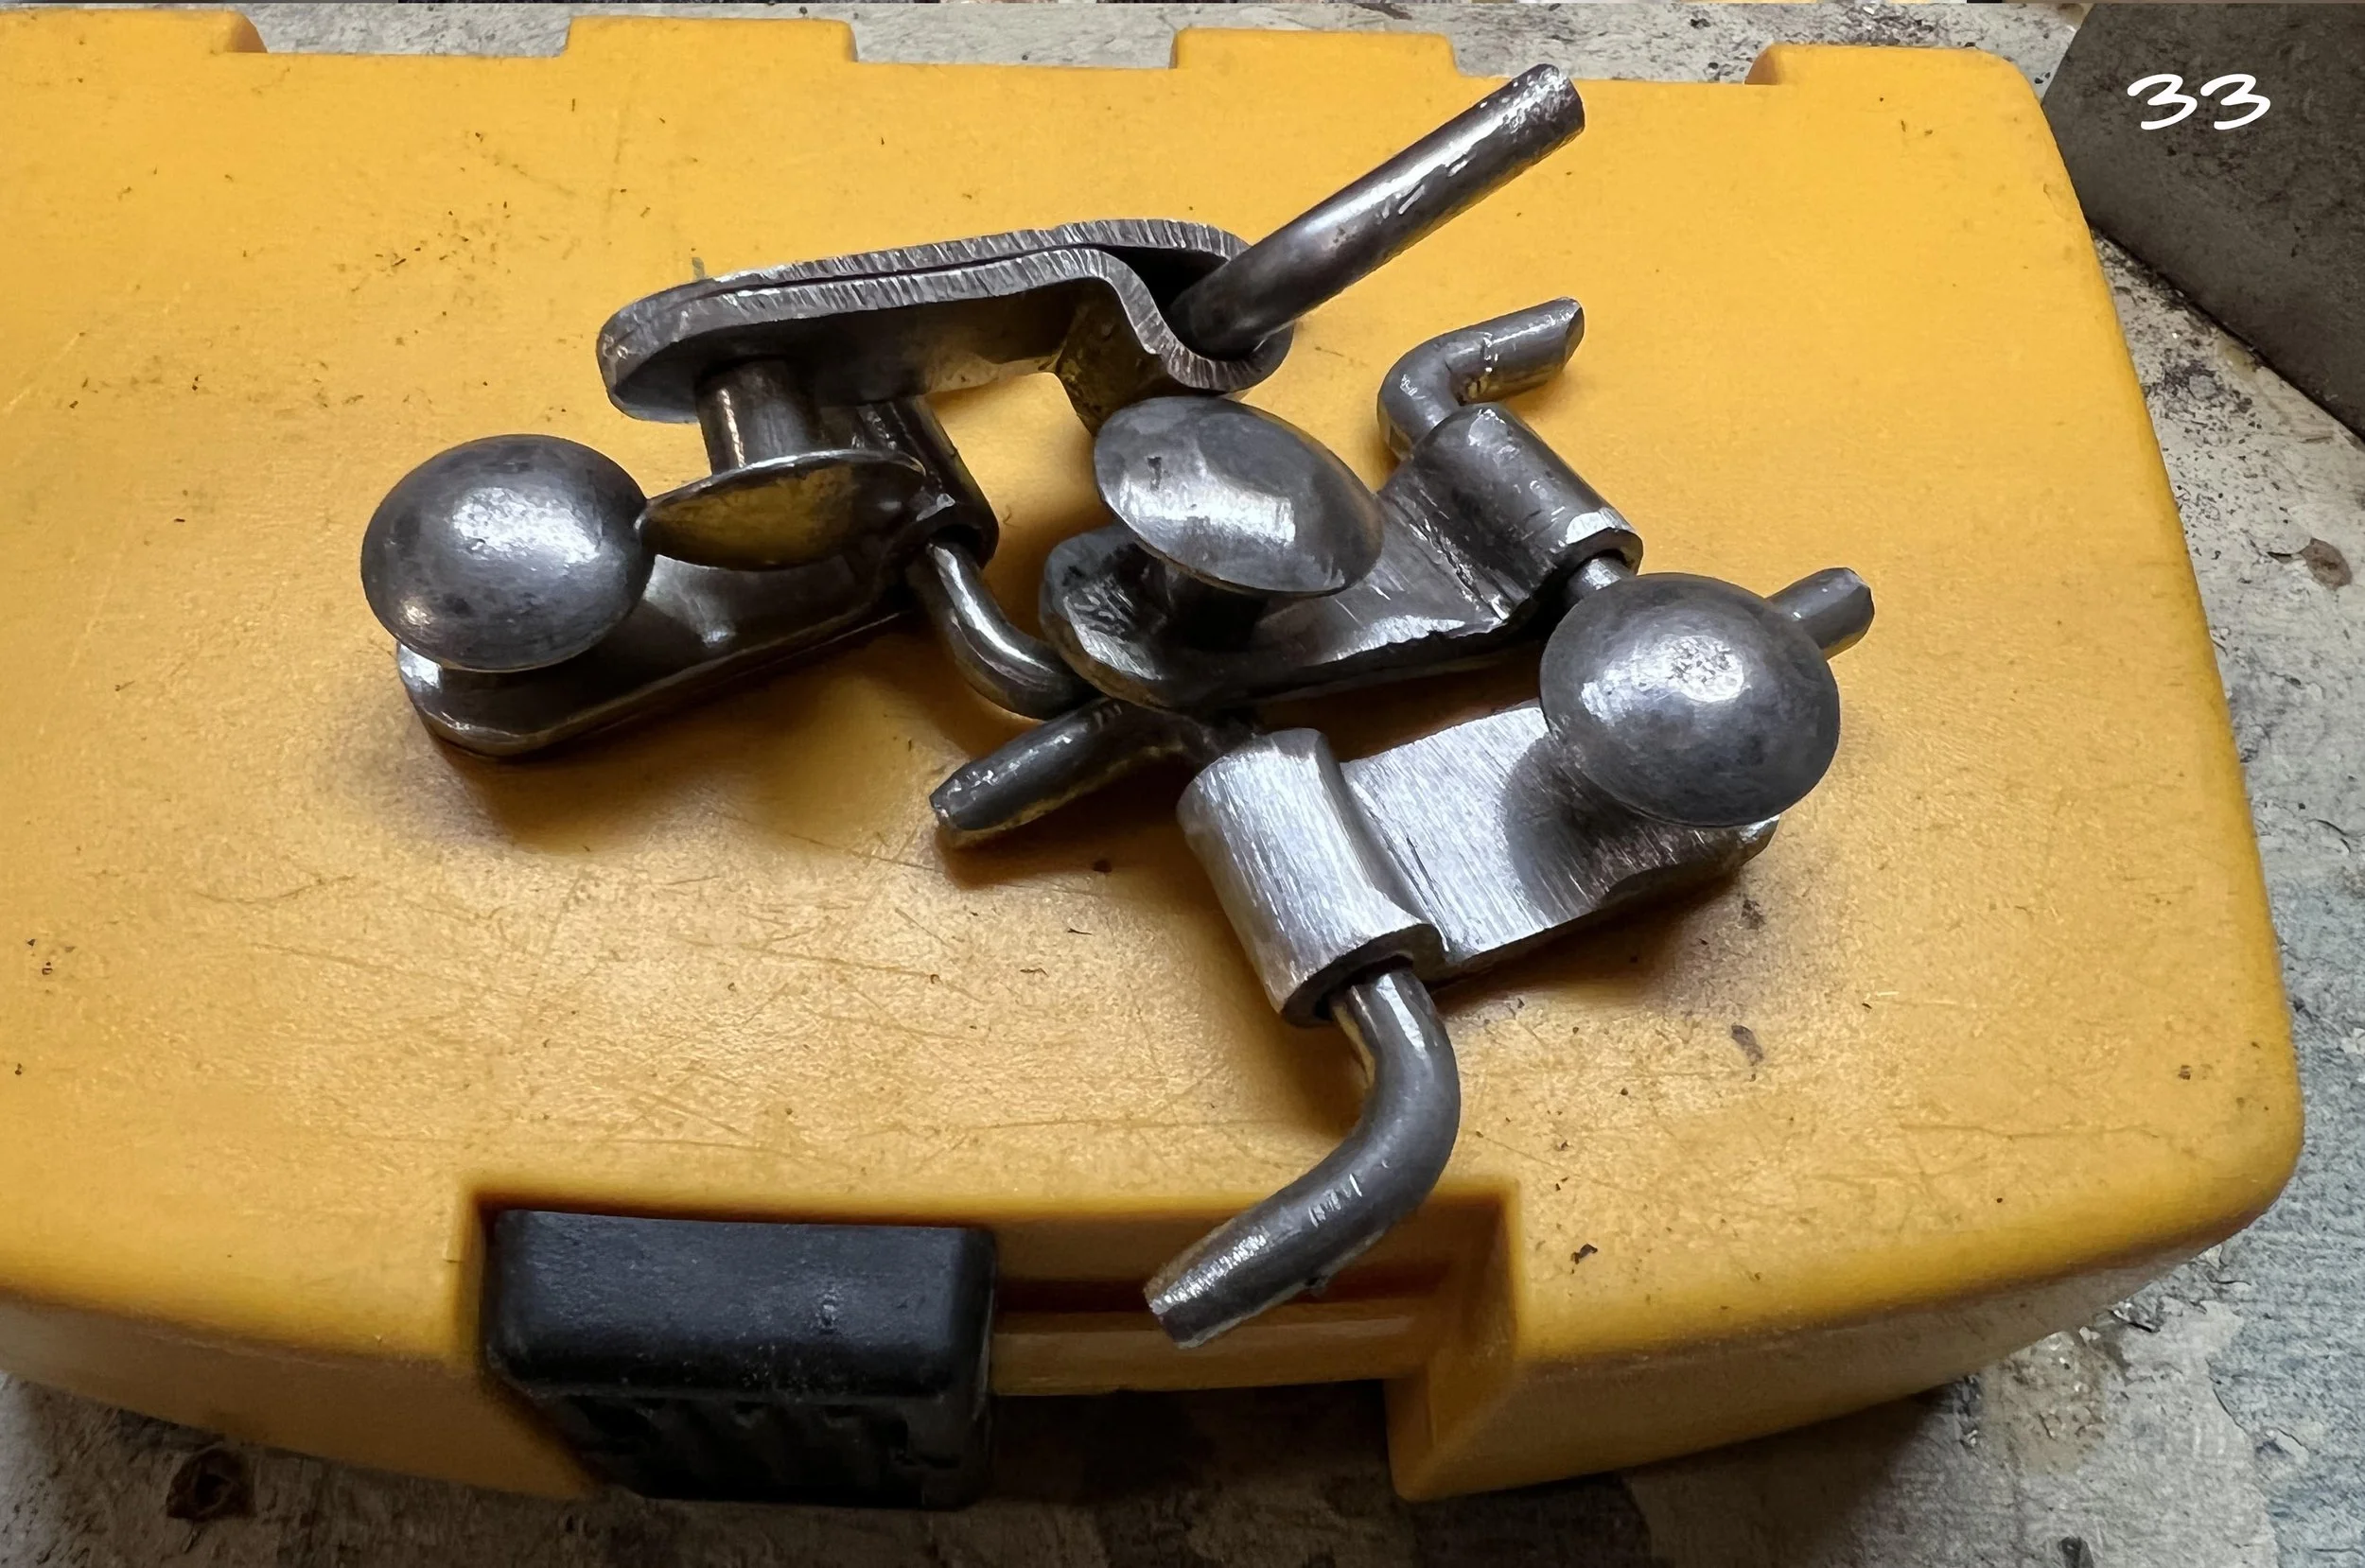
Buttons and Swingers made and ready to be added to spurs. I found this step to be a challenge, but I think that I learned from my mistakes and the whole process should get easier on any additional spurs that I might make. [Jan 15, 2023]

Showing the welds on the inside of the Heel Band that attaches the Buttons and Swingers. The ugly stage before clean-up. This is actually on the second spur and I did a much better job than on the first spur, so I guess one does get better with experience and practice. [Jan 15, 2023]
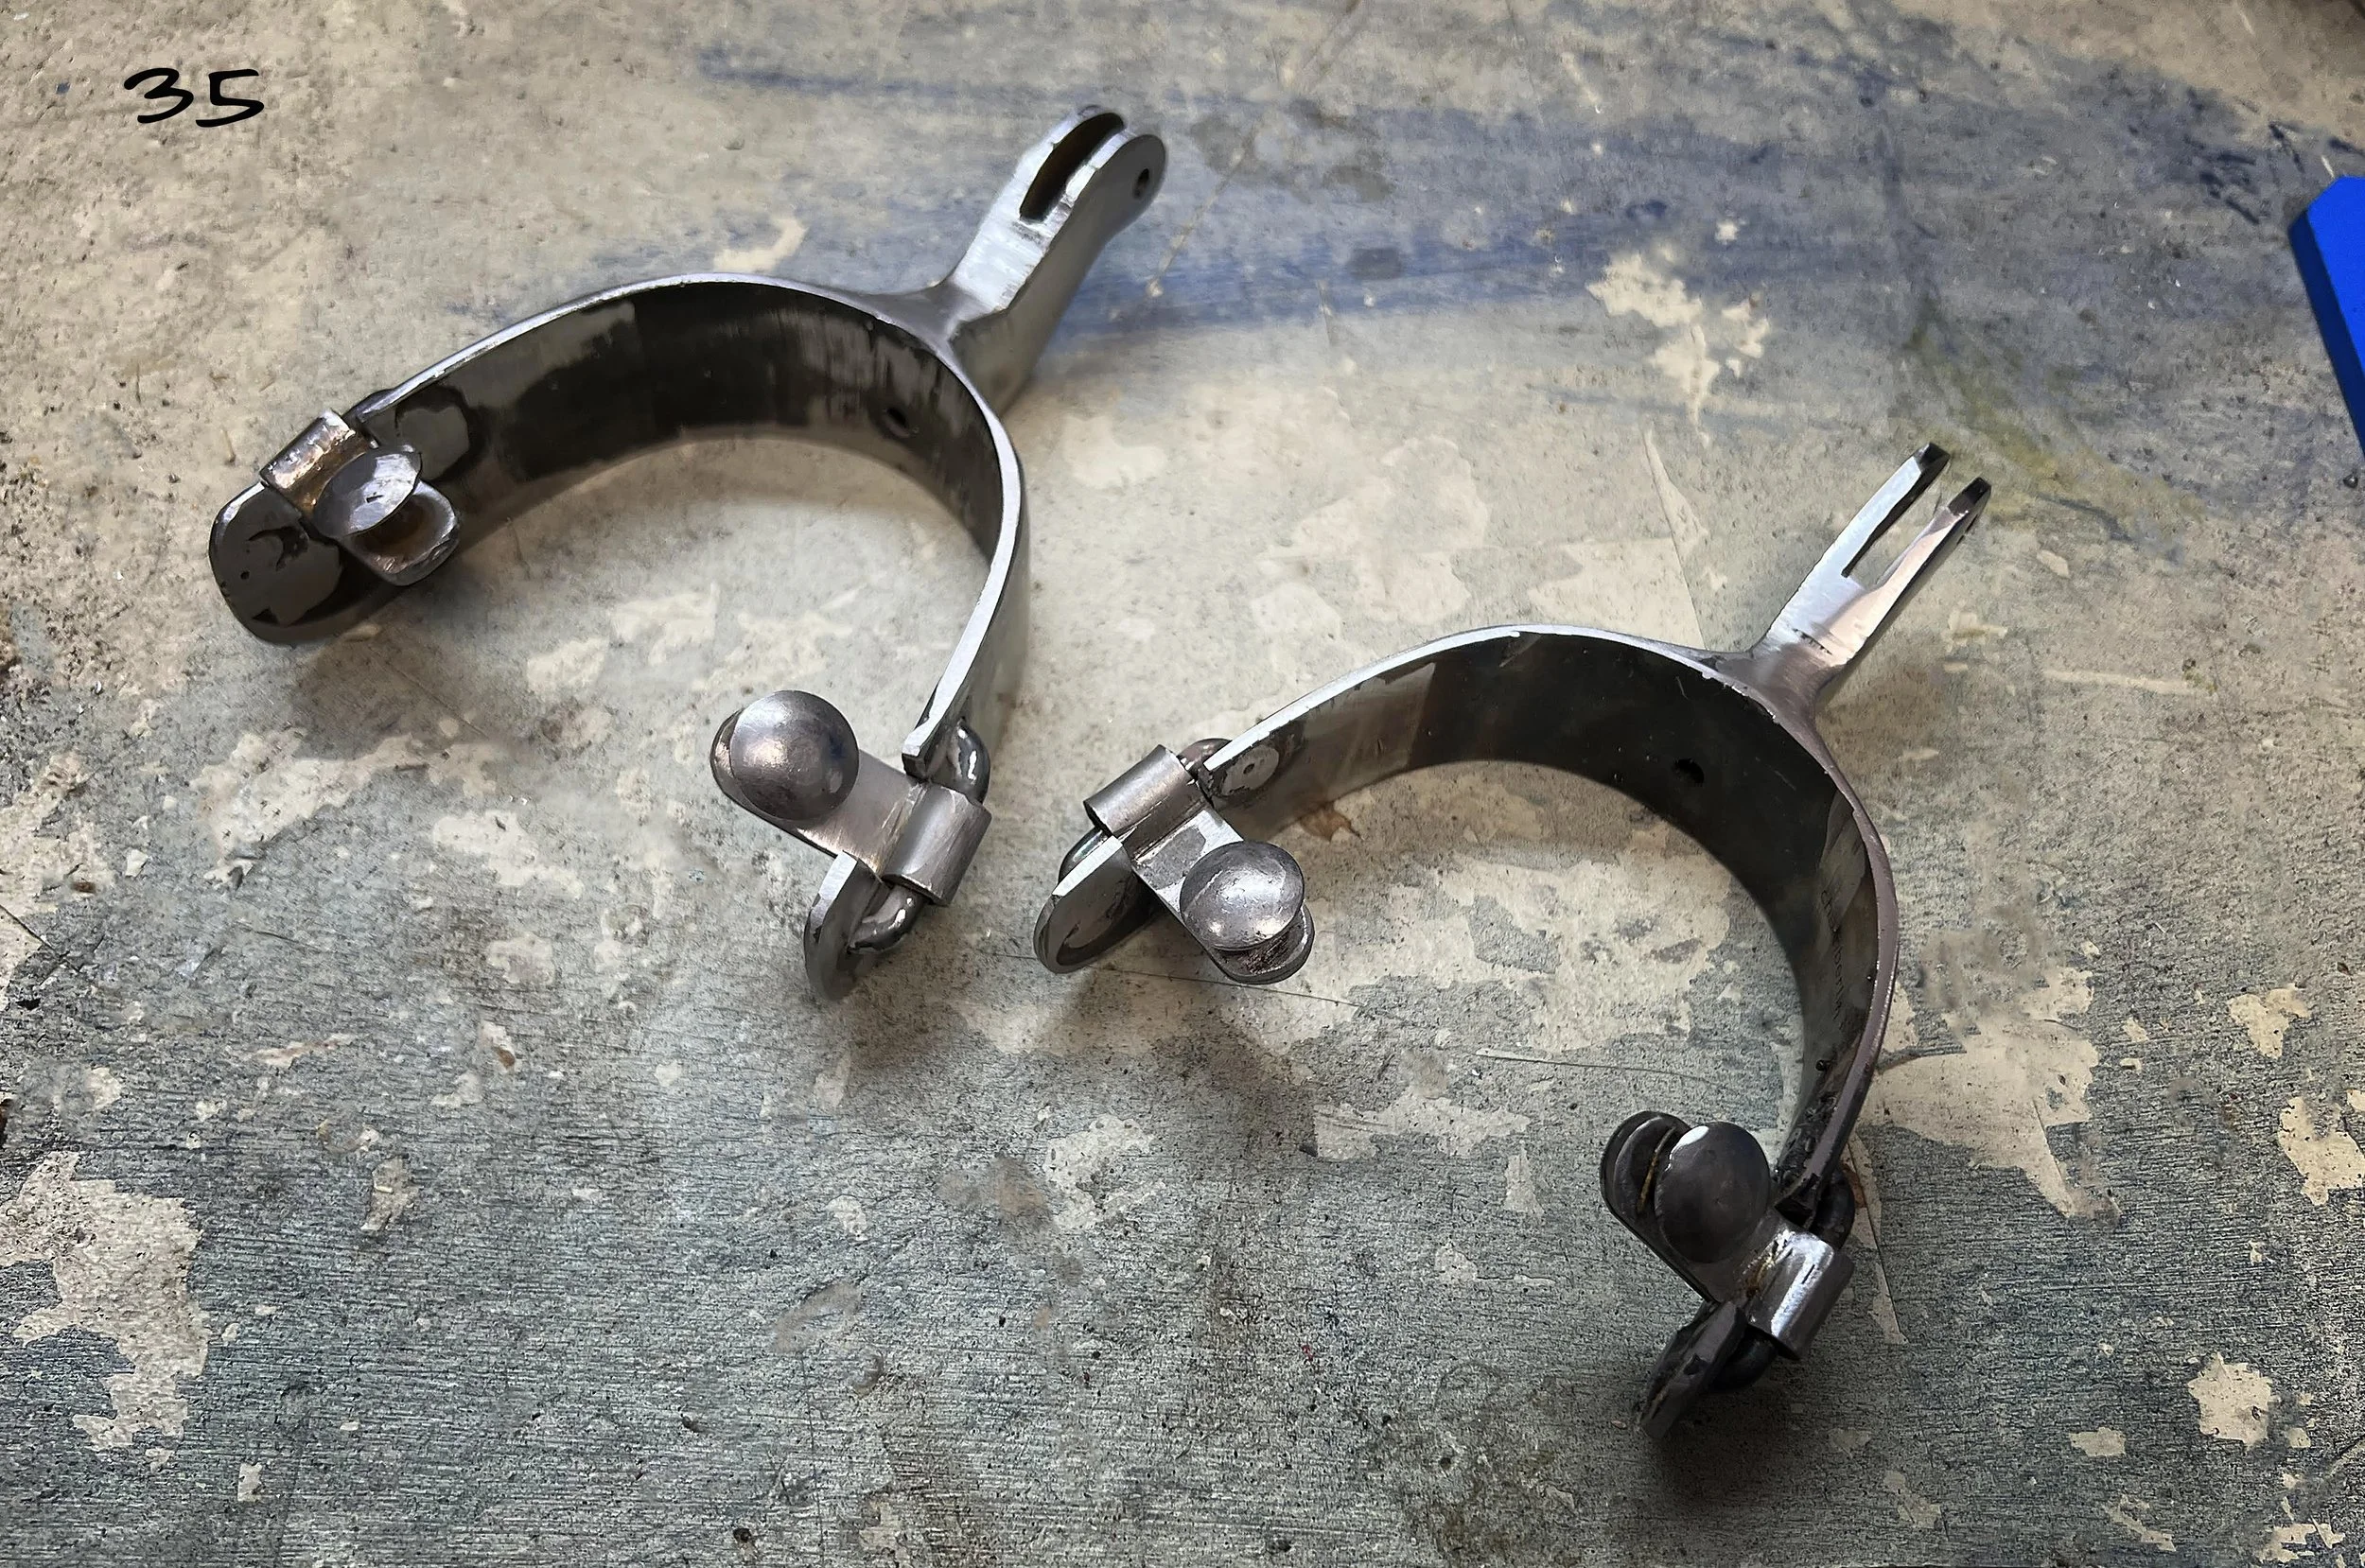
Two spurs with Buttons attached. I am down to installing the Rowels and then the final grinding, sanding, polishing and cleaning. [Jan 15, 2023]
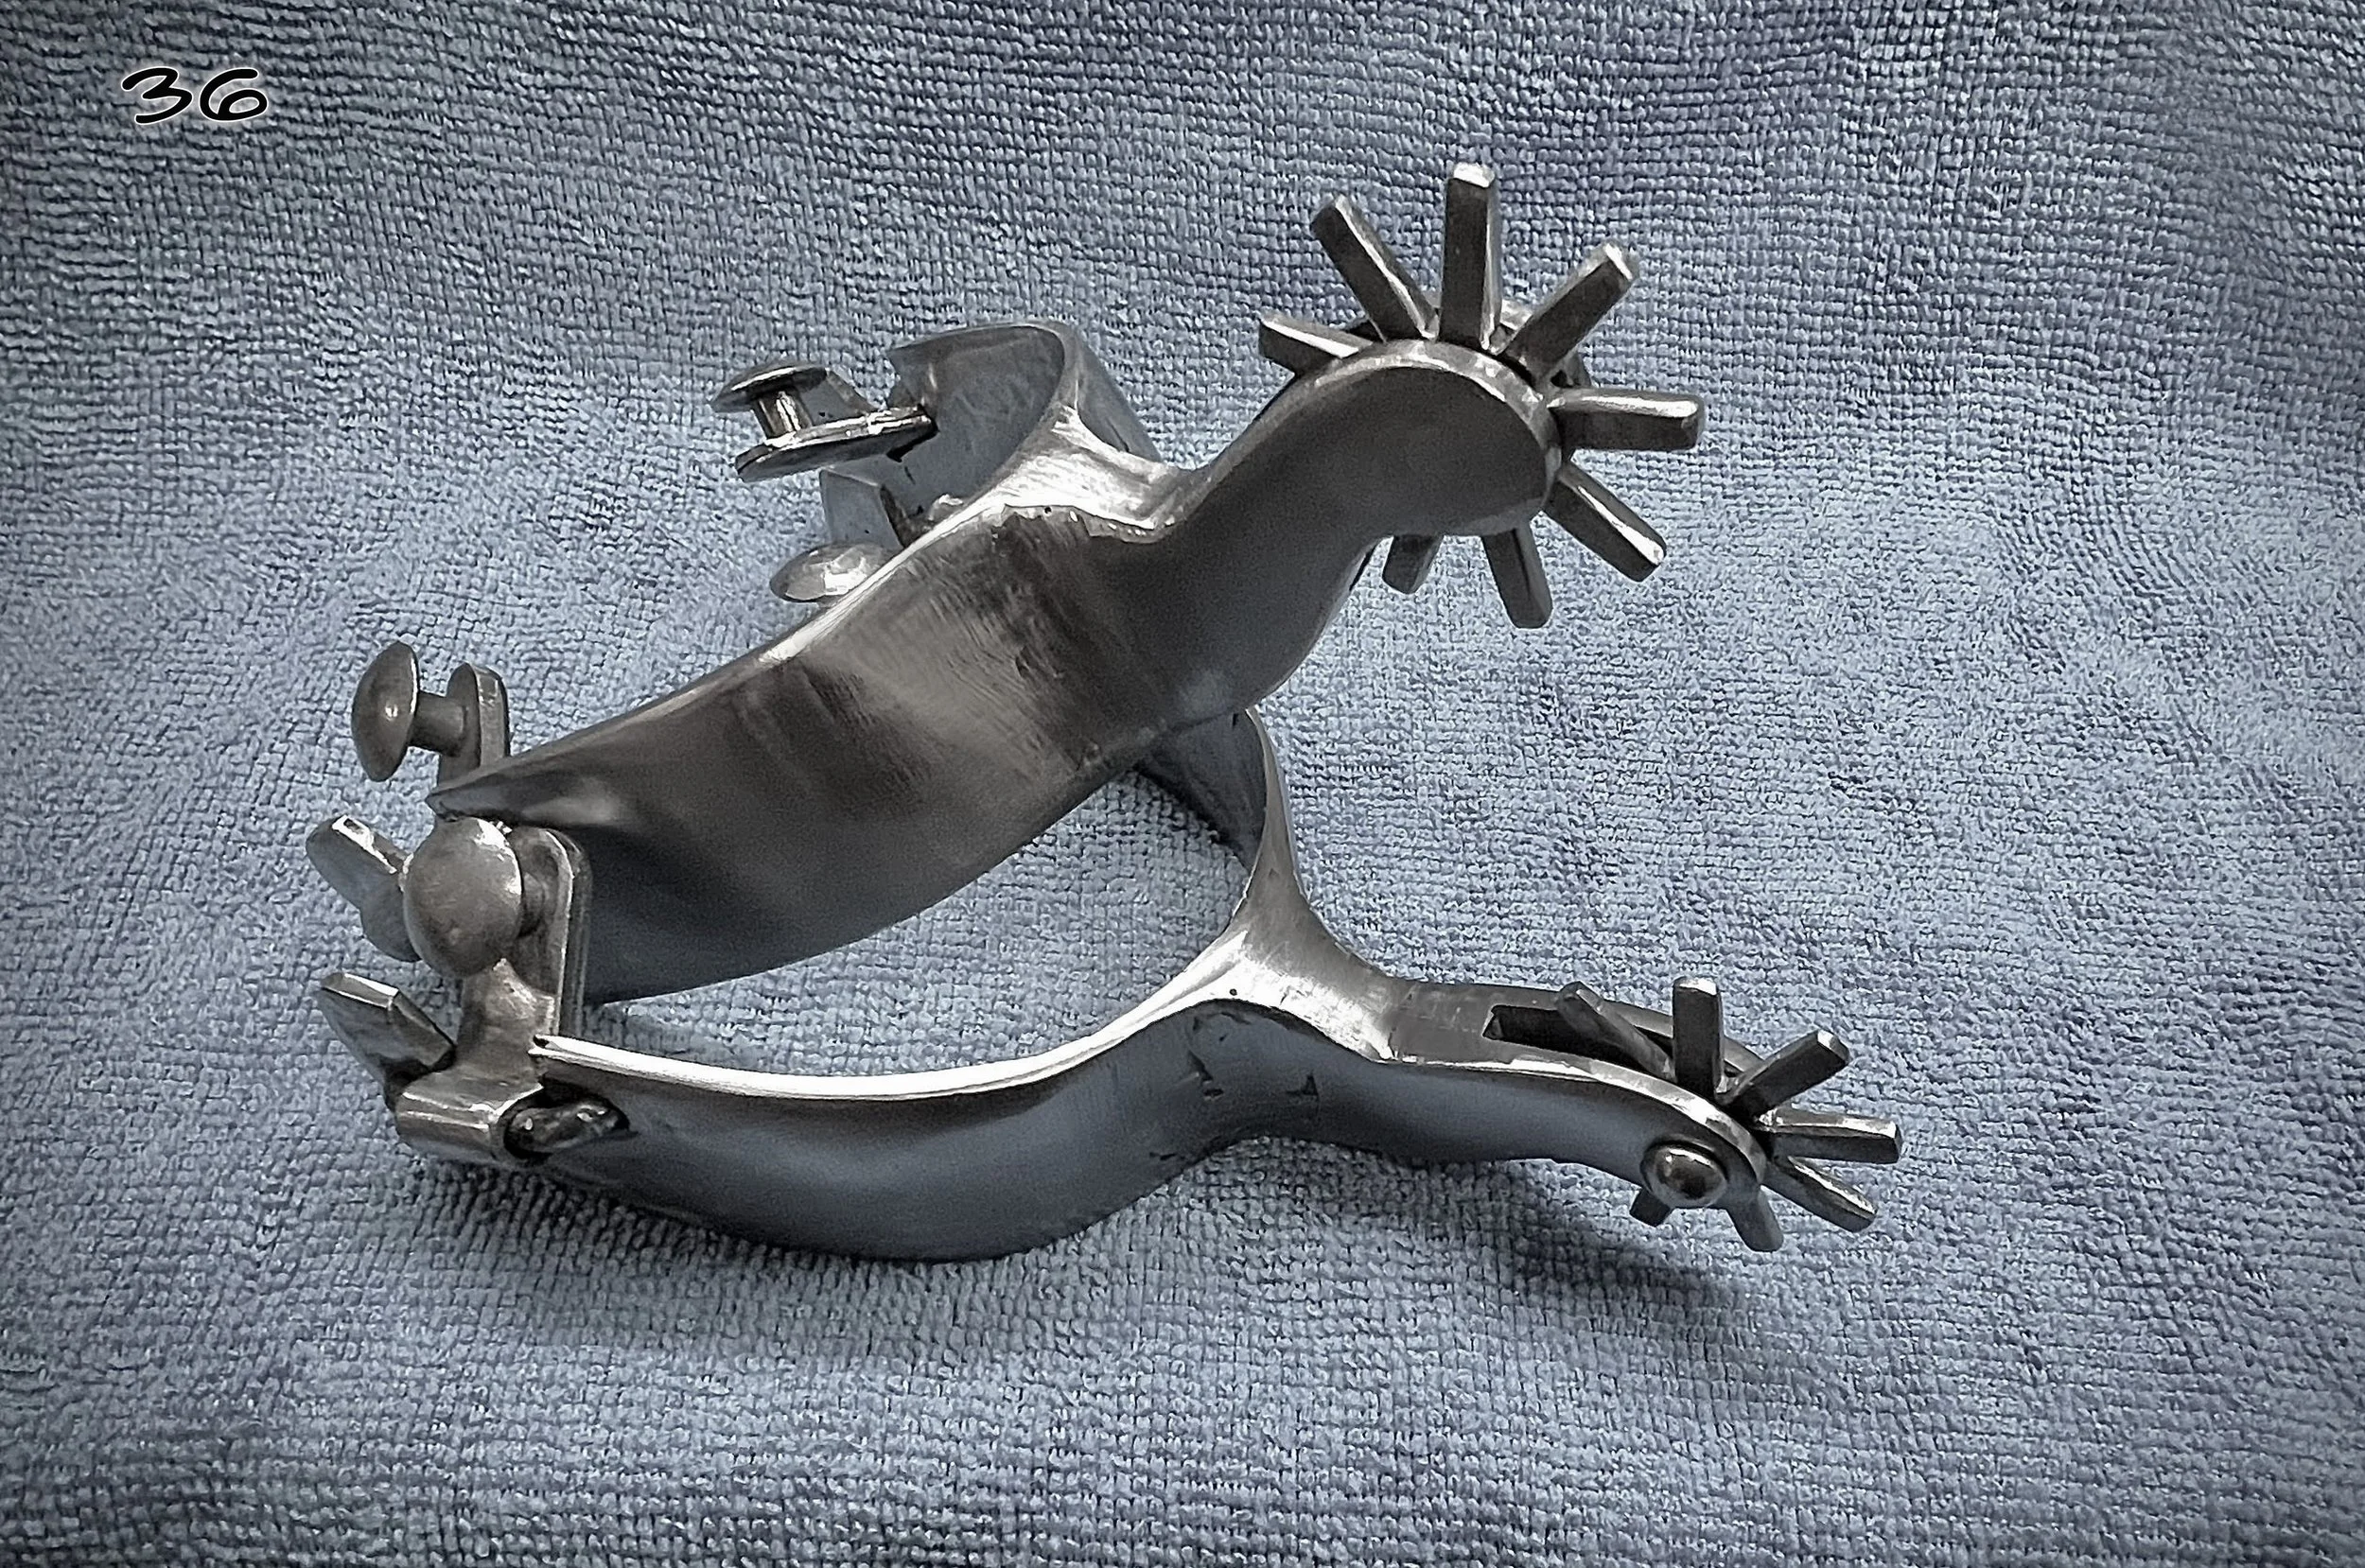
Spurs are now completely built, but my job is not done. There remains a great deal of clean-up and final polishing, plus any adornments that I might decide to do. I’m kind of itching to do some decorations and maybe even some engraving, but that might have to wait for another pair. Decisions. [Jan 26, 2023]
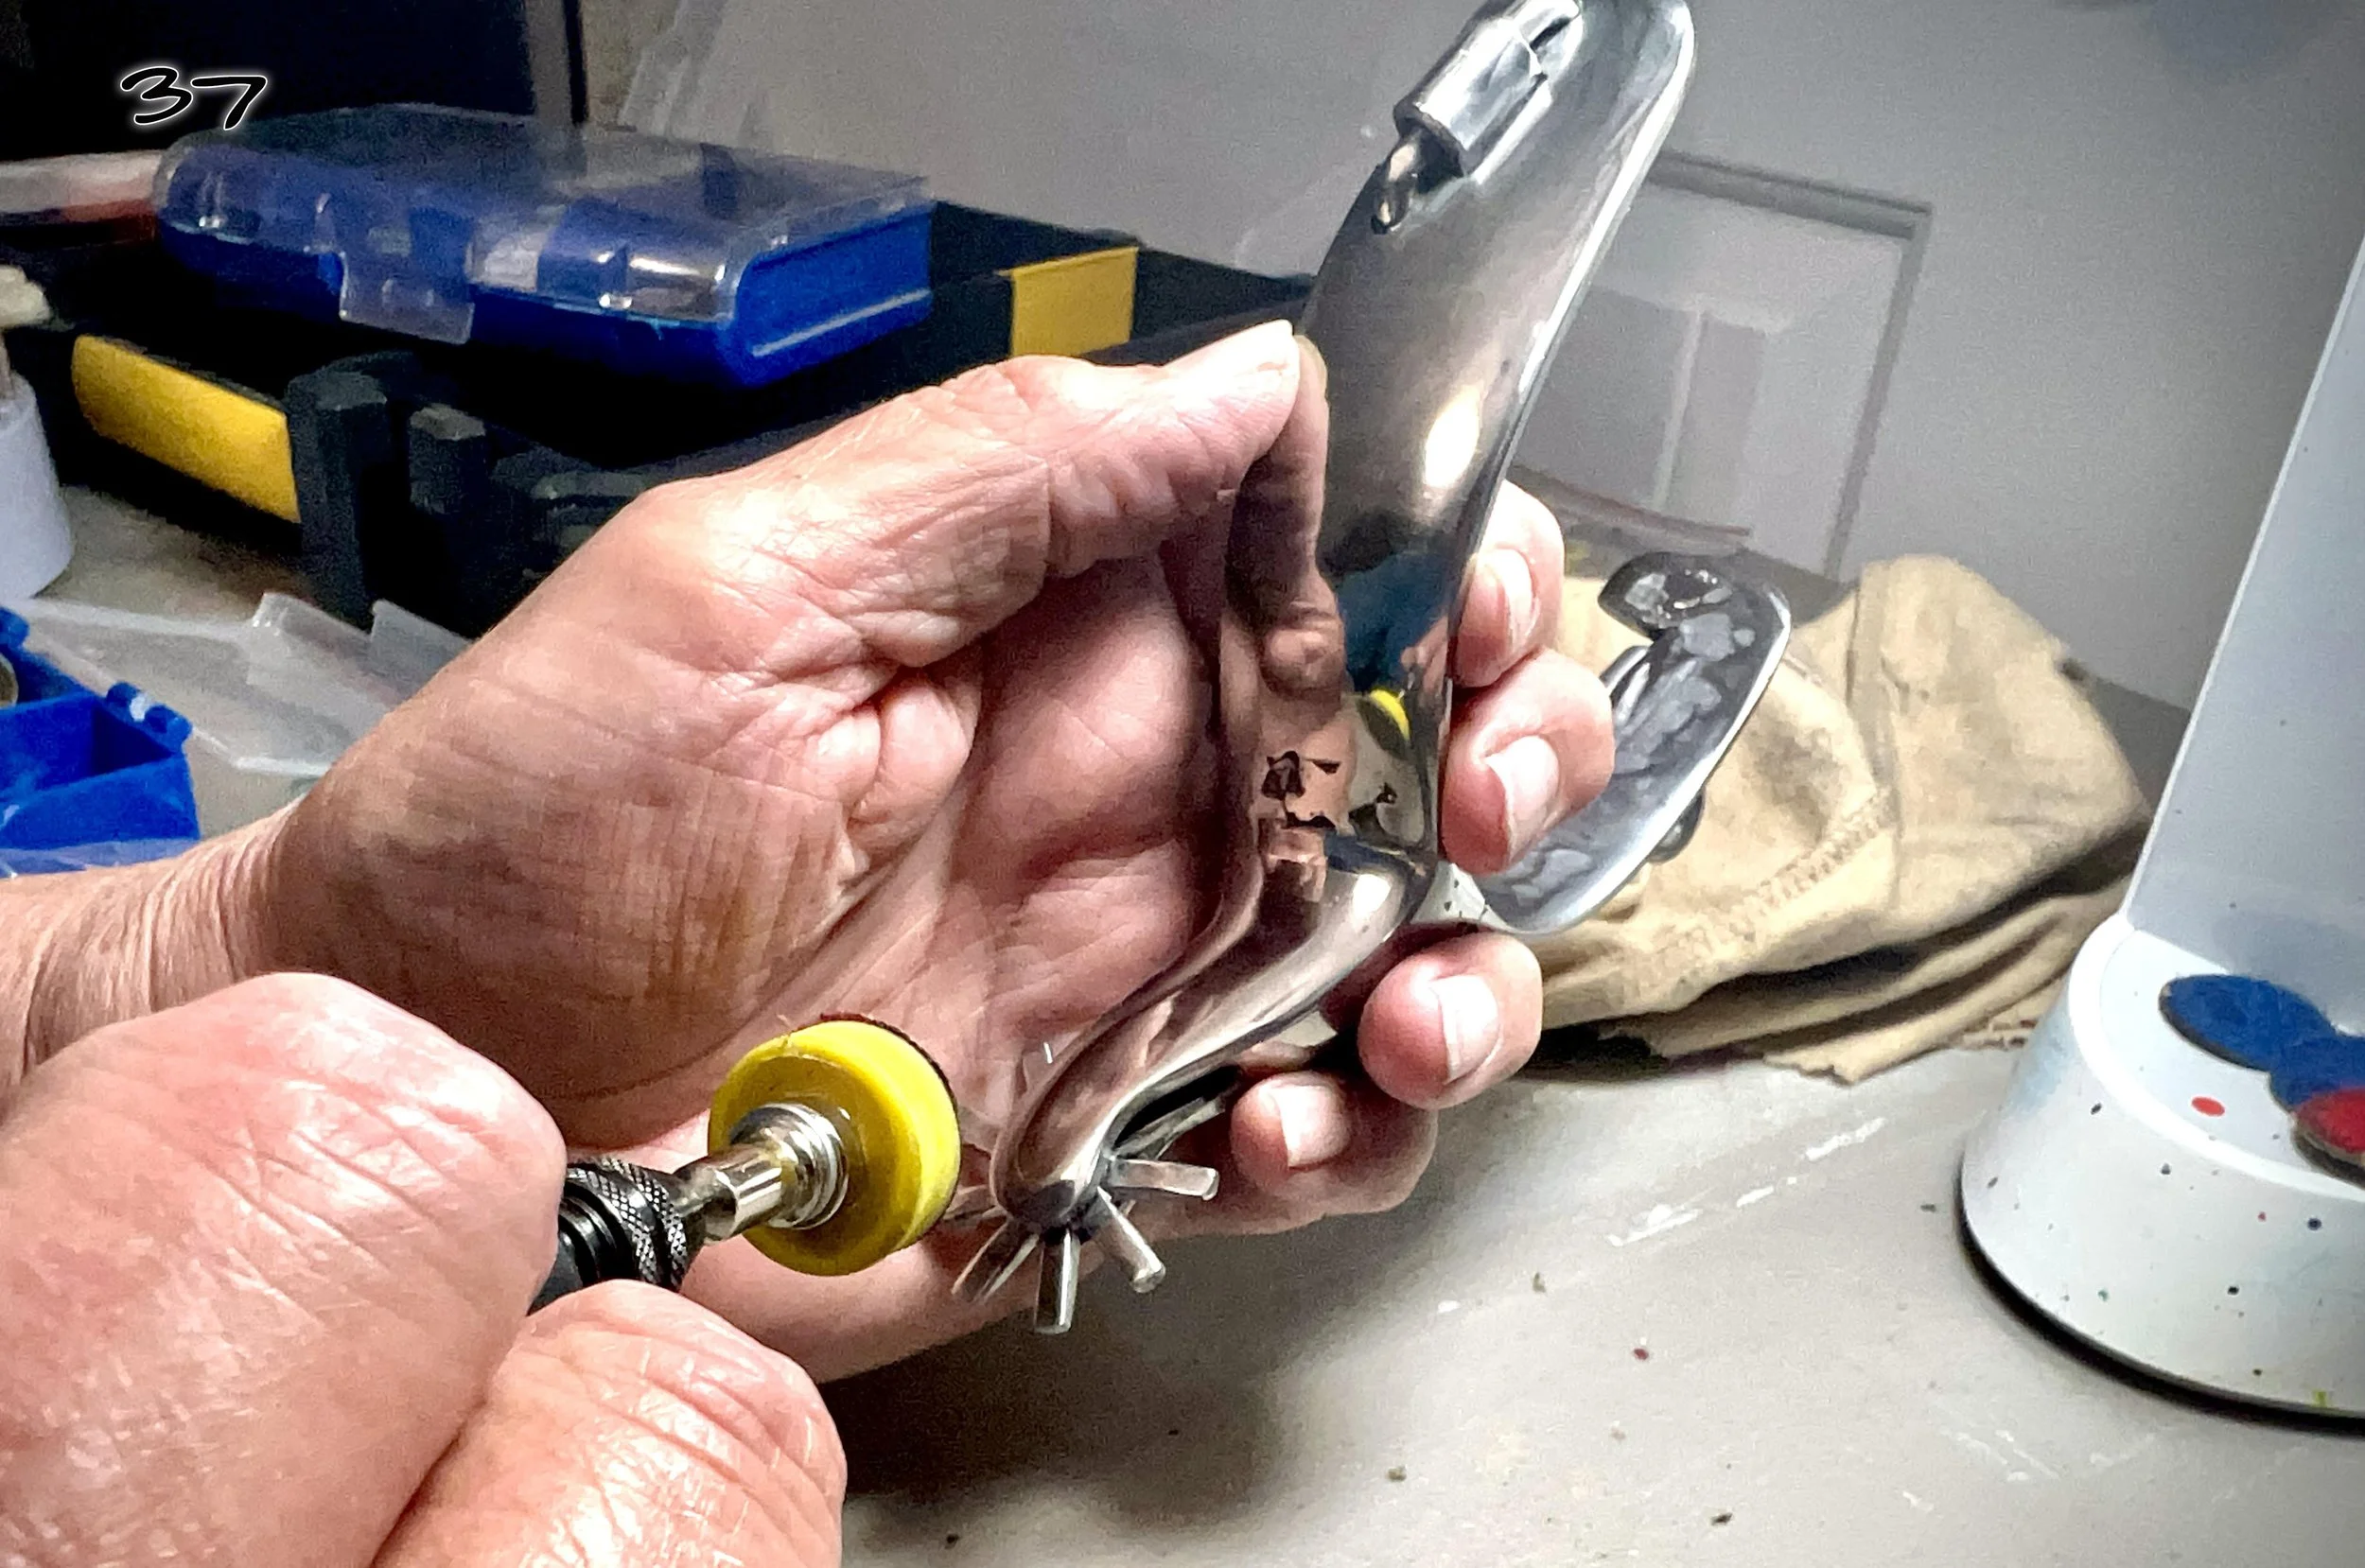
After several hours of grinding and sanding, sanding and grinding, sanding and polishing I have decided the time has arrived to call it “done.” [Feb 1, 2023]

I started on this project on September 1, 2022. Today is February 2, 2023. After five months I am officailly calling “chamberlin 01” done. Most of my time, when I devoted time to this project, was spent learning by doing, learning by watching videos of how others go about it, and learning by experimenting. I also had to gather several special tools for a workshop and find out where to acquire the raw materials needed. I thought that my first attempt would be full of flaws and blemishes, and I was correct. But each mis-step marks a lesson learned through experience. And it has been fun. As my old boss Bill Hodge used to tell me, “If you’re not having fun then you’re not doing it right.” [Feb 2, 2023]

I love this pair of spurs because I made them with my own hands, and I love them not in despite of their flaws, but because of their flaws. No one, and no thing is perfect, and flaws make us that level of uniqueness that gives interest to life.